Flavorful and Nutritious Cauliflower Cheesy Sticks Recipe
As a nutritionist and food blogger, my passion lies in promoting healthy eating habits that are also delicious, indulgent, and satisfying. Today, I’ll be sharing with you an incredible gluten-free, dairy-free, and low-carb recipe that’s perfect for snack-time or as an appetizer – Cauli Cheesy Sticks!
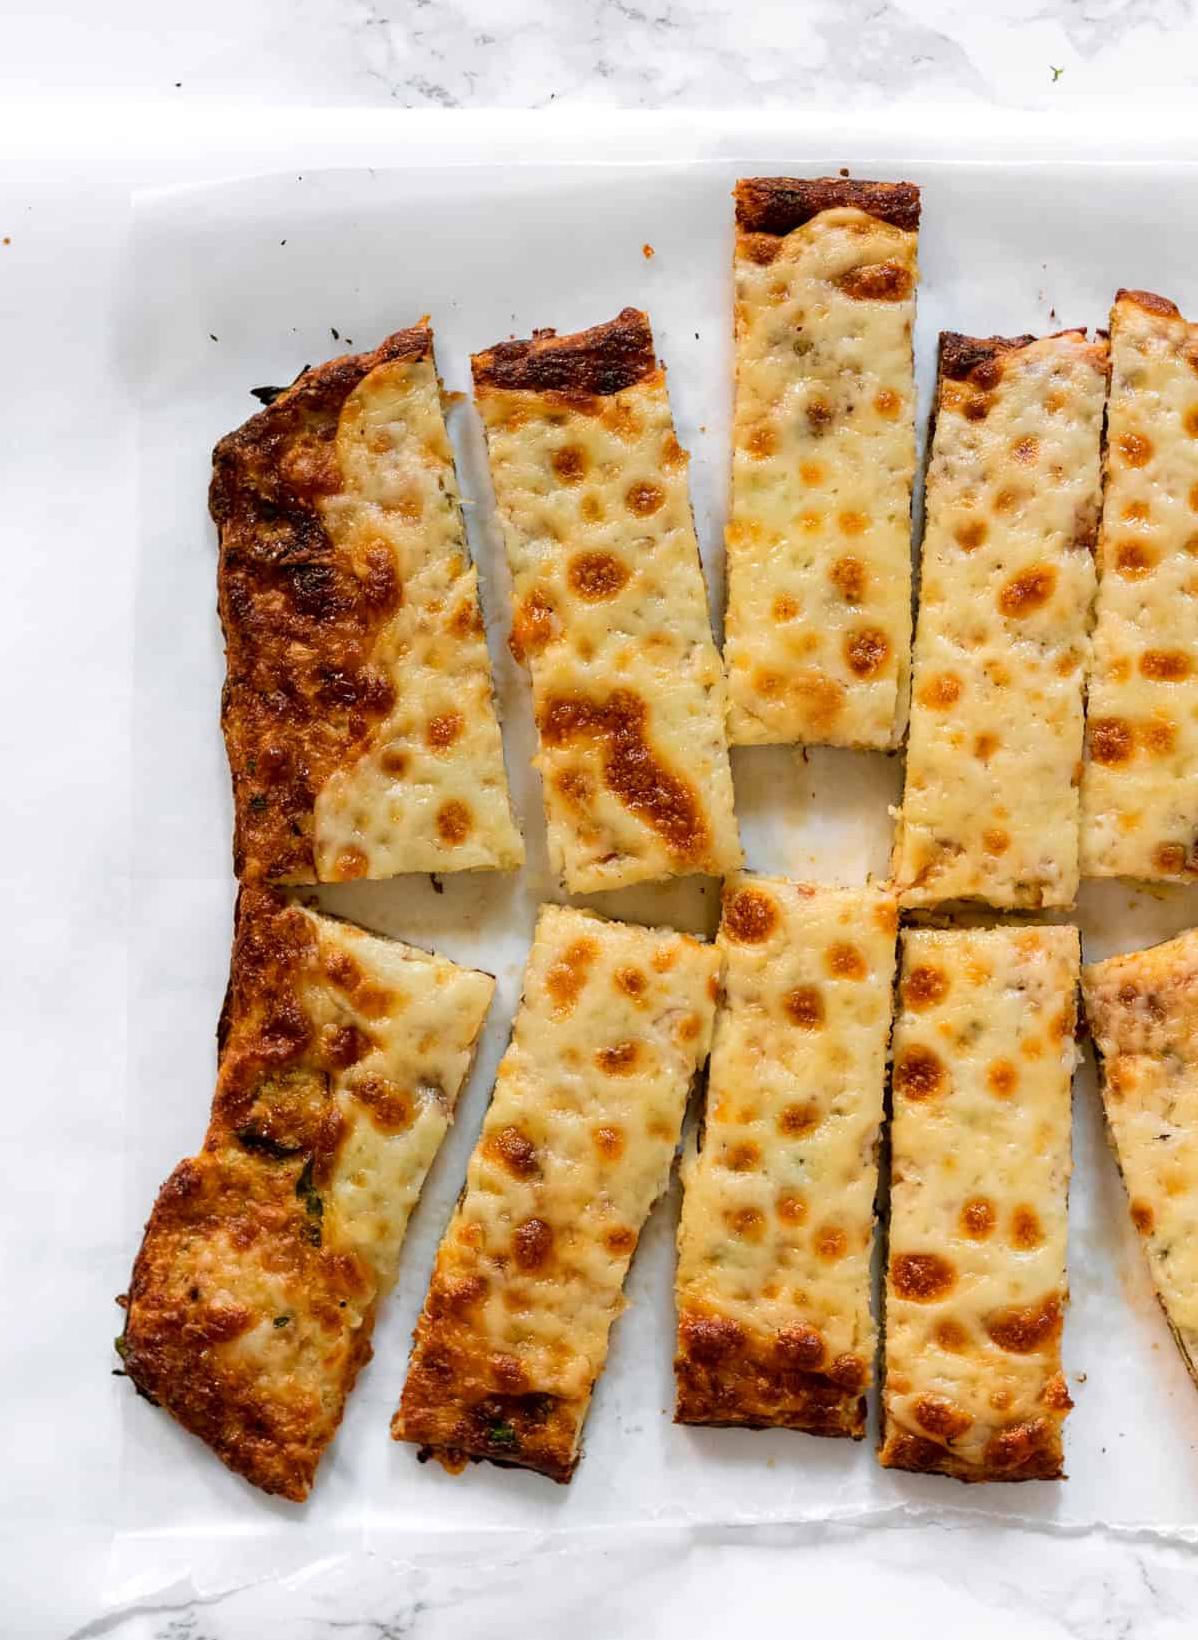
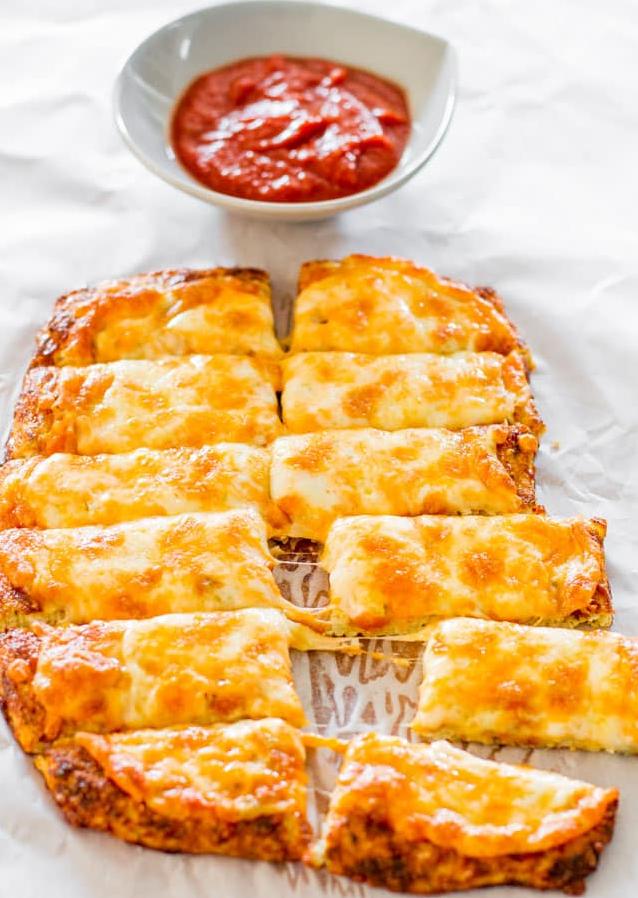
These cheesy cauliflower breadsticks are the perfect nutritious alternative to regular breadsticks. With a crispy exterior and a warm, melt-in-your-mouth interior, these tasty treats will leave your taste buds wanting more.
The best part about this recipe is that it’s easy to make and requires only a few ingredients like cauliflower, garlic salt, shredded mozzarella cheese, egg, and parmesan cheese. Not only is this recipe healthy and delicious, but it’s also versatile! You can swap in different ingredients or adjust the seasonings to suit your own taste preferences.
So whether you’re looking for a quick snack or an appetizer for your next party, these cauliflower cheese sticks are sure to impress your guests and leave them craving for more. So let’s get started on making these scrumptious cauliflower cheesy sticks!
Why You’ll Love This Recipe
There are so many reasons why you’ll fall in love with this amazing recipe for Cauli Cheesy Sticks, and if you’re looking for something that ticks all the boxes when it comes to healthy eating, gluten-free, and dairy-free options, then it could be just the recipe for you.
Firstly, this great recipe has low-carb options that cater to your dietary needs. With the use of cauliflower instead of bread or pizza dough, this recipe packs a punch when it comes to nutrition. It’s filled with Vitamin C, an important antioxidant essential for a healthy immune system.
Secondly, if you’re a lover of cheese and feel as if life isn’t complete without it, then this dish is perfect for you. This recipe not only has mozzarella cheese but also includes parmesan cheese that adds a unique twist to the dish. It’s rich in flavor and texture that you’ll surely enjoy.
Lastly, cooking with whole ingredients is always a better way to ensure that your meals are not complex and full of unhealthy additives. With food allergies becoming more prevalent today than ever before, we need to learn how to eat healthily while still enjoying our favorite dishes. This Cauli Cheesy Sticks recipe will reinvent what cheesy breadsticks should taste like since this is completely gluten-free and dairy-free.
So whether it’s for an appetizer at your next party or just a casual weeknight dinner cheat meal done healthy, give Cauli Cheesy Sticks recipe a try!
Ingredient List
- 1 large head cauliflower
- 2 garlic cloves, minced
- ⅓ cup grated parmesan cheese
- ½ cup shredded mozzarella cheese
- 1 egg
- 1 teaspoon garlic powder
- Salt and pepper to taste
- Olive oil free spray
This cauliflower breadsticks recipe uses gluten-free, grain-free, and dairy-free ingredients that guarantee nutritious and flavorful cheesy bread snacks that you will surely enjoy. Garlic-flavored riced cauliflower is mixed with eggs, Parmesan cheese, mozzarella cheese, garlic powder, salt and pepper. Use a finely grated Parmesan cheese for this recipe if possible.
The Recipe How-To
Now that you’ve gathered all the necessary ingredients, it’s time to start cooking! This recipe is easy to follow and takes less than an hour to prepare. Here’s how to make delicious and healthy Cauli Cheesy Sticks:
Step 1: Preheat Your Oven
Set your oven to 400°F. Next, prepare a baking sheet by lining it with parchment paper. Cooking these cheesy sticks on a parchment-lined baking sheet ensures that they don’t stick while baking.
Step 2: Prepare the Cauliflower
Shred or rice the cauliflower, whichever you prefer, and place it in a large bowl. Add garlic powder and salt to taste, then stir everything together.
Step 3: Add Cheese and Eggs
Now it’s time to add in your shredded mozzarella cheese. You can also try other cheeses like vegan cheddar cheese or dairy-free cheese slices for dairy-free options. Then crack in your two eggs.
Step 4: Mix Well
Next, mix everything together well using a fork or spoon. Be sure to combine everything evenly, making sure there are no large clumps of cheese.
Step 5: Mould Into Cheesy Sticks
Grab some cheesecloth or a clean kitchen towel, place your mixed cauliflower-cheese mixture on it and ‘twist’ the cheesecloth/towel at the top of the ball with enough pressure so the mixture starts sticking together. Once firmly squeezed into a ball shape that holds together (see Note below), carefully unwrap the cheesecloth so you have your cheesy dough-ball back on your large bowl.
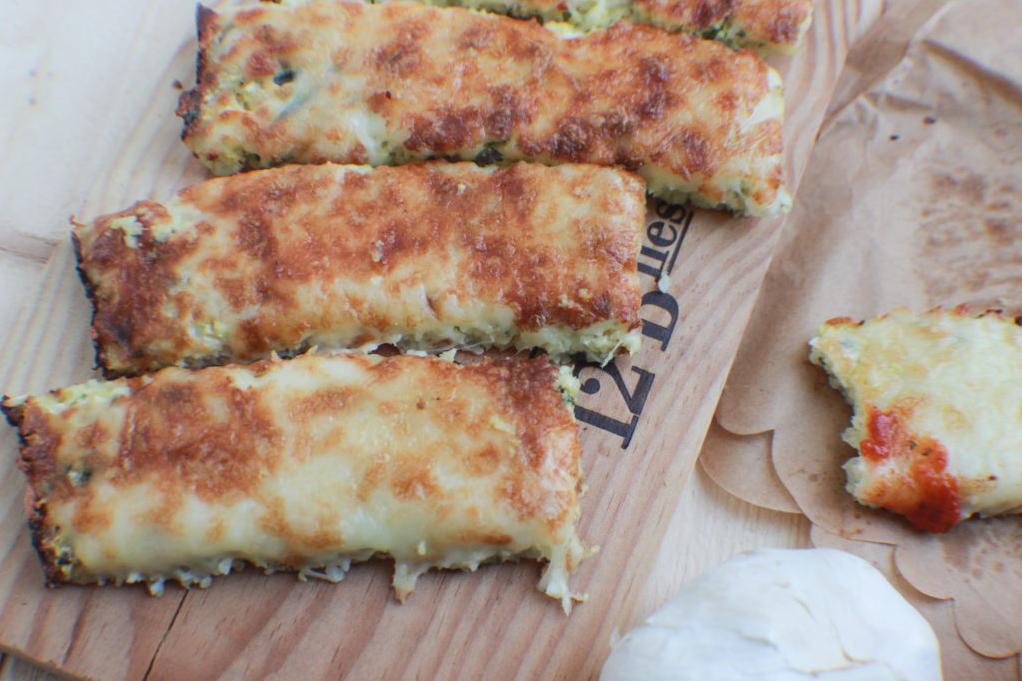
Note: Make sure the dough-hall holds together solidly when making crust/mixture.Next, form the mixture into cheesy sticks or breadsticks. You can make six long sticks, or smaller shaped sticks if you want them bite-size. Place each stick on your parchment-lined baking sheet.
Step 6: Bake in the Oven
Place the prepared cheesy sticks in the oven and bake for 20 minutes or until they become golden brown. Make sure to check them at around 15 minutes since different ovens heat differently.
Step 7: Serve Warm
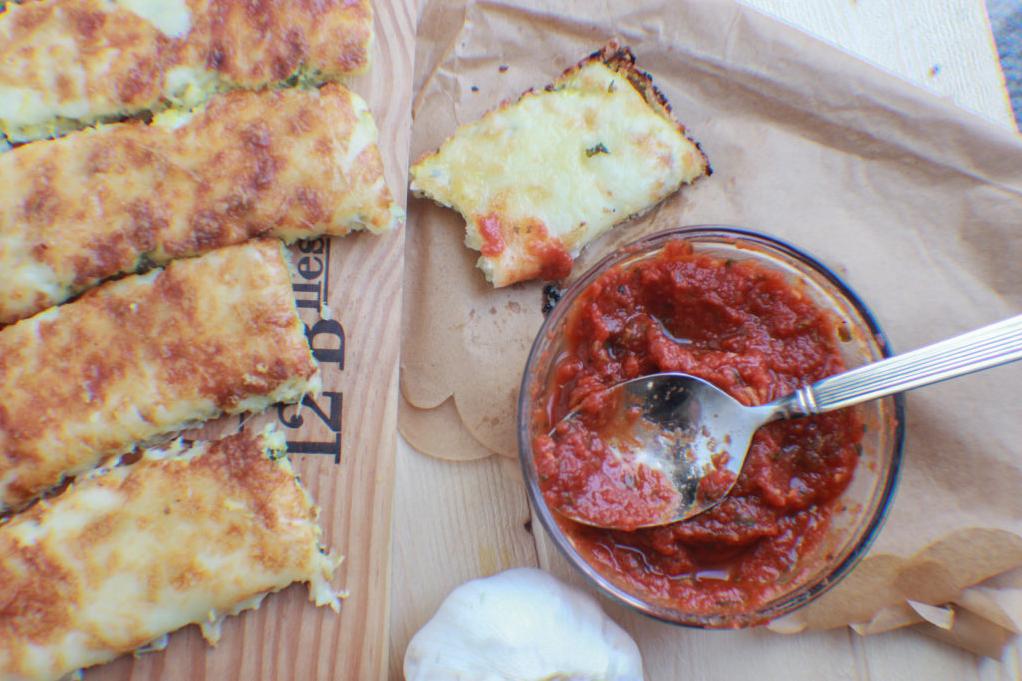
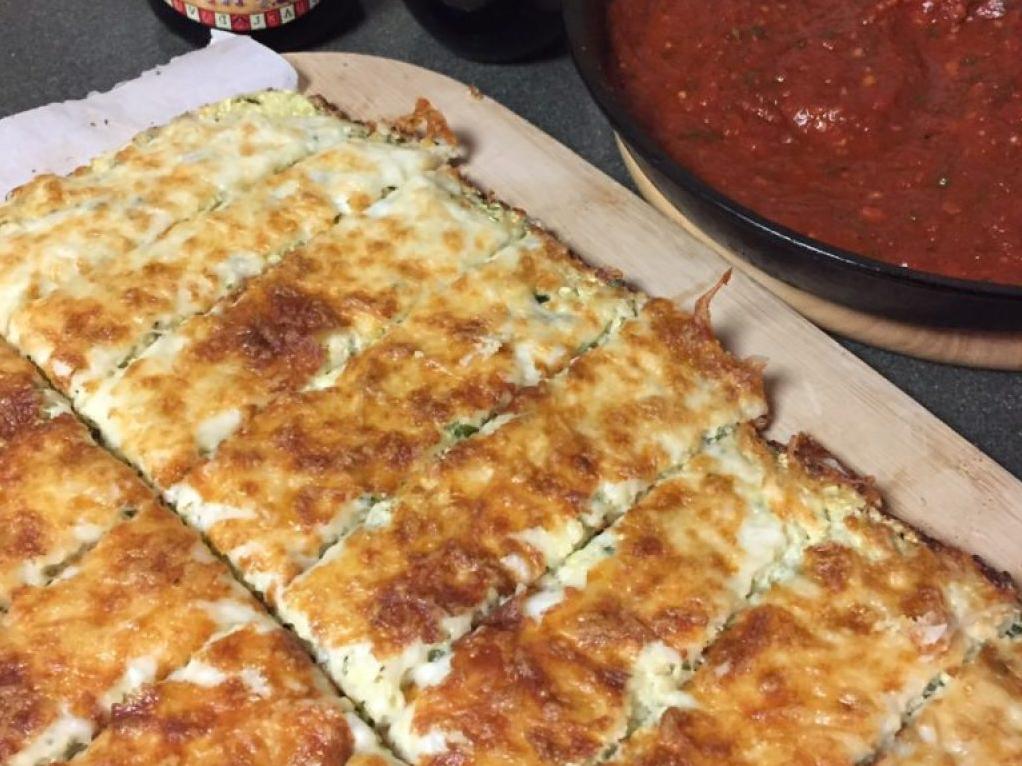
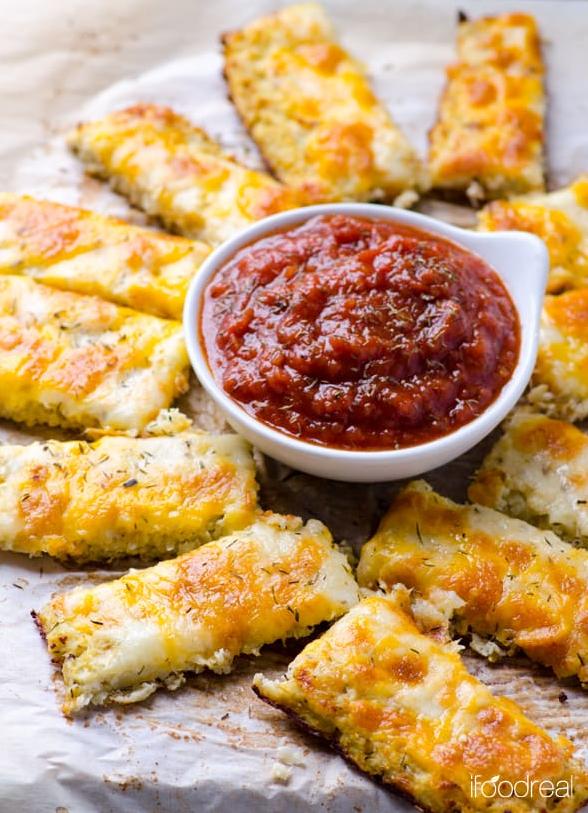
Once fully cooked, remove from oven and let cool slightly before serving. I recommend serving these Cauli Cheesy Sticks warm with vegan cheese sauce or a dip of your choice for a delicious snack or appetizer.
Enjoy the healthy, gluten-free, and dairy-free cheesy goodness!
Substitutions and Variations
As a versatile recipe, Cauli Cheesy Sticks offer an array of possibilities for substitutions and variations to cater to different dietary needs or personal preferences. Here are some options you can explore:
– Cheese type: While this recipe calls for mozzarella and Parmesan cheese, you can use other types of cheese or vegan cheese sauce for a dairy-free option. Cheddar cheese, feta, goat cheese, or even vegan cashew cheese would all make tasty substitutes.
– Bread sticks or crust: This recipe can also be modified into a cauliflower pizza crust by spreading the cauliflower mixture into a round shape and baking it longer until crispy. Alternatively, you can add more flour or breadcrumbs to the recipe to create thicker and more bready sticks.
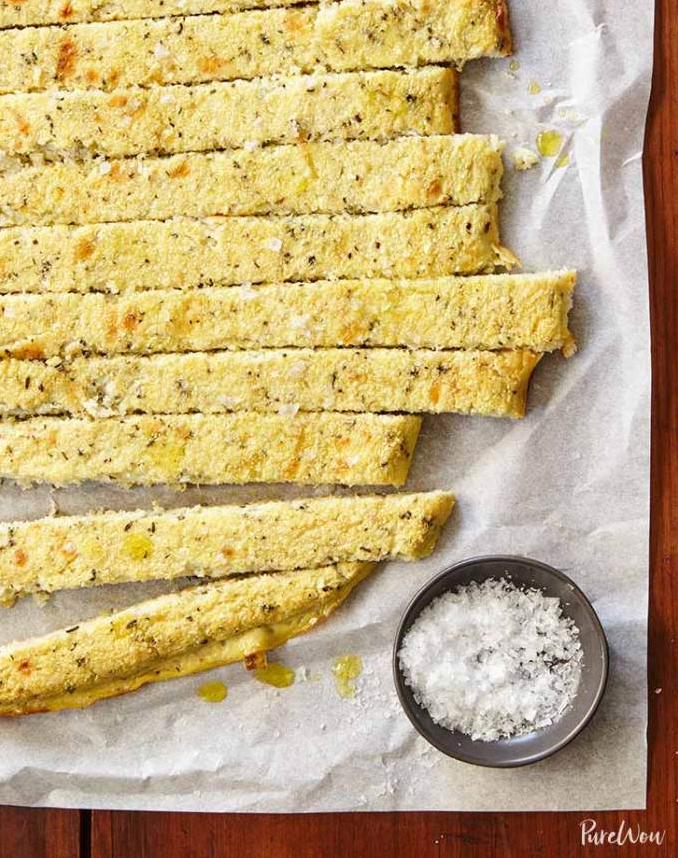
– Spices and herbs: For an extra kick of flavor, feel free to add some dried oregano, basil, red pepper flakes, or fresh herbs like parsley and thyme to the mixture. You can also sprinkle garlic salt on top of the sticks after baking for an extra dose of deliciousness.
– Vegetable mix-ins: While cauliflower is the star ingredient of this recipe, you can add other veggies like zucchini, broccoli florets, spinach leaves, or finely chopped mushrooms to boost the nutritional value and texture. Simply sauté them before adding to the cauliflower mix.
– Gluten-free flours: If you want to experiment with other gluten-free flours besides almond flour, try coconut flour, chickpea flour or buckwheat flour for variation. However, be aware that each flour has different properties and may require adjustments in the amounts used.
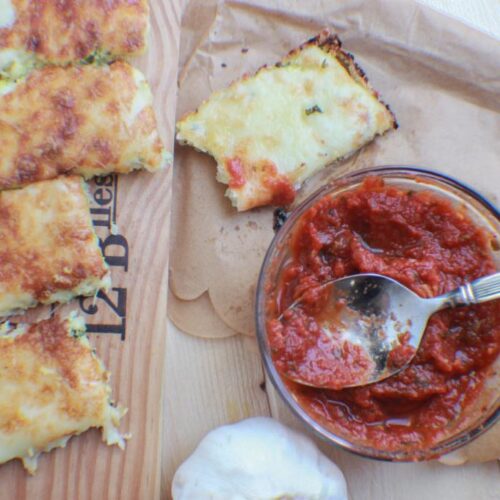
– Dipping sauce: Lastly, don’t forget about dipping sauces! These cheesy breadsticks pair well with marinara sauce but you can also make your own dipping sauce such as vegan ranch dip as well.
These suggestions are just some inspiration to help you customize Cauli Cheesy Sticks according to your taste buds and health goals. Don’t be afraid to experiment and play around with different combinations!
Serving and Pairing
After baking, these cauli cheesy sticks are best served immediately while they’re still warm and the cheese is melty. You could even serve them as an appetizer or snack at your next party. You can also serve them as a side dish for lunch or dinner.
As for pairing, these cauli cheesy sticks go well with a variety of dishes. They’re great with a fresh salad or some grilled vegetables to balance out the cheesiness of the sticks. They also pair well with a hot bowl of soup, particularly tomato soup. And if you want to make it a full meal, try serving these cheesy sticks with some protein such as grilled chicken or tofu.
Alternatively, you could dip these cheesy sticks in some marinara sauce or even a homemade vegan cheese sauce to add another dimension of flavor. The possibilities are endless!
Make-Ahead, Storing and Reheating
Once you’ve prepared the Cauli Cheesy Sticks, it’s helpful to know how best to store and reheat them. Fortunately, they keep very well in the refrigerator and freezer, so you can make large batches and enjoy them as leftovers throughout the week.
To store the Cauli Cheesy Sticks, place them in an airtight container and store in the refrigerator for up to 3 days. If you want to keep them for longer, place them in a freezer-safe container and freeze for up to 3 months. When you’re ready to eat them again, simply thaw them overnight in the refrigerator before reheating.
To reheat the Cauli Cheesy Sticks, preheat your oven to 375°F. Place the sticks on a baking sheet lined with parchment paper and bake for 10-15 minutes until they’re warmed through and crispy on the outside. Alternatively, you can reheat them in the microwave for about 30 seconds or until warm.
One thing to note is that while reheated Cauli Cheesy Sticks are still delicious, they won’t be quite as crispy as when they were freshly made. However, I find that a quick reheat in the oven brings back some of that crunchiness.
Overall, these Cauli Cheesy Sticks are a great make-ahead snack or meal option that you can enjoy over several days. Whether eaten fresh out of the oven or reheated later on, they’re sure to satisfy your cravings for something cheesy and delicious.
Tips for Perfect Results
As a nutritionist and food blogger, I understand the importance of getting that perfect texture and flavor for any dish. Here are some tips to ensure your Cauli Cheesy Sticks come out perfectly every time.
Firstly, using fresh cauliflower is key. Opt for a large head of cauliflower and rinse it thoroughly before cutting it into florets. This will also help to eliminate any unwanted insects or debris that might be present.
Next, make sure to thoroughly wring out any excess moisture from the cauliflower rice. This can easily be done by placing the riced cauliflower in a cheesecloth or paper towel and squeezing out all of the water.
When mixing the ingredients together for the dough, be sure to combine them well until the mixture becomes cohesive and holds together when pressed.
Baking on parchment paper on top of a baking sheet will ensure that the Cauli Cheesy Sticks do not stick to the bottom of the pan. A light layer of olive oil spread onto the parchment paper will create an even better nonstick surface.
For optimal crispness, flip the sticks over halfway through baking so that both sides become golden brown.
Finally, allow your finished Cauli Cheesy Sticks to cool for a few minutes before slicing them. This will help to keep them from falling apart as you cut them into perfect strips.
Follow these tips and you’ll be sure to enjoy crispy, cheesy, gluten-free Cauli Cheesy Sticks that everyone in your household will love!
Bottom Line
In conclusion, these Cauli Cheesy Sticks are an excellent alternative to traditional breadsticks, especially for those who follow a low-carb or gluten-free diet. With just a few simple ingredients, you can whip up a batch of cheesy and satisfying Cauli Cheesy Sticks in no time.
By using fresh and organic cauliflower as the base ingredient, you’ll be adding essential vitamins and minerals to your diet that will benefit your health. Additionally, the dairy-free and vegan cheese options provide a delicious alternative for those who are lactose intolerant or simply want to reduce their dairy intake.
So try out this recipe and see for yourself how deliciously wholesome gluten-free and dairy-free ingredients can taste. Your body will thank you for it!
Cauli Cheesy Sticks (Gluten Free) Recipe
Ingredients
- 1 cup cauliflower, riced
- 1 1/2 cups shredded mozzarella cheese, divided
- 1 egg, beaten
- 1 garlic clove, minced
- 1 teaspoon mixed Italian herbs
- 1 teaspoon olive oil
- garlic powder, to taste
- salt, to taste
Instructions
- Preheat oven to 450 degrees.
- Use a food processor to process cauliflower into small pieces, the size of grains of rice.
- Cook in microwave 5-10 minutes until thoroughly cooked.
- Combine cauliflower, half the cheese, egg, garlic, and herbs in mixing bowl.
- Spray baking sheet with nonstick spray. Press mixture into a square or rectangle shape.
- Bake at 450 degrees 10-15 minutes.
- Remove from oven, and turn oven up to broil. Brush crust with olive oil; dust with desired amounts of garlic powder and salt. Sprinkle on remaining cheese.
- Broil until cheese is just melted, 2-3 minutes.
- Cut into 8 slices to serve.
Add Your Own Notes
Nutrition
Recommended Recipes Just For You
None found