Delicious Gluten-Free Red Velvet Cake Recipe
Are you on the hunt for a gluten-free, dairy-free cake recipe that is moist and delicious? Look no further than this easy gluten-free red velvet cake with homemade cream cheese frosting!
As a nutritionist and food blogger, I know firsthand how difficult it can be to find satisfying desserts that fit within specific dietary requirements. But fear not, this recipe is sure to satisfy your sweet tooth without sacrificing taste or texture.
Using a gluten-free flour blend and buttermilk vinegar mixture, this classic red velvet cake recipe has been adapted to meet the needs of those who are gluten and dairy intolerant. And let’s not forget the star of the show- the creamy and tangy homemade cream cheese frosting.
With easy-to-follow instructions and flawless results every time, this cake is perfect for special occasions or a simple treat to enjoy with friends and family. Don’t believe me? Give it a try and taste for yourself why this recipe is the best ever!
So what are you waiting for? Let’s get baking!
Why You’ll Love This Recipe
Are you a dessert lover who is trying to maintain a healthy lifestyle, but can’t resist the temptation of biting into a moist, velvety cake with cream cheese frosting? Then, you’ll love this recipe for easy gluten-free red velvet cake with homemade cream cheese frosting!
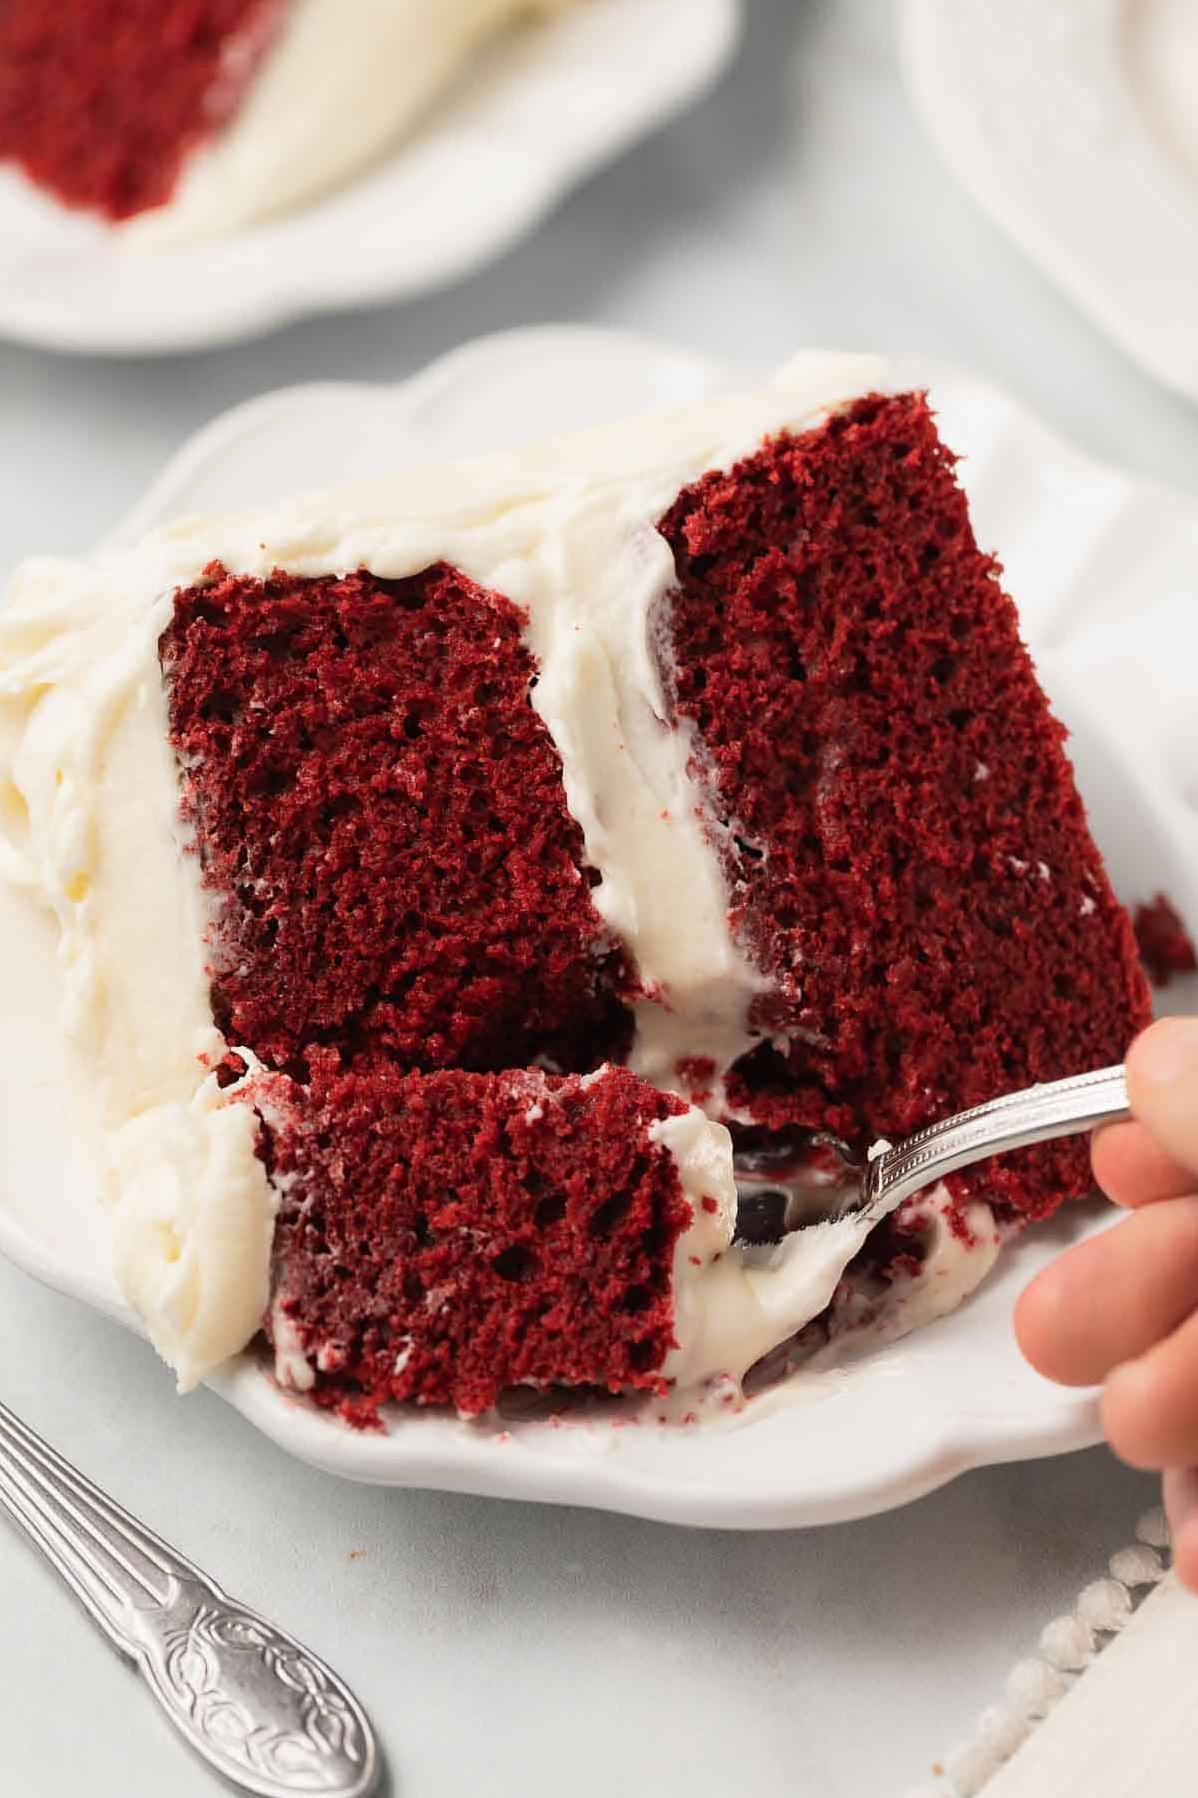
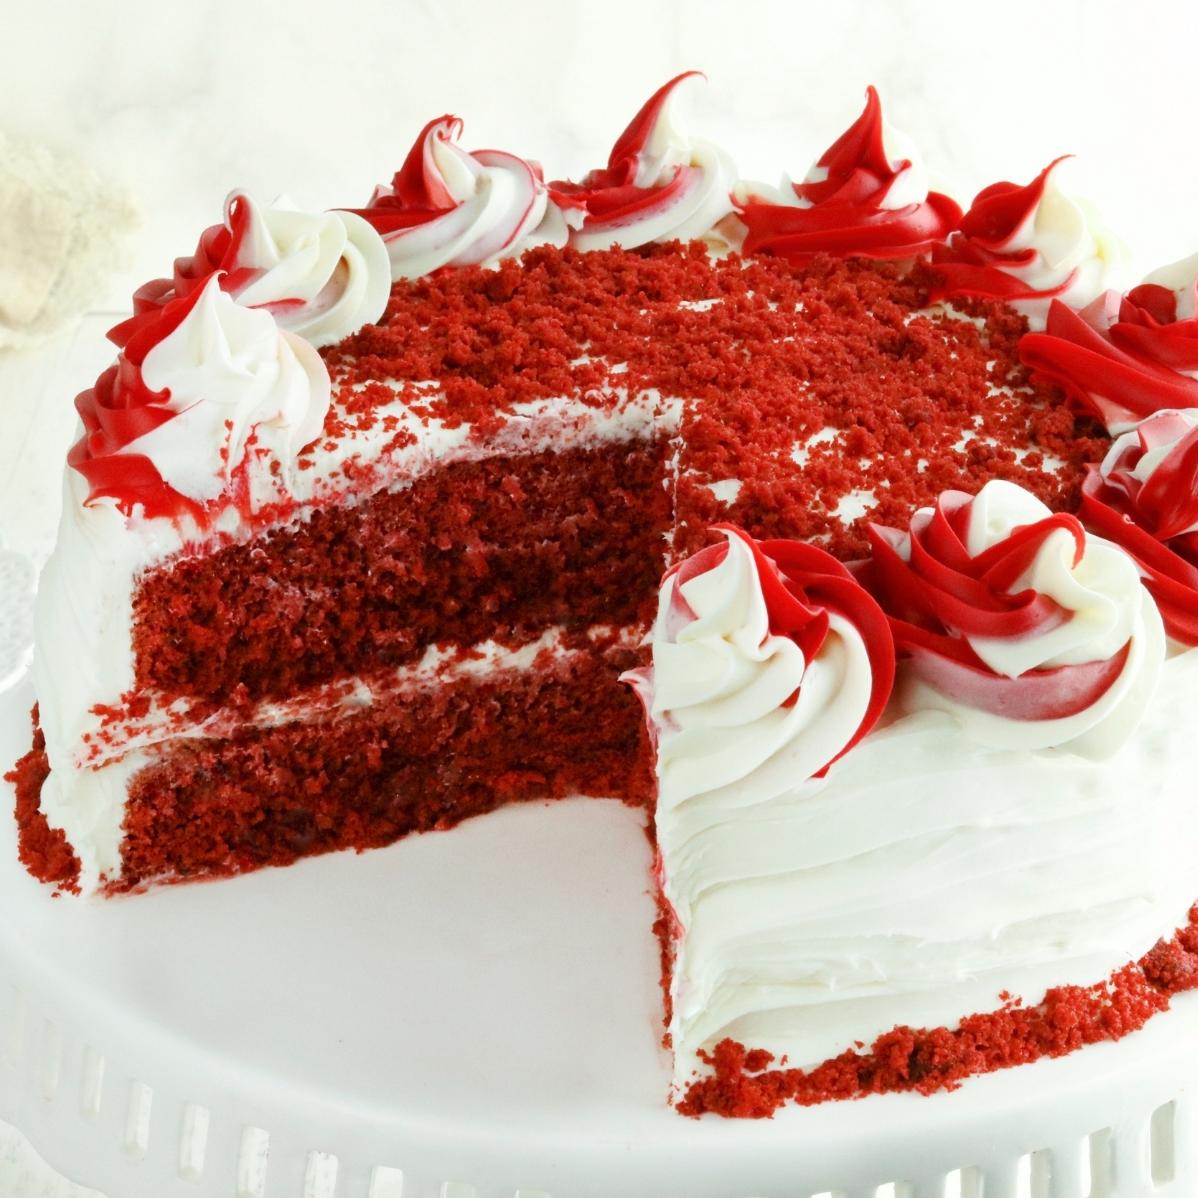
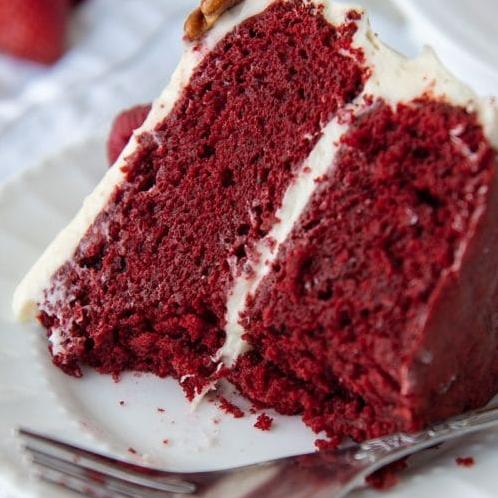
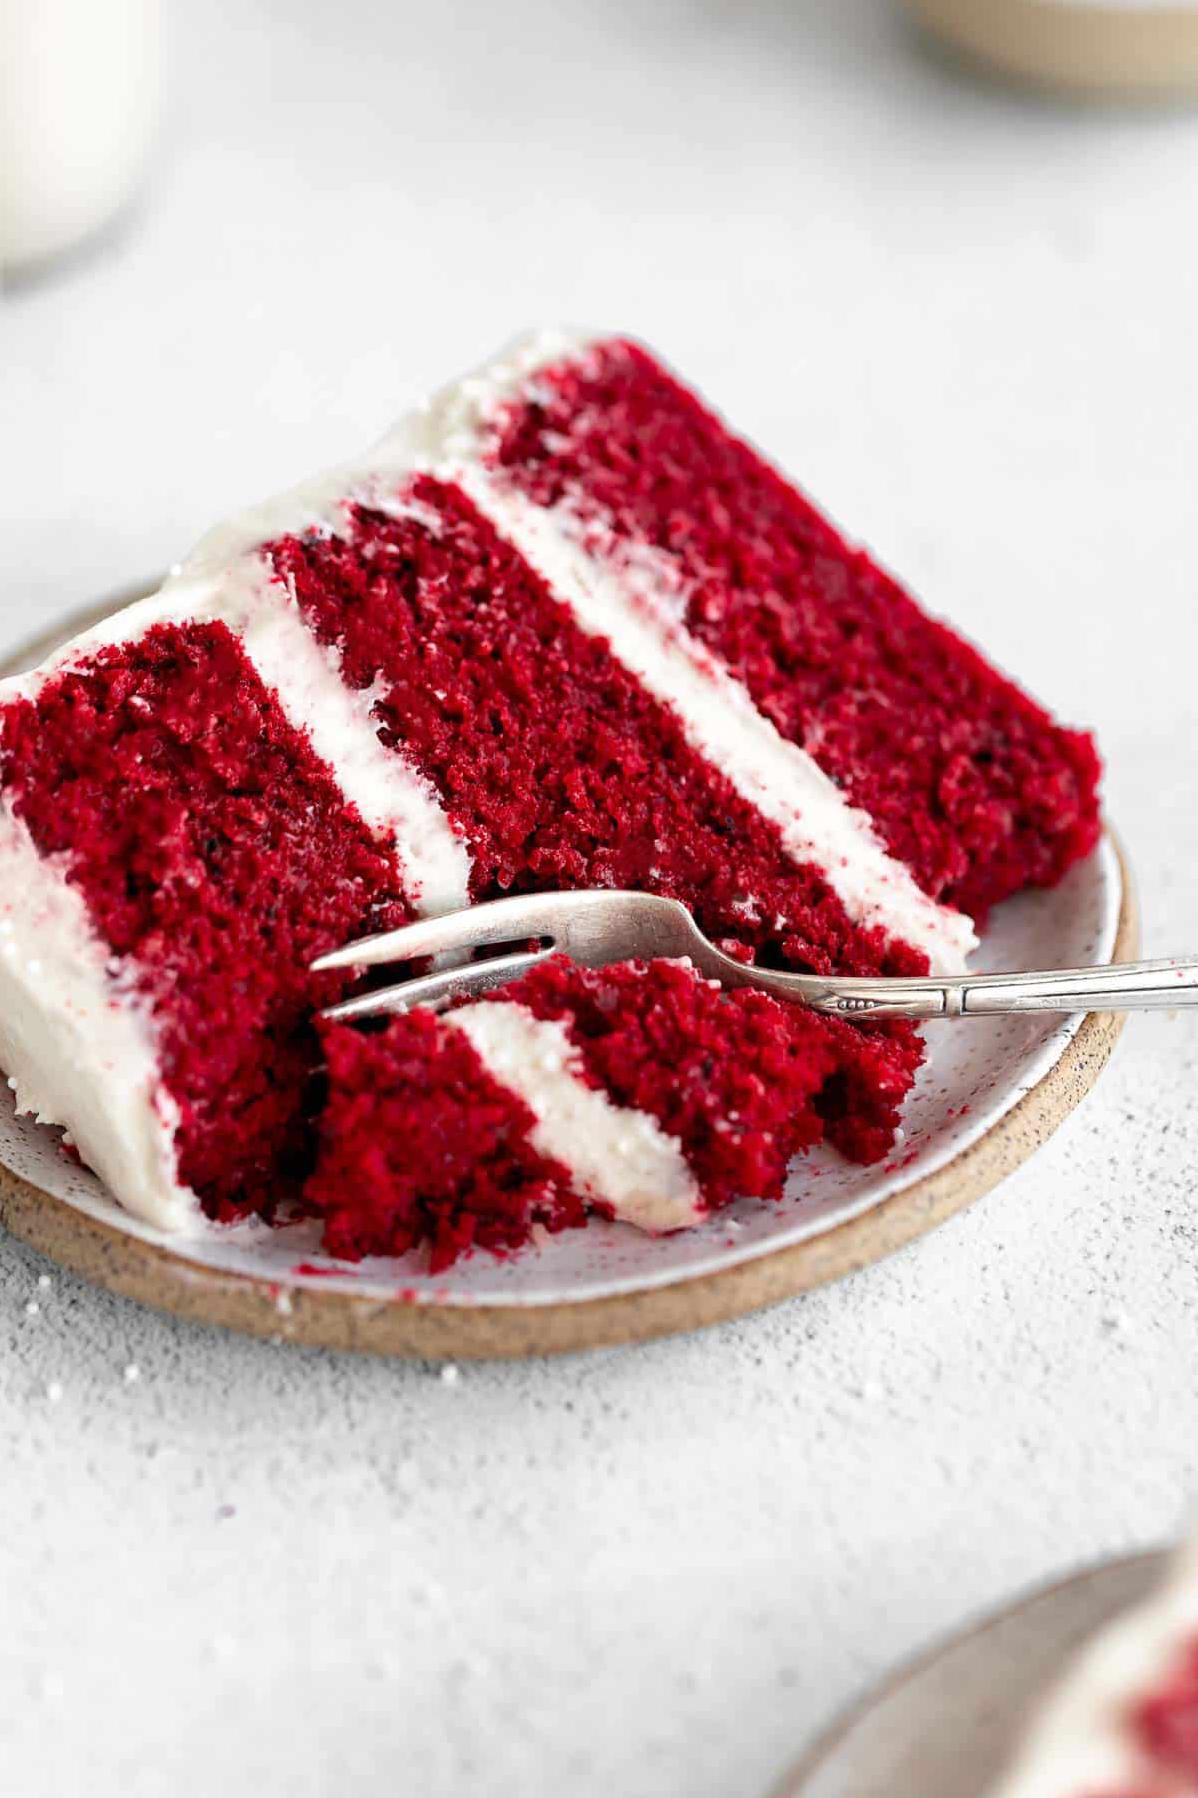
I know it may sound too good to be true, but I assure you that this gluten-free red velvet cake is nothing short of amazing. It is super moist and fluffy, thanks to the combination of butter and buttermilk. The vibrant red color and subtle cocoa flavor will transport you right down memory lane to classic red velvet cakes that you used to adore.
And don’t even get me started on the homemade cream cheese frosting! It’s tangy, sweet and creamy, all at the same time. The recipe calls for simple ingredients like cream cheese, heavy cream, powdered sugar, vanilla extract and butter. Combine them together, and you’ve got yourself the perfect frosting to complement the delicious flavors of the red velvet cake.
But what if I told you that this recipe is not only gluten-free but also dairy-free? Yes, you heard that right! People with food allergies or intolerances can enjoy this delectable treat without worrying about any adverse reactions. You can make this cake for a special occasion or just satisfy your cravings any day of the week.
So why should you love this recipe? Because it’s the best of both worlds – indulgent yet healthy. It’s a guilt-free way to treat yourself while sticking to your dietary requirements. Plus, it’s easy to follow and uses simple ingredients that are easily accessible at your local grocery store.
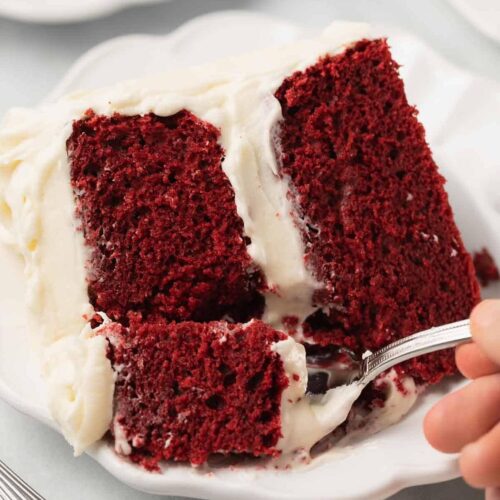
Trust me; once you take a bite of this gluten-free red velvet cake with homemade cream cheese frosting, you won’t be able to resist going back for more. It’s the perfect balance of flavors and textures that will have your taste buds dancing with delight. Don’t believe me? Try it out for yourself, and I promise you won’t be disappointed.
Ingredient List
The gluten-free red velvet cake with homemade cream cheese frosting is deliciously moist and decadently sweet. To make this classic dessert, you will need specific ingredients that will ensure a rich flavor and the perfect texture. Here’s a list of everything you need:
Dry Ingredients
- 2 cups (gluten-free) flour blend
- ¾ cup granulated sugar
- 1 ½ tbsp unsweetened cocoa powder
- 1 tbsp Jello Instant Vanilla Pudding Mix
- 2 tsp baking powder
- ½ tsp xanthan gum
- ½ tsp baking soda
Wet Ingredients
- 4 large eggs, at room temperature
- 1 cup buttermilk (or dairy-free alternative mixed with vinegar)
- ½ cup butter, softened (or dairy-free alternative)
- 2 tsp vanilla extract
- 1 tablespoon red food coloring (optional)
Cream Cheese Frosting Ingredients:
- 8oz cream cheese, at room temperature
- ½ cup butter, at room temperature
- 3 cups powdered sugar
- 3 tbsp heavy cream
- 2 tsp vanilla extract
Make sure to line up each item on the ingredient list to ensure that all essential components are present when making the recipe. Additionally, make sure all items are gluten-free if necessary.
The Recipe How-To
Ingredients
- Cake:
- 2 cups Gluten-Free flour blend (make sure it contains xanthan gum or add 1/2 teaspoon if using a flour blend without it)
- 2 tablespoons cocoa powder
- 1 teaspoon baking soda
- 1/2 teaspoon salt
- 3/4 cup unsalted butter, softened (dairy-free butter if necessary)
- 1 and 1/2 cups granulated sugar
- 4 large eggs, room temperature
- 1 tablespoon vanilla extract
- Red food coloring gel (use until you achieve the desired color)
- Buttermilk:
- 1 cup milk (dairy-free milk if necessary)
- 1 tablespoon white vinegar or lemon juice
- Frosting:
- 8 oz cream cheese, room temperature (dairy-free cream cheese if necessary)
- 1/2 cup unsalted butter, room temperature (dairy-free butter if necessary)
- 3 cups powdered sugar
- 3 tbsp heavy cream (dairy-free heavy cream if necessary)
- Vanilla extract to taste
Step One: Making the Cake
- Preheat the oven to 350°F.
- In a medium mixing bowl, mix all the dry ingredients (flour, cocoa powder, baking soda, and salt).
- In a separate mixing bowl beat butter and sugar together until creamy. Then add one egg at a time while still beating until well combined.
- Add vanilla extract and beat in the buttermilk mixture.
- Pour in the dry ingredients mix into your buttermilk mixture and keep mixing until smooth.
- Grease two layer cake pans with non-stick cooking spray
- Divide the batter between the two cake pans and bake for 25-30 minutes until done.
- Check if it is done by inserting a toothpick into the center of the cake, if it comes out clean the cake is ready.
- Cool the cakes on wire racks until they are at room temperature.
Step Two: Making the Frosting
- In a mixing bowl, whisk cream cheese and butter until smooth and well combined.
- Gradually add powdered sugar and mix well.
- Add vanilla extract to taste.
- Add heavy cream and whisk in until desired frosting consistency is achieved.
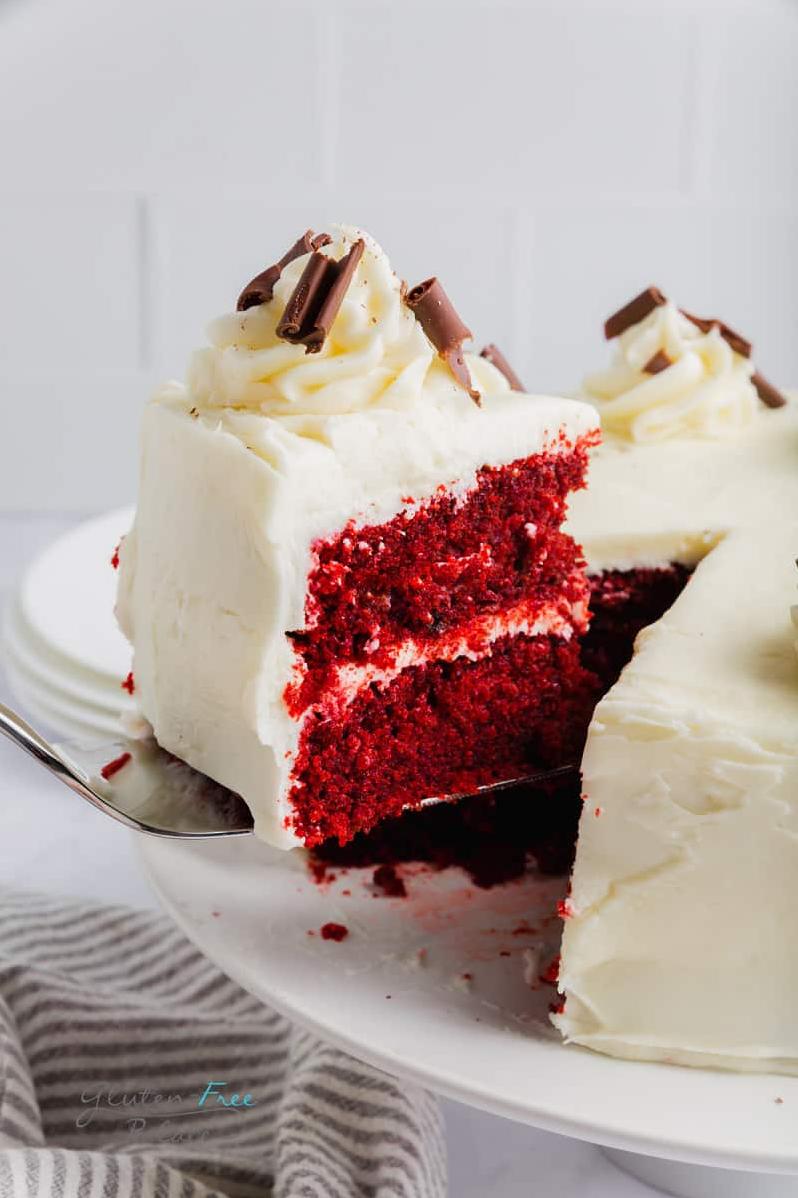
Step Three: Assembling the Cake
- On a serving plate, put one layer of cooled cake.
- Spread over with some frosting then add another cake layer.
- Spread frosting onto the top and sides of the cake using an offset spatula to get a smooth finish
- Garnish with berries, mint, or any decoration of your choice
Enjoy your Easy Gluten Free Red Velvet Cake With Homemade Cream Cheese Frosting!
Substitutions and Variations
If you have dietary restrictions or simply want to mix things up, there are many ways to modify this gluten-free red velvet cake recipe to your liking. Here are some substitutions and variations that you can try:
– Dairy-free: To make the cake dairy-free, substitute vegan butter and cream cheese for the dairy versions used in the recipe. Be sure to use a dairy-free buttermilk substitute made with non-dairy milk and vinegar or lemon juice.
– Egg-free: If you’re allergic to eggs or follow a vegan diet, you can replace each egg in the recipe with a flax or chia egg. To make one flax egg, simply combine one tablespoon of ground flaxseed meal with three tablespoons of water and let it sit for five minutes until it thickens. To make a chia egg, use the same ratio of chia seeds and water.
– Sugar-free: If you’re watching your sugar intake or have diabetes, you can use a sugar substitute instead of granulated sugar in the cake batter and frosting. Keep in mind that sugar substitutes may affect the texture and taste of the cake.
– Flour blend: This recipe calls for a gluten-free flour blend, but if you prefer to make your own flour blend or use a different brand, feel free to do so. Just make sure that it contains xanthan gum or another binding agent, as gluten-free flours tend to crumble without it.
– Chocolate version: You can also transform this red velvet cake into a chocolate version by replacing some of the cocoa powder with additional gluten-free flour. Add more cocoa powder as desired for a richer chocolate flavor.
Whether you choose to stick with the classic gluten-free red velvet cake recipe or experiment with different substitutions and variations, this cake is sure to satisfy your sweet tooth.
Serving and Pairing
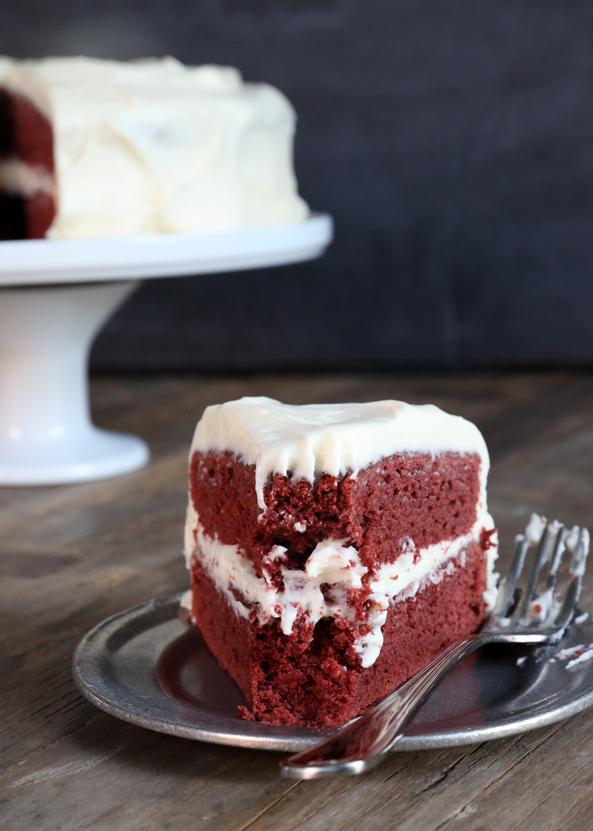
Once your gluten-free red velvet cake has cooled and been frosted with the creamy homemade cream cheese frosting, it’s time to serve and enjoy! This cake is a showstopper on its own and doesn’t need any extra bells and whistles, but if you’re looking for some pairing suggestions, here are a few of my favorites.
Pairing Suggestions:
– Fresh berries: Top each slice of cake with a handful of fresh raspberries or strawberries. Their sweetness will perfectly complement the tartness of the cream cheese frosting.
– Vanilla ice cream: Serve warm slices of gluten-free red velvet cake with a scoop of vanilla ice cream on top. The cool creaminess of the ice cream paired with the slightly spicy cake creates an irresistible combination.
– Hot cocoa: If you’re enjoying your gluten-free red velvet cake during the winter months, consider pairing it with a warm cup of cocoa. The richness of the chocolate in the cocoa pairs perfectly with the cocoa powder in the cake.
– Coffee: And finally, there’s nothing better than enjoying a slice of cake with a hot cup of coffee. The bitterness of the coffee cuts through the sweetness of the cake and enhances its flavor notes.
No matter how you choose to serve your gluten-free red velvet cake, I guarantee it will be a hit at any gathering or special occasion.
Make-Ahead, Storing and Reheating
Making a cake ahead of time can be a smart strategy for busy days, and this gluten-free red velvet cake is no exception. Preparing this velvety delight in advance will ensure that it’s ready to serve when you need it.
To make the cake ahead of time, you can pre-bake it and keep it wrapped in plastic wrap or aluminum foil. You can also freeze the cake by wrapping it in several layers of plastic wrap or aluminum foil before placing it in the freezer.
When storing baked red velvet cake, it is important to keep it at room temperature, ideally inside an airtight container. The cake should remain fresh for up to 3-4 days if stored properly.
Reheating the cake requires a gentle touch to maintain its moisture levels and prevent overcooking. To reheat slices of the cake, use the microwave on low power setting for about 10 seconds at a time until they reach your desired temperature. Alternatively, you can pop them in the oven at 180 degrees Celsius (350 degrees Fahrenheit) for 5-10 minutes until heated through.
This gluten-free red velvet cake is delicious enough to be enjoyed plain or with cream cheese frosting, which should be stored separately from the cake. Simply refrigerate leftover frosting in an airtight container for up to three days. Don’t forget to bring it to room temperature before usage.
With these storage and reheating tips in mind, you’ll have soft and luscious red velvet cake whenever you crave it!
Tips for Perfect Results
To ensure that your gluten-free red velvet cake turns out perfectly, here are some tips and recommendations that you should consider.
Firstly, I strongly recommend using fresh buttermilk instead of sour cream or yogurt as they tend to make the cake too dense. Also, don’t forget to add vinegar along with buttermilk as it creates a chemical reaction that gives the cake its signature red color and a slightly tangy taste.
Secondly, it is essential to have all ingredients at room temperature before mixing the batter. This includes butter, eggs, and buttermilk as room temperature ingredients mix together more evenly, leading to a smoother and fluffier cake.
Thirdly, when using gluten-free flour blends, make sure they contain xanthan gum or another binder to help replicate the texture of gluten in baked goods. Alternatively, you can create your own gluten-free flour blend by mixing together rice flour, potato starch, and tapioca starch.
Moreover, I encourage you not to skip the step of sifting your dry ingredients like cocoa powder and gluten-free flour blend before adding them to the wet ingredients as it eliminates any lumps and distributes each ingredient evenly throughout the batter.
Furthermore, do not overmix the batter; otherwise, it will lead to a tough cake. Once all the ingredients are combined and there are no visible streaks of flour remaining in the batter, then stop mixing.
Next, when baking your cake, it’s always best to use an oven thermometer to ensure a consistent temperature throughout the baking process. It also helps determine whether your oven runs hot or cold.
Lastly, allow your cake to cool completely before frosting it with homemade cream cheese frosting. To avoid smearing crumbs on the frosting during application, I recommend doing a “crumb coat” by applying a thin layer of frosting all over the cake and refrigerating for about 30 minutes before applying another layer of frosting.
By following these tips, you can create a delicious and moist gluten-free red velvet cake that will impress any crowd.
FAQ
Before we wrap up this article, I have gathered some frequently asked questions (FAQ) about this easy gluten-free red velvet cake with homemade cream cheese frosting recipe. If you have any queries regarding any of the points mentioned in this article or want to clarify anything related to this recipe, then you must read this section.
Why do people put cream cheese on red velvet?
When it comes to making a delicious red velvet cake, buttermilk and vinegar are essential ingredients that contribute to its soft and airy texture. This classic dessert is typically paired with a sweet and tangy cream cheese frosting, which not only enhances the vibrant red color but also complements the rich buttermilk flavor.
What is red velvet frosting made of?
When it comes to red velvet, I find that cream cheese frosting is the perfect match. Luckily, I have a straightforward recipe that only requires a few ingredients. All you need is some block-style cream cheese, butter, confectioners’ sugar, a touch of milk, vanilla extract, and a pinch of salt to balance out the sweetness.
What is the ingredient in red velvet cake that makes it red?
Have you ever wondered what makes red velvet cake so red in color? Well, it turns out that cocoa powder contains a special antioxidant known as anthocyanin. This antioxidant is pH-sensitive, which means that it reacts to acids and bases in a unique way. When raw cocoa powder reacts with acidic ingredients such as vinegar and buttermilk, it transforms into a dark red hue that gives red velvet cakes their signature color.
How do you keep gluten free cake moist?
When it comes to making gluten-free cakes, it’s crucial to prevent them from becoming dry and hard. To achieve perfectly moist and delicious cakes, I suggest incorporating buttermilk and increasing the fat content in the batter. This will help to counteract the typically dry texture of gluten-free baked goods. Additionally, proper storage in the refrigerator with adequate covering is essential to maintain freshness.
Bottom Line
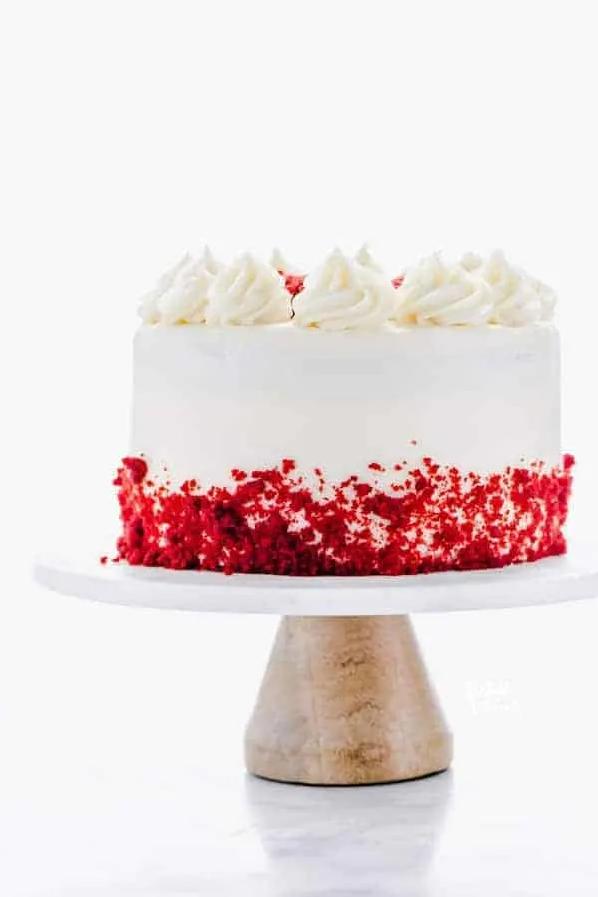
In conclusion, this easy gluten-free red velvet cake with homemade cream cheese frosting recipe is simply the best ever. Imagine all of the scrumptious flavors and the absolutely moist texture, combined with a dollop of creamy frosting that literally melts in your mouth. Without a doubt, this cake will be the center of attention at any event or gathering.
By using high-quality, organic ingredients like Jello Instant Vanilla Pudding Mix, gluten-free flour blend, and unsweetened cocoa powder, you can indulge in your favorite dessert without feeling guilty. Plus, with easy substitutions like dairy-free butter and buttermilk vinegar, this recipe can be adapted to cater to anyone’s dietary needs.
The tips and recommendations mentioned throughout this article will help ensure that your cake turns out perfect every single time. Remember to store it correctly to keep it fresh for longer periods, and feel free to make-ahead for any special occasion.
So get tested and give this easy-to-follow recipe a try today. Classic gluten-free red velvet cake is an all-time favorite dessert that you don’t want to forget about anytime soon. It’s time to forget about everything else and focus on this cream cheese frosting gluten-free cake.
Easy Gluten Free Red Velvet Cake With Homemade Cream Cheese Fros Recipe
Ingredients
- cake
- betty crocker gluten free yellow cake mix (1 box)
- 3 tablespoons unsweetened cocoa powder
- Jello Instant Vanilla Pudding Mix (1 lg box)
- 1/2 cup butter, melted & cooled
- 1 cup buttermilk
- 3 eggs, beaten
- 2 teaspoons vanilla (gluten free)
- food coloring, red (1 bottle)
- cream cheese frosting
- 1/2 cup butter (sofened)
- 16 ounces cream cheese (sofened)
- 4 cups powdered sugar
- 2 teaspoons vanilla (gluten free)
- 3 tablespoons heavy cream
Instructions
- Cake:
- - Pre heat oven to 350 deg (lower to 325 for dark/non stick pans).
- - Spray two 8 inch round pans with baking spray or grease with butter.
- - Combine dry ingredients (cake mix, cocoa powder and pudding mix) in a medium bowl until well blended.
- - In a seperate bowl combine wet ingredients (butter, buttermilk, beaten eggs, vanilla, food coloring) and mix unitl well blended.
- - Now slowly add your wet ingredients to you dry ingredients, mixing and scraping the side of the bowl as you go. Continue until all are well blended and beat for additional 2 minutes.
- Note: Batter will be thick, if you think it is too thick for your mixer to handle you can add more buttermilk to thin it down, but don't add too much.
- - Pour batter evenly split between the two baking pans.
- - Bake according to package directions or until toothpick comes out center clean -- approx 30 minute.
- - Cool.
- Optional Homemade Frosting - Make while the cake is cooking:
- - Cream butter and cream cheese together until they are light and fluffy.
- - Gradually add the powdered sugar and continue beating until well blended.
- - Add vanilla and heavy cream and beat until fluffy and spreadable.
- Optional: For a thicker frosting you can add more powdered sugar until you get the consistency you are looking for.
- - Place into the refrigerator until you are ready to use.
- Assembly:
- - Make sure cakes have cooled.
- - Stir the frosting until it is spreadable again.
- - Place first layer of cake on plate.
- - Spread 1/3 of the frosting over this layer.
- - Place the second layer (upside down) on top.
- - Spread the rest of the frosting over the entire cake.
- - Refrigerate until you are ready to serve.