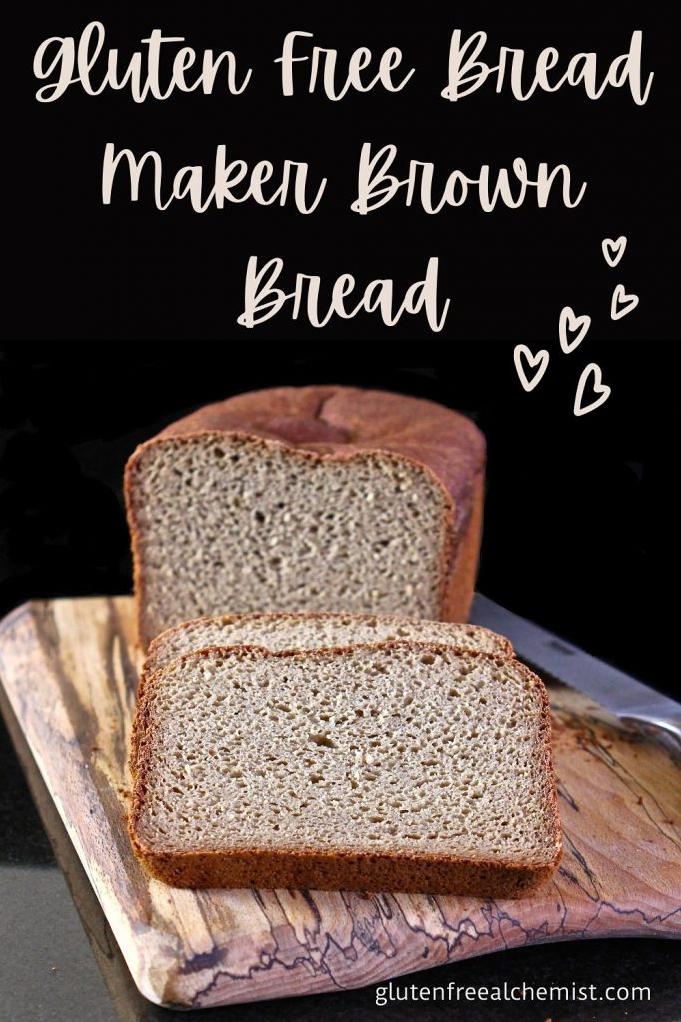
Tasty Gluten-Free Brown Bread Recipe for Food Lovers
It is a pleasure to share with my readers today a recipe for delicious gluten-free brown bread made entirely in a bread maker. As a nutritionist cum food blogger, it is my job to devise recipes that contribute to healthy eating and lifestyles. I believe this recipe will be an instant hit for those who are looking for healthier options and those who have gluten or dairy-free dietary requirements.
Not only is this gluten-free bread tasty, but it is also easy to prepare using a bread machine that does most of the work for you. The ingredients are simple and mostly staples that one would find in their pantry or at the grocery store. You don’t have to worry about kneading or proofing since the bread maker does all of that.
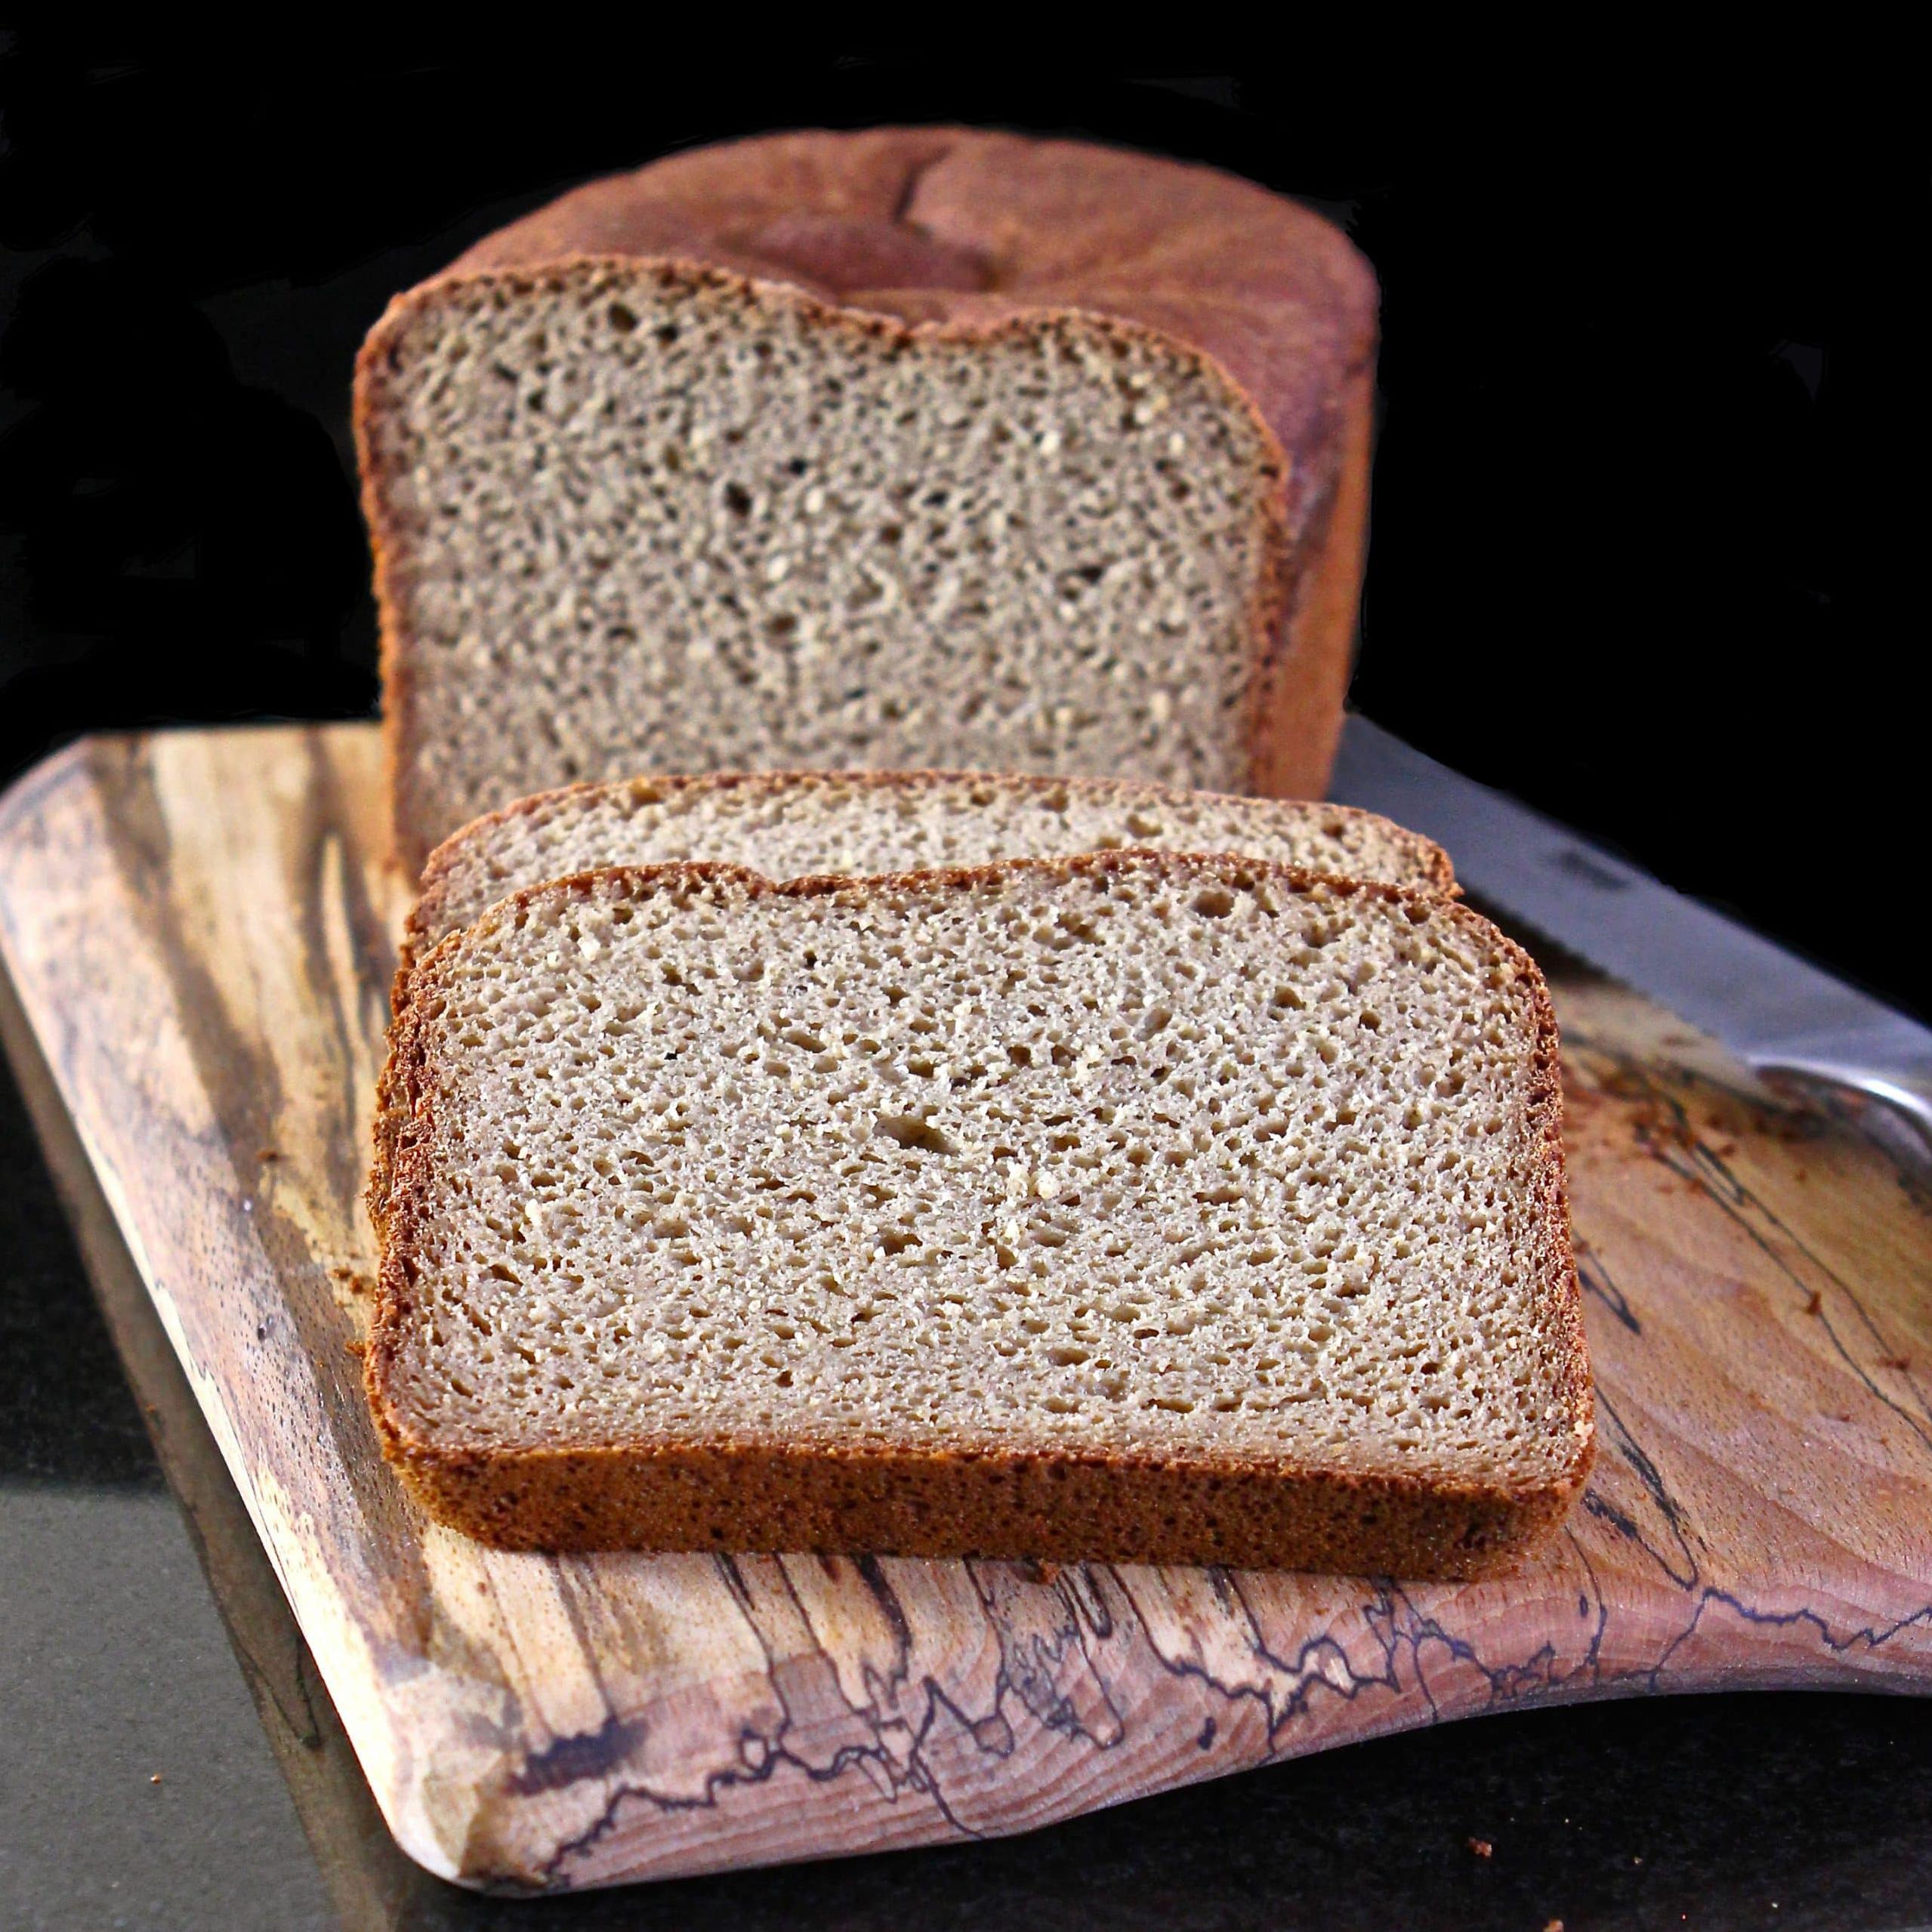
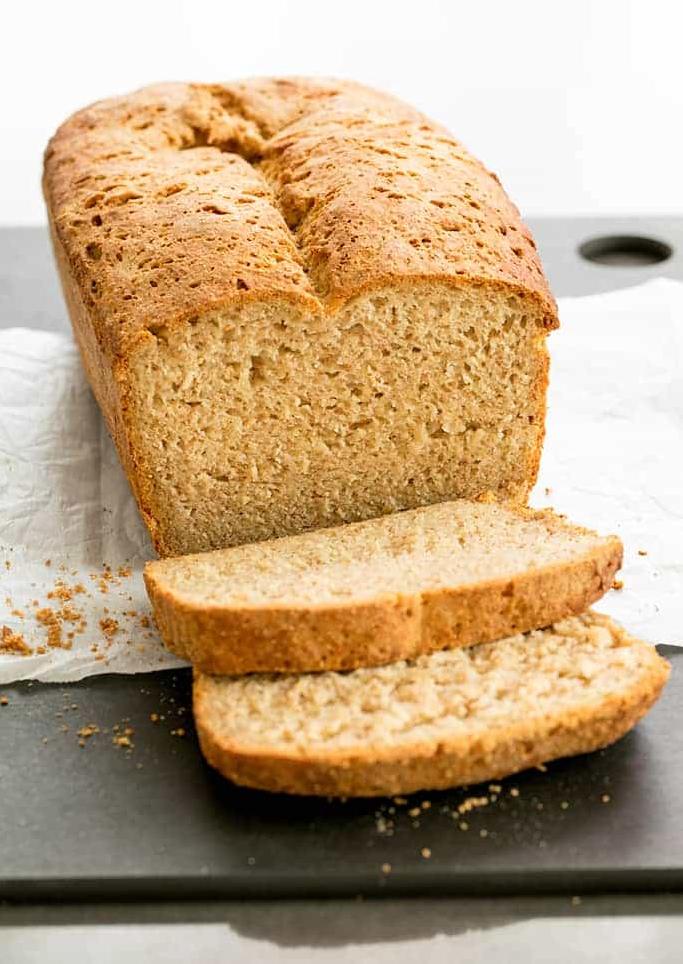
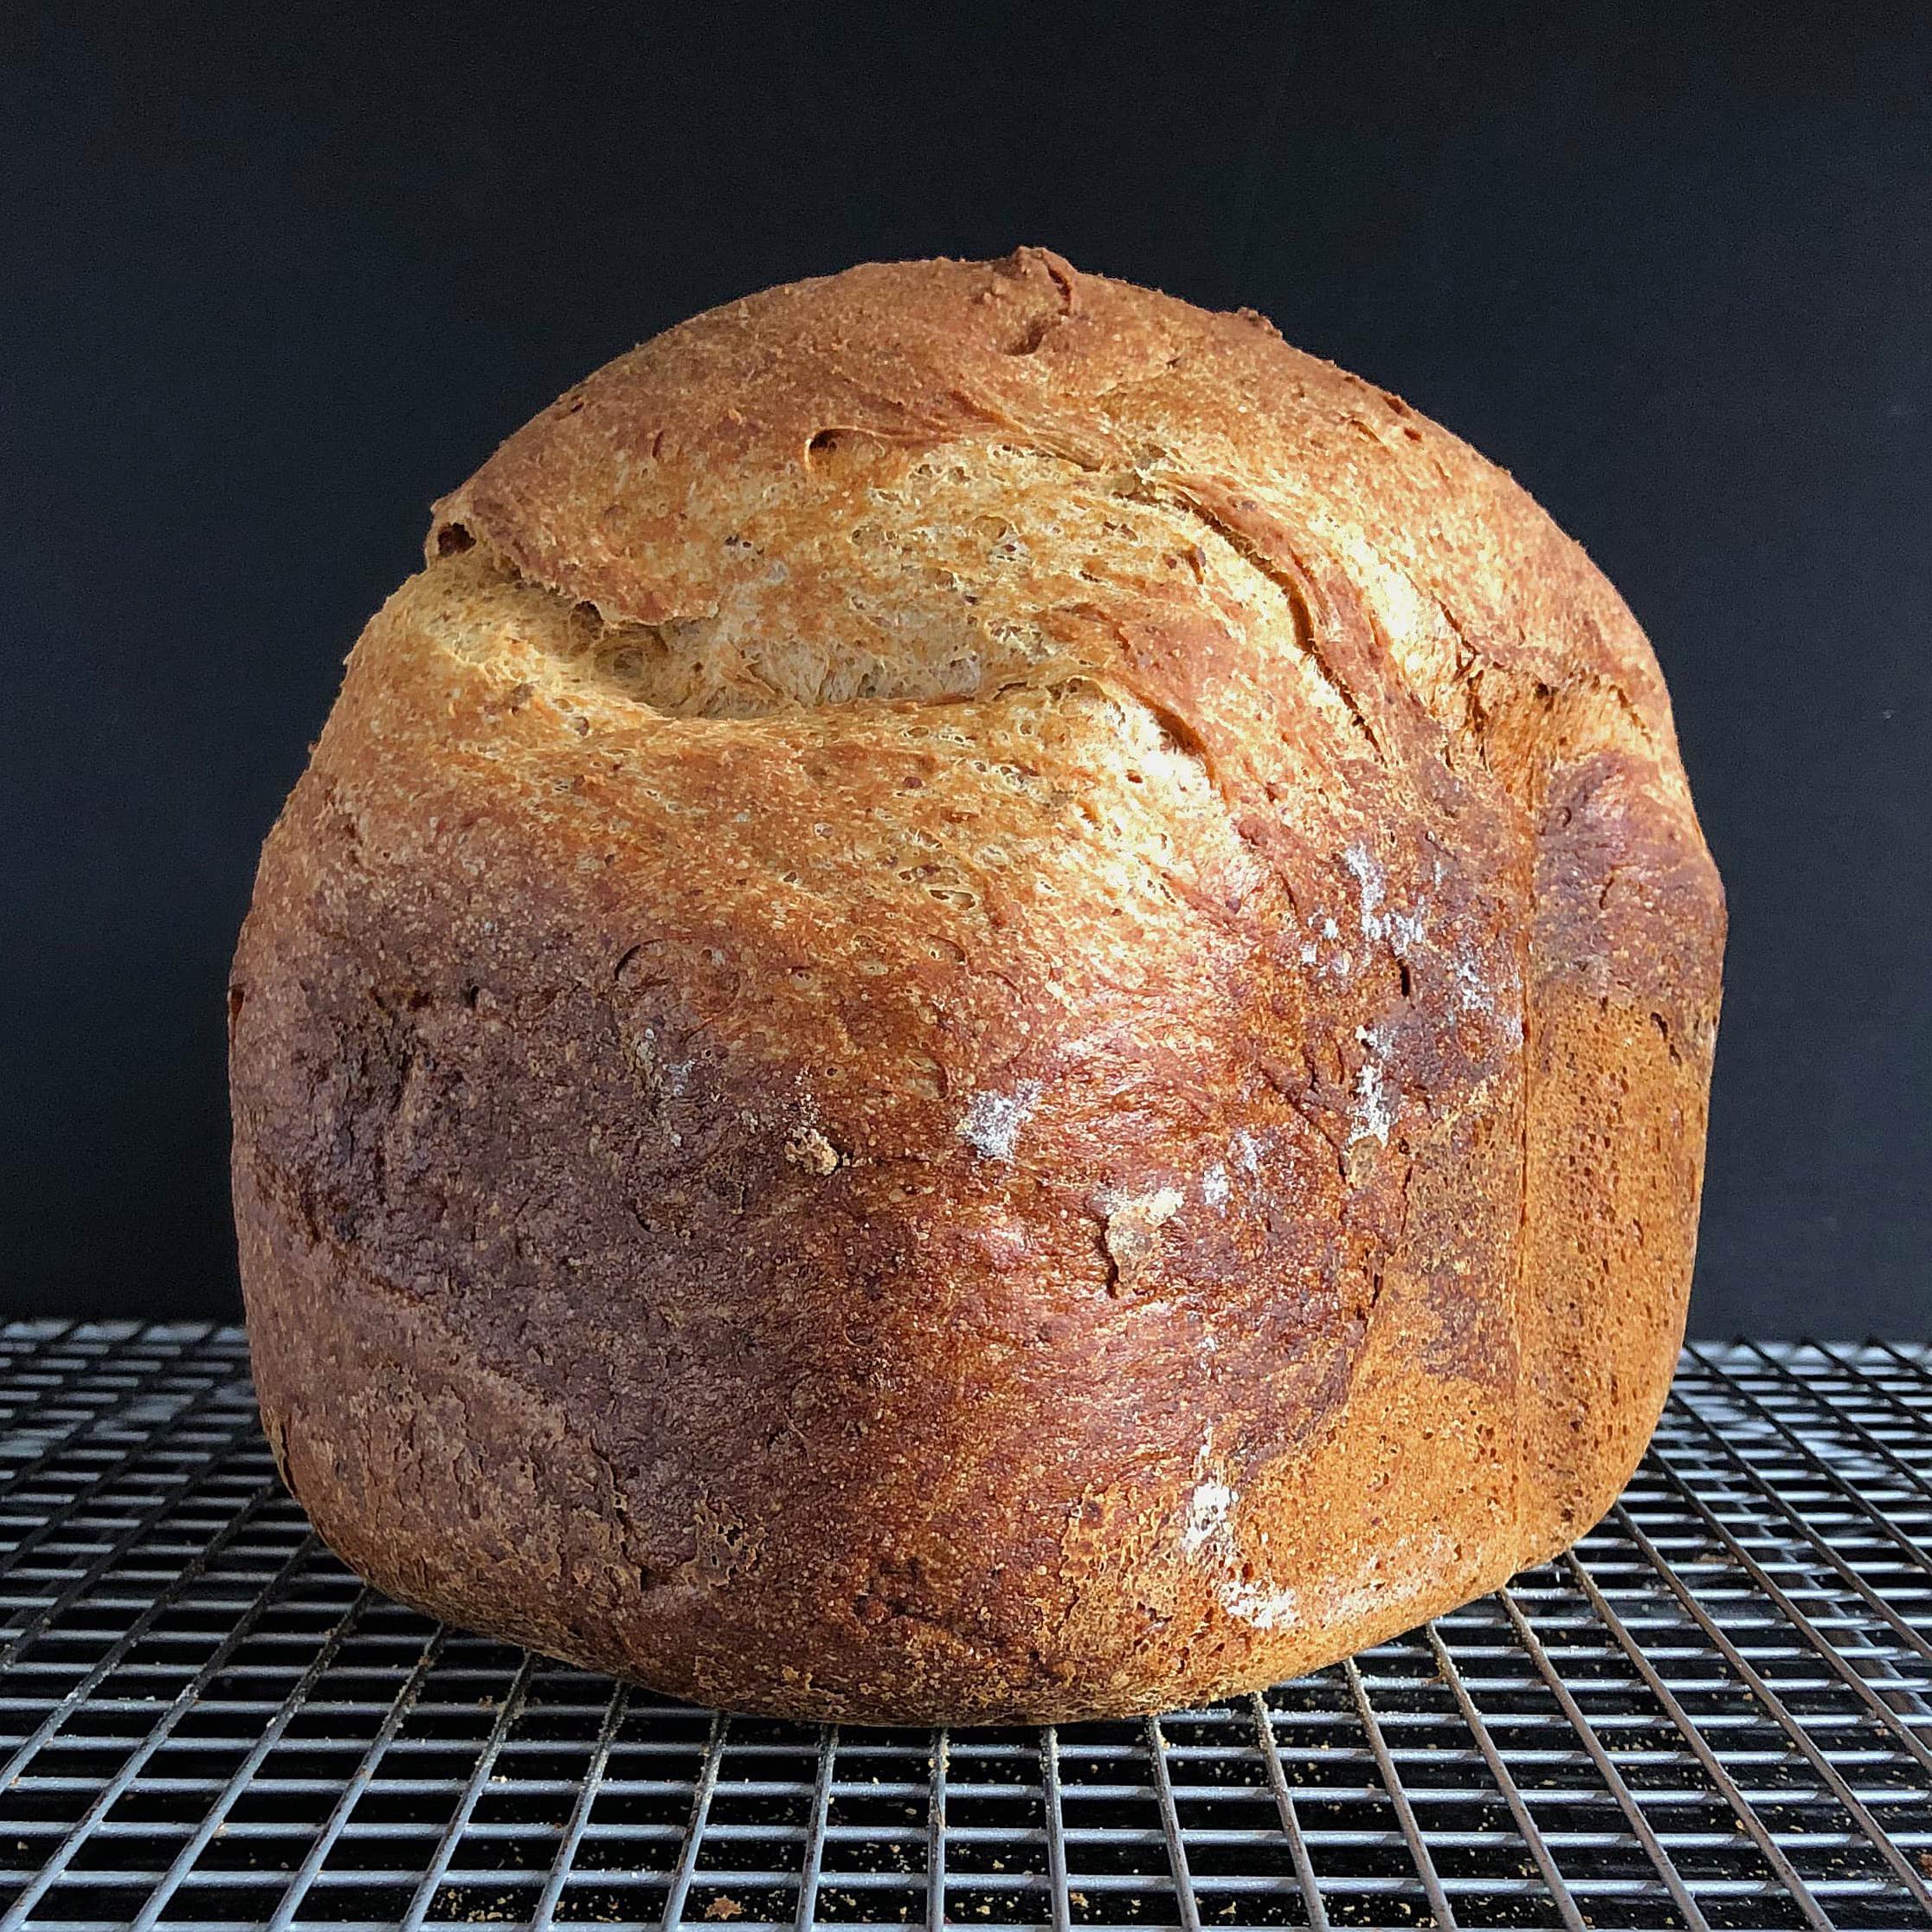
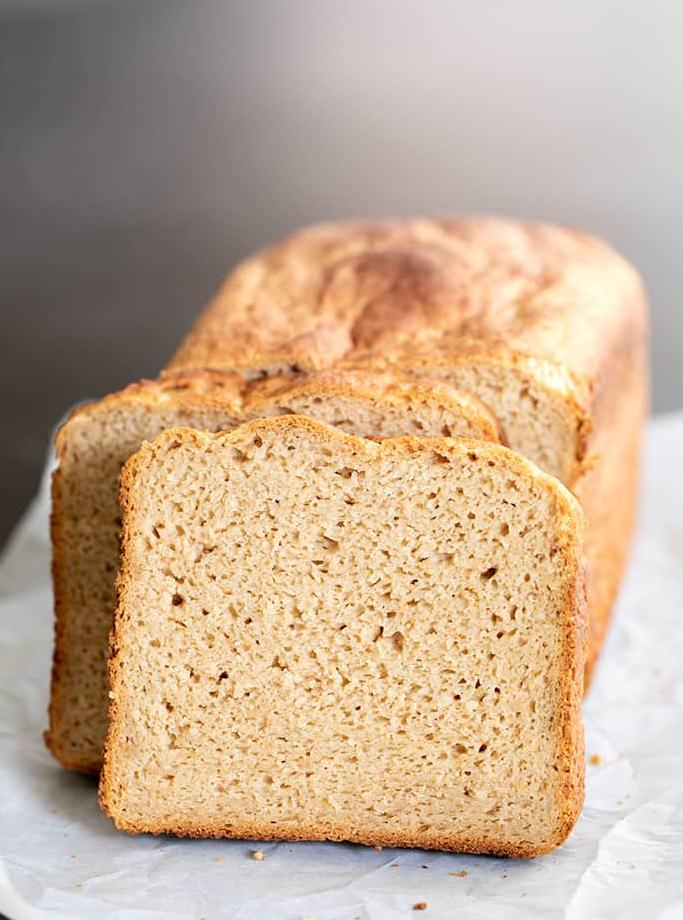
For those who are new to gluten-free baking, this recipe produces an excellent loaf that doesn’t crumble apart into dry shards when sliced. Instead, it has a denser texture akin to whole grain bread but without any grittiness. The crust is light, crispy and nicely browned.
I am thrilled to share this recipe with you and I can guarantee that this gluten-free brown bread will become a regular feature in your household once you try it out. With no further ado, let us dive into the details of what makes this recipe so special!
Why You’ll Love This Recipe
My dear readers, I can assure you that this bread recipe will bring great joy to you and your family. Not only is this gluten-free bread free of dairy, but it is also delicious and easy to make with a bread machine.
For those who avoid gluten and dairy, finding a tasty and healthy bread option can be nearly impossible. But fear not, for this brown bread recipe provides the perfect solution! Made with brown rice flour, sorghum flour, and tapioca starch, this loaf is filled with wholesome ingredients that won’t leave you feeling bloated or heavy.
Let me assure you, it’s not just good for you — it’s downright delicious. The molasses gives this bread a subtle sweetness that pairs perfectly with any topping of your choice. The recipe produces a small loaf that is perfect for sandwiches or enjoying as a side dish to soups or salads. The texture is soft yet satisfyingly chewy, making it an excellent option for anyone who enjoys whole grain bread.
The beauty of this recipe lies in its convenience. You need not worry about measuring ingredients precisely, as the bread machine does all the work for you by mixing and kneading the dough to perfection. All that’s left for you to do is wholeheartedly delight in the aroma of freshly baked bread wafting from your kitchen.
So my dear foodies, if you are searching for an easy and healthy gluten-free brown bread recipe that tastes divine – this is your answer! Your taste buds will dance with delight after trying this exceptional recipe. I urge you to go ahead and give it a try; I guarantee that it won’t disappoint.
Ingredient List
Dry Ingredients:
- 2 cups (300 g) gluten-free brown rice flour
- 3/4 cup (90 g) sorghum flour
- 1/2 cup (60 g) tapioca starch
- 1/4 cup (32 g) cornflour
- 1/4 cup (32 g) potato flour
- 1 tablespoon (10 g) active dry yeast
- 1 tablespoon (15 g) caster sugar
- 2 teaspoons (6 g) guar gum
- 1 teaspoon (6 g) baking soda
- 1 teaspoon (5 g) salt
Wet Ingredients:
- 2 eggs, beaten
- 1/4 cup (60 ml) vegetable oil or olive oil
- 2 tablespoons (30 ml) molasses or maple syrup
- 2 teaspoons (10 ml) apple cider vinegar
- 1 teaspoon (5 ml) filtered water
Optional Additions:
- 3 tablespoons (20 g) powdered milk for a dairy-free option or almond flour for a vegan bread
- Xanthan gum can also be used in place of guar gum, in the same amount.
Note: Always double-check the ingredients to be specifically labeled as gluten-free.
This recipe produces a homemade unsliced sandwich bread that has a moist crumb and a slightly sweet taste. With this ingredient list, you’ll have everything you need for this gluten-free, dairy-free and healthy bread!
The Recipe How-To
Ingredients
- 1 1/2 cups gluten-free brown rice flour
- 1/2 cup potato flour
- 1/2 cup tapioca starch
- 2 tbsp powdered milk
- 1 tbsp guar gum or xanthan gum
- 3 tbsp caster sugar
- 1 tsp salt
- 1/4 cup dark molasses
- 1 tsp apple cider vinegar
- 2 large eggs, beaten
- 1 tsp active dry yeast (gluten-free)
- 1/4 cup olive oil
- 3/4 cup warm water
Instructions
- In a large mixing bowl, sift together the gluten-free brown rice flour, potato flour, tapioca starch, powdered milk, guar gum, caster sugar, and salt.
- In a separate bowl, whisk together the dark molasses, apple cider vinegar, beaten eggs, active dry yeast, olive oil, and warm water.
- Pour the wet ingredients slowly into the dry ingredients while mixing at medium speed with an electric mixer or in a bread machine.
- Scrape the sides of the bowl using a spatula to ensure all the ingredients are mixed properly.
- Mix for approximately five minutes until the dough is smooth and sticky; it should stick to your finger when touched.
- Pour the dough into a greased loaf pan and fluff with a fork or knife.
- Cover the loaf pan with plastic wrap and keep it in a warm environment for approximately one hour until it has risen to about an inch over the edge of the pan.
- Preheat your oven to 375°F (180°C).
- Remove the plastic wrap from the dough.
- Bake in the preheated oven for approximately 35-40 minutes.
- After 35 minutes, check that the bread is done by tapping the bottom; it should sound hollow.
- If needed, bake for another 5-10 minutes until it’s fully cooked.
- When done, let the bread cool in the pan for five minutes then transfer it to a wire rack to cool completely.
Note: This recipe produces a dense bread.
This simple recipe is great for beginners, and it provides instructions on how to make homemade gluten-free brown bread using a bread maker. The flavors and texture of this Brown Rice Bread are similar to wheat bread, with the added bonuses of fiber and nutrition from brown rice flour. The addition of molasses gives this bread a deep, hearty flavor and also promotes browning during the baking process.
Substitutions and Variations

Variety is the spice of life! While this gluten-free brown bread recipe is already packed with so much flavor and nutrition, there are plenty of substitutions and variations you can take to suit your taste buds or dietary needs.
If you want to go dairy-free, simply replace the powdered milk with almond milk powder, and substitute olive oil for the vegetable oil. You can also try using coconut oil instead of olive oil for a tropical twist.
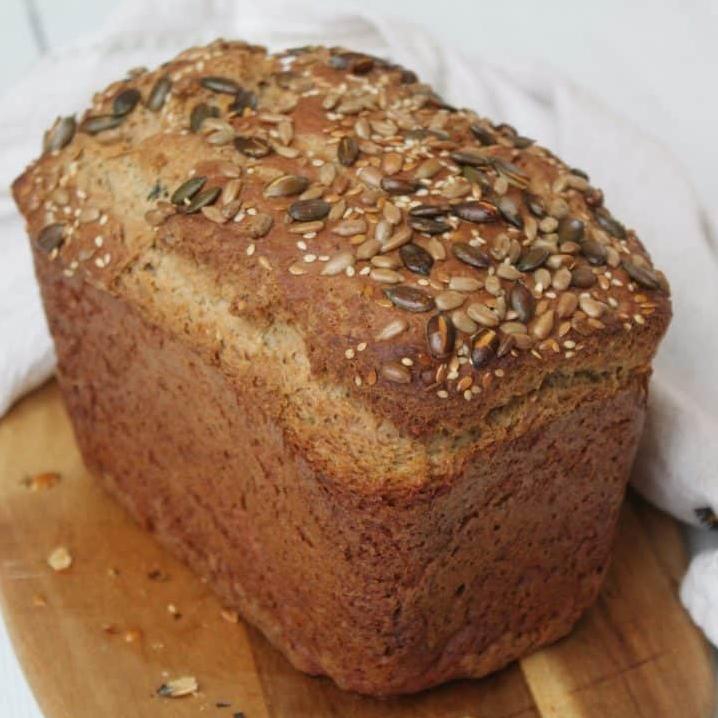
If you’re looking to add some more fiber to this whole grain bread, swap out the brown rice flour for sorghum flour or buckwheat flour. You could also try adding some extra seeds or nuts into the mix, like sunflower seeds, flaxseeds, chia seeds, or almonds.
For a sweeter option, add some raisins or cranberries into the dough. Alternatively, you could also add a dash of cinnamon or pumpkin pie spice for an extra cozy touch.
If you want to test how creative you can get with this gluten-free bread recipe, try experimenting with different flours to create new flavors. You could try cornmeal, quinoa flour, teff flour, or even coconut flour for a tropical flavor profile.
Whatever substitution or variation you choose to make, do not forget to adjust the measurements accordingly and have fun with it!
Serving and Pairing
Once your delicious gluten-free brown bread is out of the oven or bread maker, you’ll be eager to slice it and try it right away. The bread’s rich, deep flavor is perfect for a variety of uses.
One of my favorite ways to enjoy this gluten-free brown bread is as a hearty sandwich packed with fresh ingredients like crisp lettuce, ripe tomatoes, and creamy avocado. The bread’s thick, chewy texture provides the ideal container for all of these tasty fillings. You could also add some turkey, chicken or vegetarian patties to create a more substantial sandwich.
Another great way to serve this bread is toasted with a bit of melted butter or margarine on top. It makes a wonderful addition to breakfast staples such as eggs or beans.
The earthiness of the gluten-free brown bread also makes it an excellent accompaniment to hearty soups and stews. It can hold its own alongside a rich tomato soup, beef stew or chilli. Its sturdy texture won’t turn into mush once it’s been immersed in the soup or stew.
Lastly, this gluten-free brown bread pairs beautifully with cheeses and fruits. Serve sliced with a range of cheeses, some homemade chutney and grapes on the side. The sweetness and tanginess of the chutney complement the rich flavors of the cheese and the rustic taste of the brown bread.
There are endless creative ways to enjoy this gluten-free brown bread recipe; it is all up to your imagination!
Make-Ahead, Storing and Reheating
My dearest readers, I do hope you have enjoyed crafting your delightful gluten-free brown bread in your reputable bread machine. However, it is important to discuss how you may store this anticipated indulgence for future snacking pleasure.
To commence, let us address the make-ahead process. Should you desire a piping hot loaf of bread in the morning but wish to avoid the early wake-up call, you may prepare the recipe’s dry ingredients beforehand and neatly store them in an airtight container until necessary. Once required, simply add to your bread maker, dearest one.
Now on to the matter at hand, storage. Your unparalleled bread can be stored at room temperature or placed in a plastic bag within the refrigerator, but I do advocate for preserving freshness by placing your beloved loaf in your freezer once cooled. This will permit a lengthy lifespan of up to three months and enable premature planning for unexpected occasions.
Finally, should you long for warm bread on a chilly evening or need to revitalize a frozen commodity, reheating is crucial. I suggest wrapping it in foil and placing it in an oven at 350°F (180°C) for twelve minutes or popping slices into your toaster for rapid reclamation.
My dear food connoisseurs, with these storage tips and reheating instructions, you are now equipped with the knowledge necessary to savor this delicacy time and time again.
Tips for Perfect Results
In this section, I will share with you some tips and tricks that will help you get perfect results when making gluten free brown bread using a bread maker.
First and foremost, it’s essential to follow the recipe ingredients and measurements mentioned. Using the right quality and quantity of ingredients is crucial, especially for gluten-free baking. Measurements matter, so make sure to use the correct measuring cups and spoons.
While making brown bread, it’s important to keep an eye on the dough consistency. The dough should be slightly soft but not too sticky or firm. If it’s too dry, add a little more warm water. If it’s too wet, add some cornflour or potato flour.
One of the most important tips is to use gluten-free flours made specifically for bread-making. Using regular flour may result in the bread being too dense or dry. Many brands sell gluten-free flour combinations that are great for baking gluten-free bread.
Make sure to check the expiration date of your active dry yeast before using it. Old yeast may not activate as well as fresh yeast, resulting in poor rising and a dense texture.
You can add some vinegar (apple cider or white) to help activate the yeast further by creating an acidic environment. Adding 1-2 teaspoons of vinegar will also give your bread a tangy flavor.
If you want your bread to be sweeter or more savory, feel free to adjust the sugar levels according to your taste preference.
Another tip is to preheat your bread maker before putting your ingredients inside. This ensures that your machine is ready for action when you are, resulting in efficient and even baking.
Lastly, don’t hesitate to play around with different ingredients and substitutions. For instance, try using almond flour instead of sorghum flour or olive oil instead of vegetable oil. However, do keep in mind that substitutions may change the taste and texture of the bread.
With these tips in mind, you are well on your way to making delightful and delicious gluten-free bread that’s perfect every time!
Bottom Line
In conclusion, the Gluten Free Brown Bread recipe is a must-try for anyone looking for a healthy and tasty alternative to regular bread. Thanks to the use of gluten-free flours, this recipe produces a bread that is suitable for people with gluten allergies or sensitivities. Moreover, it’s also dairy-free and can be made vegan with minor substitutions.
Using a bread machine makes the process much easier and hassle-free, yielding excellent results every time. With its perfect texture and slightly sweet flavor, this brown bread is ideal for making sandwiches or enjoying it on its own as a snack. The use of molasses and brown sugar adds a depth of flavor that will satisfy any sweet tooth while still fitting into a healthy diet.
Whether you’re looking to cut out gluten, dairy or just want to try out a new and delicious baking recipe, this Gluten-Free Brown Bread recipe is bound to impress. A great substitute for wheat flour bread, soda bread or even whole grain bread, this recipe offers a variety of options to switch up your usual sandwich routine!
Give it a try today and experience the joy of baking your own delicious and nutritious loaf of bread!

Gluten Free Brown Bread - Breadmaker Recipe
Ingredients
- 2 cups rice flour
- 1/2 cup potato flour
- 1/2 cup maize cornflour
- 1/3 cup soya flour
- 3 teaspoons guar gum
- 2/3 cup powdered milk
- 1/4 cup caster sugar or 1 tablespoon molasses
- 1 1/2 teaspoons salt
- 2 teaspoons dried active dry yeast
- 1 teaspoon sugar
- 2 tablespoons whole linseeds (optional)
- 3 eggs
- 350 ml warm water
- 4 tablespoons safflower oil (1/3 cup)
- 1 teaspoon cider vinegar
Instructions
- Add dry ingredients to breadmaker.
- Add yeast to warm water with 1 tsp sugar.
- Beat eggs, molasses, vinegar and oil together.
- Add yeast/water mix to egg mixture and stir.
- Add wet ingredients to breadmaker.
- Cook on the rapid bake setting (2 hrs).
- Store in a plastic bag.
- Loaf should stay fresh for 2-3 days.
Add Your Own Notes
Nutrition
Recommended Recipes Just For You
None found