Delicious Berry Bars Recipe for a Healthy Snack
As a nutritionist and food blogger, I am always on the lookout for healthy yet delicious recipes. Today, I am excited to share with you my latest creation: Berry Bars- a dairy-free, gluten-free, and organic recipe that is sure to impress your taste buds.
These bars are perfect for anyone who loves the taste of fresh berries paired with a crumbly crust. Not only are they incredibly delectable, but they are also easy to make! In just a few simple steps, you can create a batch of these mouth-watering bars and indulge in a healthy dessert that will satisfy any sweet cravings.
Additionally, these bars are versatile enough to be served as breakfast bars or as an afternoon snack. You can even top them off with ice cream or yogurt for an extra treat.
So what are you waiting for? Let’s dive into our Berry Bars recipe and enjoy a perfect summer dessert or snack that is both healthy and delicious.
Why You’ll Love This Recipe

Looking for a delicious, healthy dessert recipe? Look no further than these amazing Berry Bars! Not only are they made completely gluten-free and dairy-free, but they are also chock-full of yummy berries that your whole family will love.
As a nutritionist and food blogger, I can tell you that finding a great dessert recipe that is also healthy can be a challenge. Many desserts are loaded with sugar, unhealthy fats, and processed ingredients – all things that we want to avoid if we’re trying to eat healthily. But these Berry Bars are different.
First off, they’re vegan-friendly, which means that they’re great for people who follow a plant-based diet. But even if you’re not vegan, you’ll find that these bars are incredibly delicious. The crust is made with a combination of almond flour and oatmeal – two ingredients that lend themselves beautifully to creating a crumbly, melt-in-your-mouth texture.
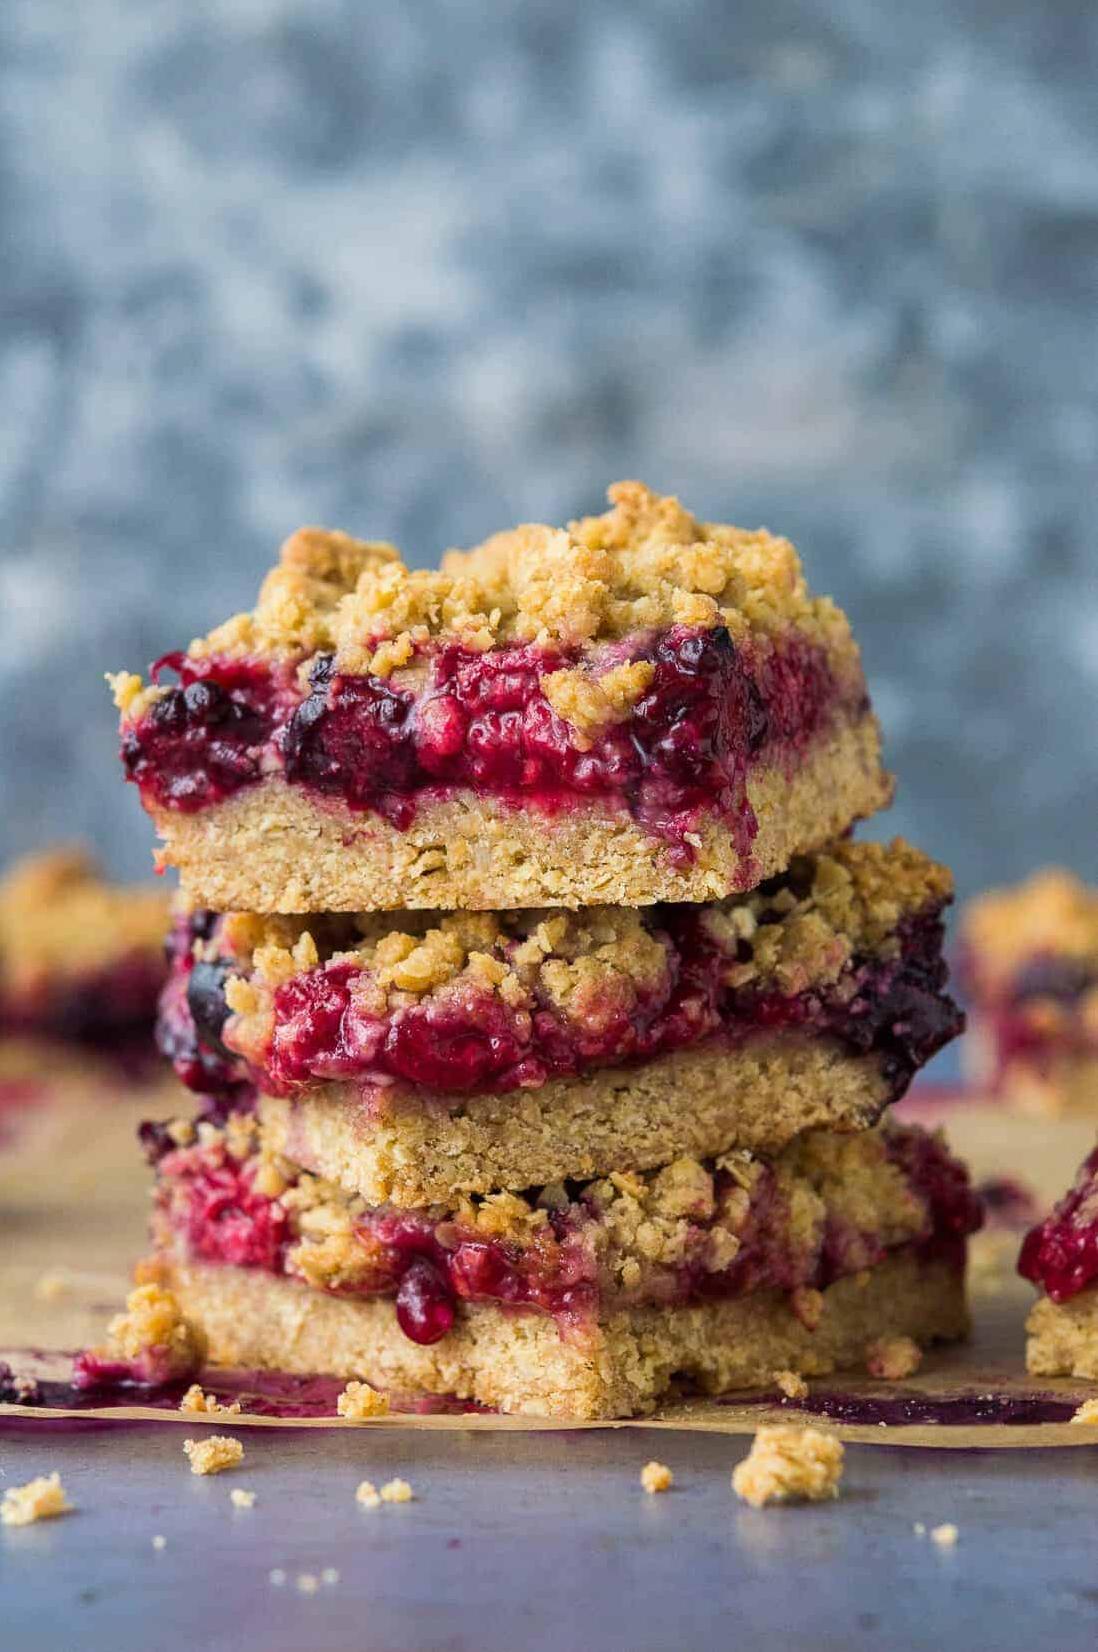
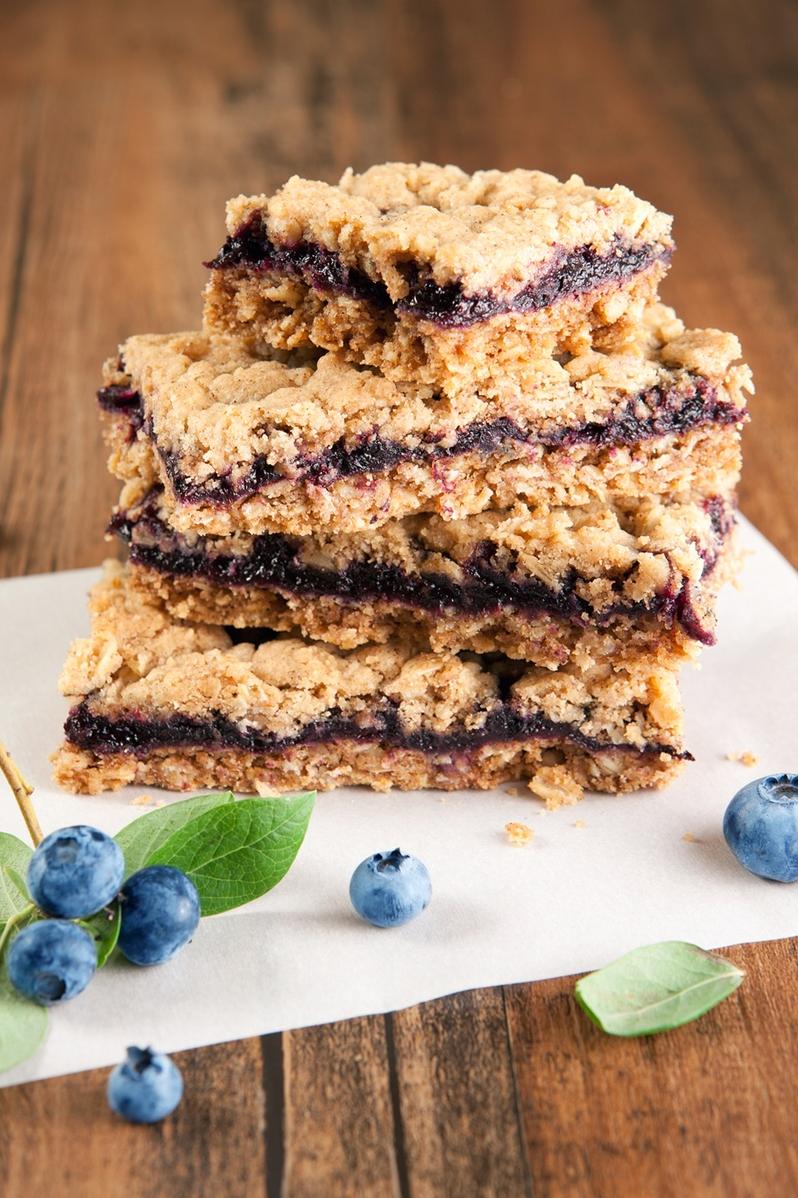
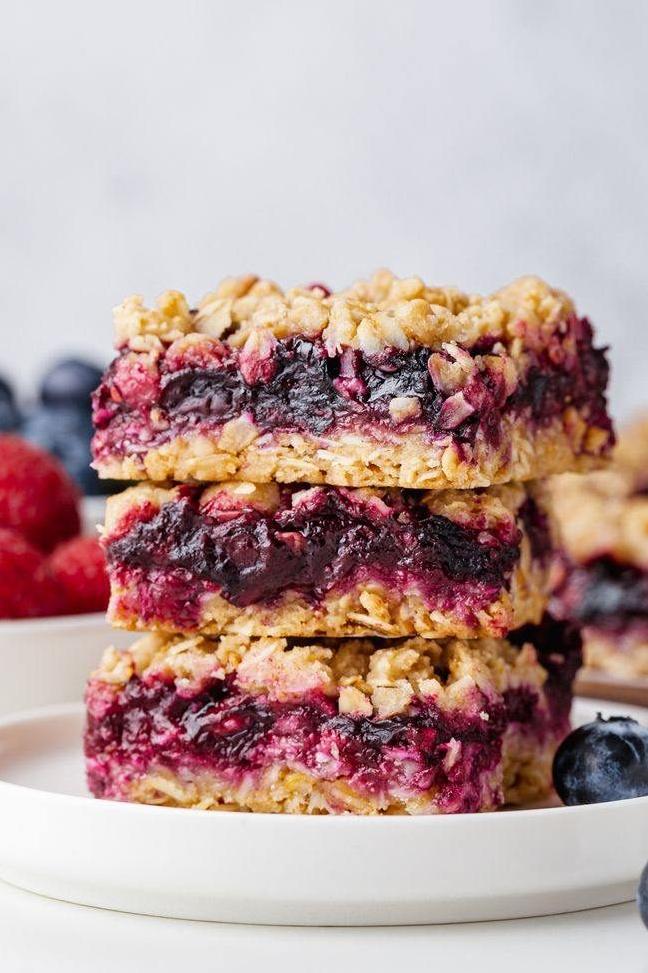
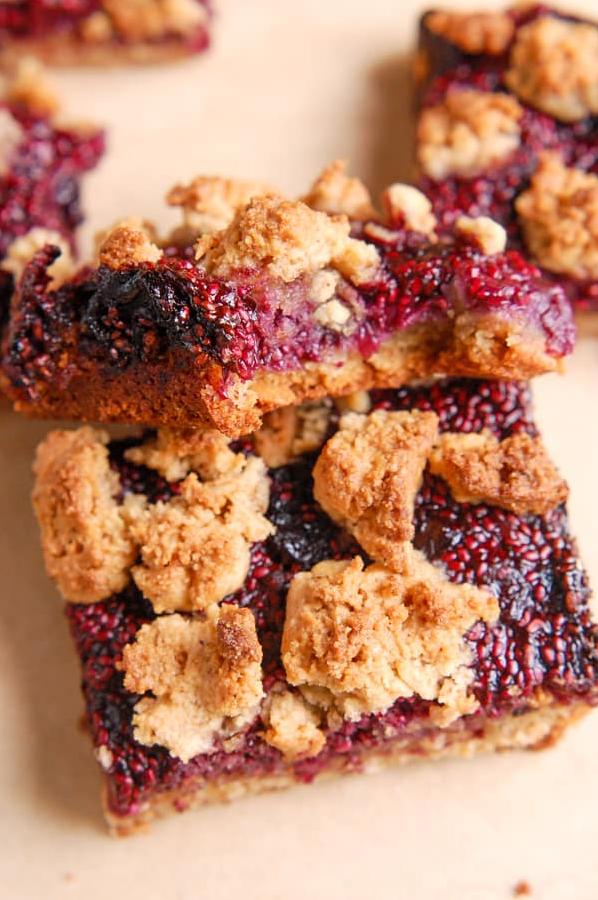
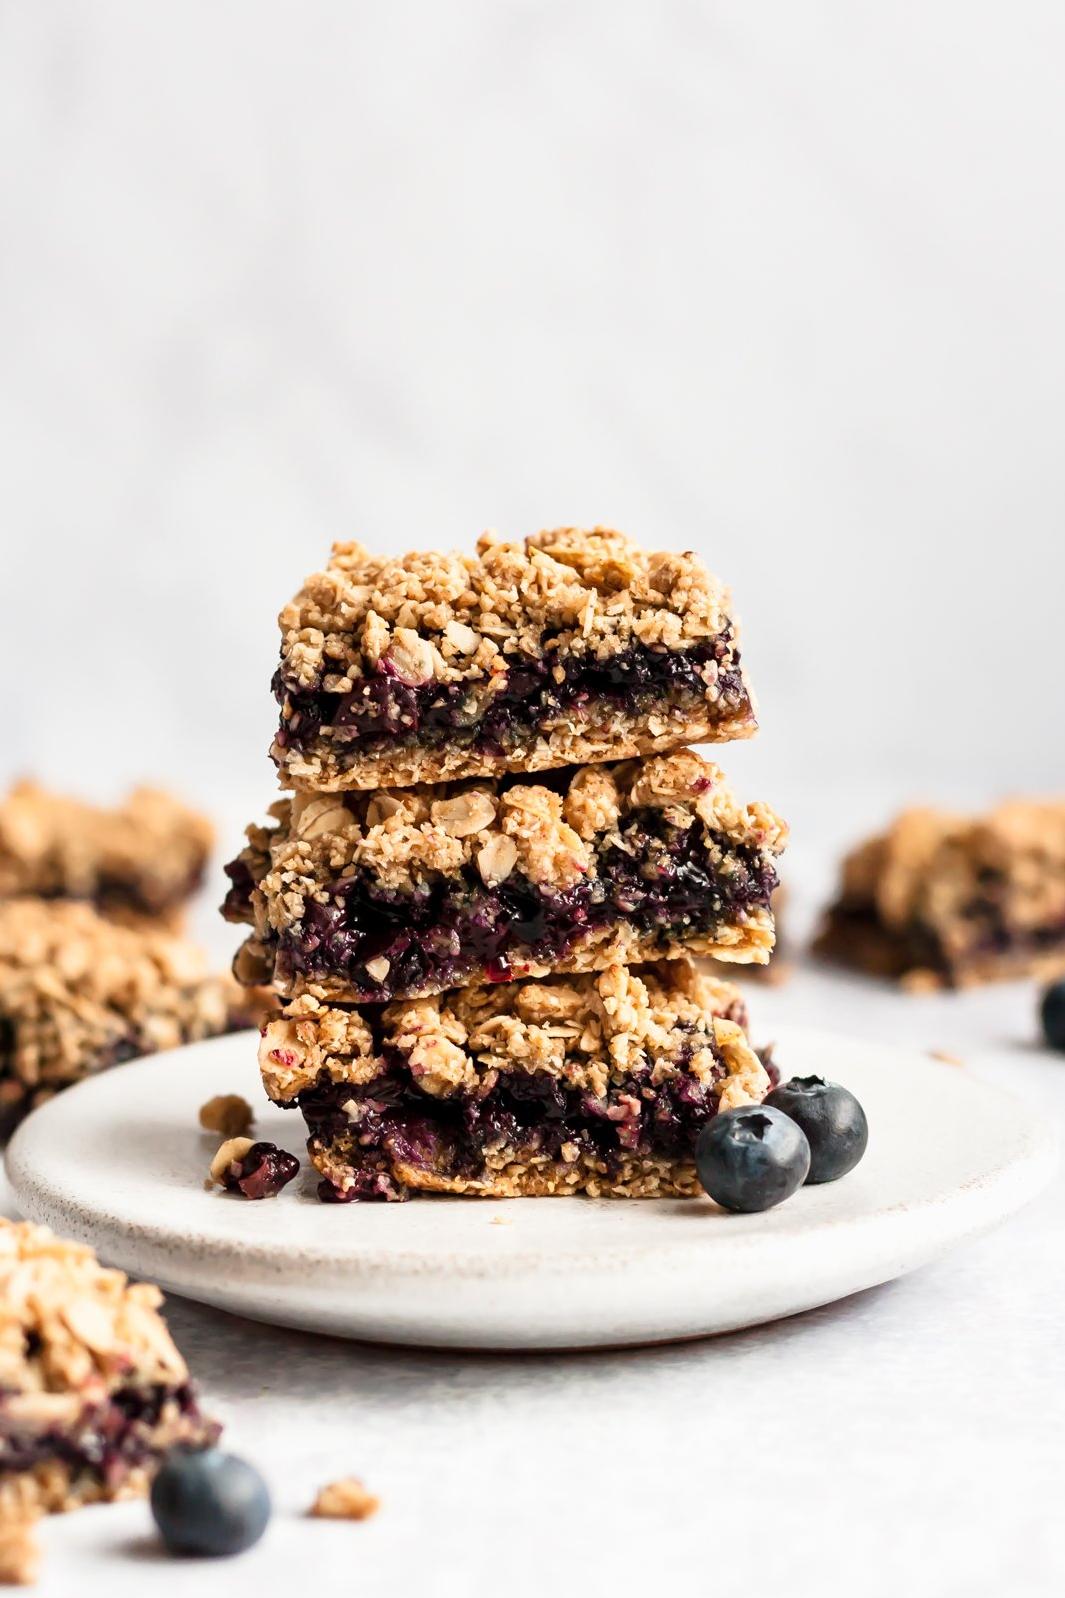
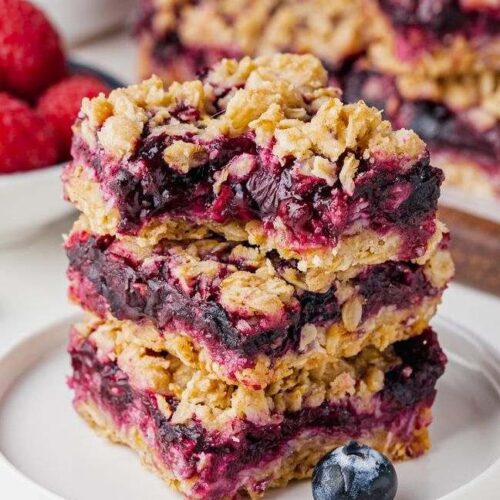
Then there’s the filling – fresh or frozen berries mixed with just the right amount of lemon juice and cornstarch to create the perfect balance of sweetness and tartness. The bars are topped with a crumbly mixture of oats, flour, cinnamon, allspice, salt, baking powder and brown sugar for an irresistible texture and taste.
These bars are perfect for any occasion – from lazy summer afternoons to fancy dinner parties. They’re easy to make and always sure to impress. And if you happen to have leftovers (although who am I kidding?), they keep well in the fridge or freezer, making them an ideal make-ahead dessert option.
So why will you love this recipe? Because it’s healthy, it’s delicious, it’s easy to make, and it’s perfect for any occasion. So what are you waiting for? Get in the kitchen and start baking up some Berry Bars today!
Ingredient List
Here’s what you’ll need to create these delicious vegan berry bars:
- 1 1/2 cups rolled oats (certified gluten-free if necessary)
- 1 1/2 cups oat flour (make your own by blending rolled oats in a food processor until finely ground)
- 1/2 cup almond flour
- 1/2 cup light brown sugar
- 1/4 teaspoon salt
- 1 teaspoon baking powder
- 2 tablespoons cornstarch
- 1 teaspoon cinnamon
- 1/4 teaspoon allspice
- Juice of one small lemon
- 8 tablespoons melted margarine (or coconut oil)
- 4 cups fresh or frozen berries (such as raspberries, blackberries, and blueberries)
Note that you can use any combination of berries that you like for this recipe, either fresh or frozen. If using frozen berries, allow them to thaw before using in the recipe. Make sure to use dairy-free margarine to keep this recipe dairy-free.
The Recipe How-To

Let’s get into the juicy part: how to make these delicious gluten-free, dairy-free berry bars! Don’t worry, the process is simple and easy to follow. Check out the step-by-step guide below.
Ingredients:
- Crust and crumble topping
- 1 1/2 cups certified gluten-free old fashioned rolled oats
- 1 cup certified gluten-free oat flour
- 1/2 cup almond flour
- 1/2 cup light brown sugar
- 1 tsp baking powder
- 1 tsp cinnamon
- 1/4 tsp allspice (optional)
- pinch of salt
- 10 tbsp vegan margarine, cold and cut into small pieces
- Berry filling
- 4 cups fresh or frozen mixed berries (blueberries, raspberries, blackberries)
- 2 tbsp cornstarch
- juice of half a lemon
- 1/4 cup pure maple syrup
Step by Step Instructions:
Preheat the oven and prep the pan
- Preheat your oven to 350°F (175°C).
- Grease an 8×8 inch square baking pan with cooking spray or line it with parchment paper.
Make the crust
-
In a large mixing bowl, combine oats, oat flour, almond flour, brown sugar, baking powder, cinnamon, allspice (if using), and salt. Stir until well-blended.
-
Add in the vegan margarine pieces and use a pastry cutter or two forks to cut them into the dry mixture until a coarse crumb forms.
-
Set aside about one-third of the crumb mixture for the topping.
-
Transfer the remaining two-thirds of the mixture to your prepared pan. Use your fingers or a flat-bottomed measuring cup to press it firmly and evenly into the bottom of the pan to create an even crust.
-
Bake the crust for about 12 to 15 minutes, or until it’s lightly golden brown around the edges.
Prepare the berry filling
-
In a separate mixing bowl, toss together the berries, cornstarch, lemon juice, and maple syrup.
-
Use a fork or potato masher to gently mash some of the berries, creating a lightly chunky texture.
-
Pour the berry mixture evenly over the warm crust.
Add crumble topping and bake
-
Sprinkle the reserved crumble mixture evenly over the top of the berry filling.
-
Return the pan to your oven and bake for additional 25-30 minutes or until edges are golden brown and filling is bubbling.
-
Allow bars cool in pan for 10-15 minutes before cutting.
Savor your gluten-free vegan berry crumble bars with your friends and family!
Substitutions and Variations
When it comes to making berry bars, there are plenty of substitutions and variations you can make to suit your individual preferences and dietary needs. Here are a few ideas to get you started:
– Gluten-free: If you’re aiming for a gluten-free option, you can substitute regular flour for oat flour or almond flour, as these options are certified gluten-free. You can also swap out the rolled oats for certified gluten-free oats.
– Vegan: For a vegan option, replace margarine with coconut oil or vegan butter. You can also use maple syrup instead of honey, and flax eggs instead of regular eggs.
– Berry blend: While this recipe uses blackberries, feel free to switch up the berries in your bar mix. Raspberries, strawberries or blueberries work wonderfully too!
– Lemon raspberry: To give your berry bars an extra zingy twist, try adding a teaspoon (or two) of lemon juice to the filling mixture when mixing with raspberries.
– No-bake bars: Looking for something quick and effortless? Try making no-bake bars using some granola, dates paste, and pecans. Simply blend these ingredients together in a food processor until they stick together nicely and press them into the bottom of the pan.
– Chocolate berry crumble: Take your berry bars up a notch by adding dark chocolate chunks to your mix before baking! Or try using chocolate chips as a topping on your baked crumble.
By switching up some of the ingredients here and there, you can create many delicious variations of this classic berry crumble bar recipe. These suggestions are just the beginning! Experiment with different nuts, sweeteners and spices for even more exciting possibilities!
Serving and Pairing
Berry Bars are a delicious snack that can be paired with a variety of different beverages. These bars are perfect for a mid-day treat or as a dessert after dinner.
Enjoy these bars with a hot cup of tea, your favorite coffee, or a tall glass of cold milk or almond milk for a wonderful contrast of temperatures. Adding whipped cream or ice cream on top will take these bars to the next level and make them an indulgent and satisfying dessert for any occasion.
For something more sophisticated, try serving these Berry Bars with some bubbly champagne or sparkling wine at a gathering of friends or family.
You might also consider pairing them with fresh berries, such as blackberries or raspberries, to create a colorful and flavorful presentation on your plate.
These crumble bars are also the perfect accompaniment to granola or yogurt-based breakfast bowls, making them an ideal breakfast or brunch option in the summertime.
No matter how you choose to enjoy them, be sure to cherish the burst of flavors from the berry filling combined with the crunchy oatmeal crust and cinnamon crumb topping!
Make-Ahead, Storing and Reheating
When it comes to making berry bars ahead of time, I’ve got you covered. These delectable treats can be made up to two days in advance and stored in the fridge or freezer for later consumption. Simply allow them to cool after baking, then wrap them tightly in plastic wrap or aluminum foil to keep them fresh longer. To reheat, pop them in the oven for 5-10 minutes until they are heated through and crispy again.
If you want to store your berry bars for longer periods, try freezing them. The bars will keep well in the freezer for up to three months. Be sure to wrap and store them properly, so they do not develop freezer burn; freezer burn can cause ice crystals to form on the surface of the bar, meaning it will not taste as fresh as it should.
To thaw frozen berry bars, remove them from the freezer and let them sit at room temperature for at least an hour or two before you plan on eating them. Alternatively, you can microwave the bars on low heat for a few seconds to defrost them quickly.
If you want your berry bars to last longer than two days in the fridge or three months in the freezer, avoid adding icing, milk or cream-based fillings, and instead stick with fruit-based toppings and jams that can withstand freezing temperatures.
Overall, these berry bars are perfect for any occasion or mealtime. Made with gluten-free flour, rolled oats, and crushed almond crust topped with fresh or frozen berries – this healthy dessert recipe is sure to be a hit at any summer outdoor gathering or family event. So why not start baking a batch right away?
Tips for Perfect Results
When baking berry bars, it’s essential to follow the recipe directions accurately to obtain the perfect texture and flavor. Here are some tips for ensuring the outstanding results:
Firstly, use old-fashioned rolled oats instead of quick oats. The former provides a better texture and structure to the crumble bars. Moreover, using certified gluten-free oats is crucial for making gluten-free vegan berry crumble bars.
Secondly, use almond flour as a substitute for all-purpose flour. Almond flour contributes to the delicious almond flavor in the oatmeal crust and is much healthier than regular flour.
Thirdly, when pressing the crust crumble onto the baking dish, ensure that it is evenly spread and tightly packed. Using your hands or a flat spatula can help achieve this goal.
Fourthly, for berry bars that are fresh and easy-to-pair with other dishes, use fresh frozen berries instead of canned ones. Fresh frozen maintains better freshness and flavor compared to canned berries.
Fifthly, when making the berry sauce for the filling, be sure not to overcook it as it can result in a lousy texture of the berry crumble bars. Instead, cook until it thickens only slightly and remains syrupy.
Sixthly, after taking out the berry bars from the oven, let them cool for ten minutes before slicing them into individual portions. This allows them to set correctly, making sure they hold their shape without crumbling apart.
Lastly, store leftover blueberry crumb bars in an airtight container at room temperature or refrigerate for up to four days or freeze them for up to three months.
By following these tips, you can create a delicious and healthy dessert recipe with ease. Perfect for summer treats or morning breakfast!
Bottom Line
As a nutritionist and food blogger, I strongly recommend trying out these delicious and healthy berry bars. Not only are they completely gluten-free and dairy-free, but they are also vegan and made with organic ingredients.
This recipe provides a perfect summer dessert that is packed with fresh fruit flavors and a tasty almond-oatmeal crust. These bars can be served as an after-dinner treat or enjoyed as a breakfast snack alongside a cup of coffee.
By making substitutions or variations, you can easily personalize the recipe to your liking. The make-ahead and storing options make it convenient for you to have these bars available at all times.
I guarantee that the combination of the fruity filling and crumbly topping will leave you feeling satisfied and fulfilled. So go ahead, indulge in this healthy dessert, and enjoy the delicious flavors of organic berries in each bite!
Berry Bars - Dairy Free Recipe
Ingredients
- 16 ounces blackberries (fresh, frozen or canned)
- 2 1/2 tablespoons cornstarch
- 1 tablespoon lemon juice
- 2 cups flour
- 2 fluid ounces rolled oats
- 1 cup brown sugar
- 1 1/4 teaspoons baking powder
- 3/4 teaspoon salt
- 1/2 teaspoon allspice
- 1 teaspoon cinnamon
- 1 cup margarine
Instructions
- Preheat oven to 400.
- Grease a 13x9x2 pan.
- Warm berries in a saucepan until the juices run.
- Reserve 1 cup of the juice, adding water if needed.
- Cook, stirring constantly until thickened.
- Stir in the blackberries and set aside.
- Combine all dry ingredients except margarine.
- Then, cut in the margarine until crumbly.
- Press 2/3 (about 4 cups) of the mixture into prepared pan.
- Bake for 15 minutes.
- Cool slightly.
- Spread blackberry sauce over this crust.
- Crumble remaining batter over this and press lightly.
- Bake for another 20-25 minutes.