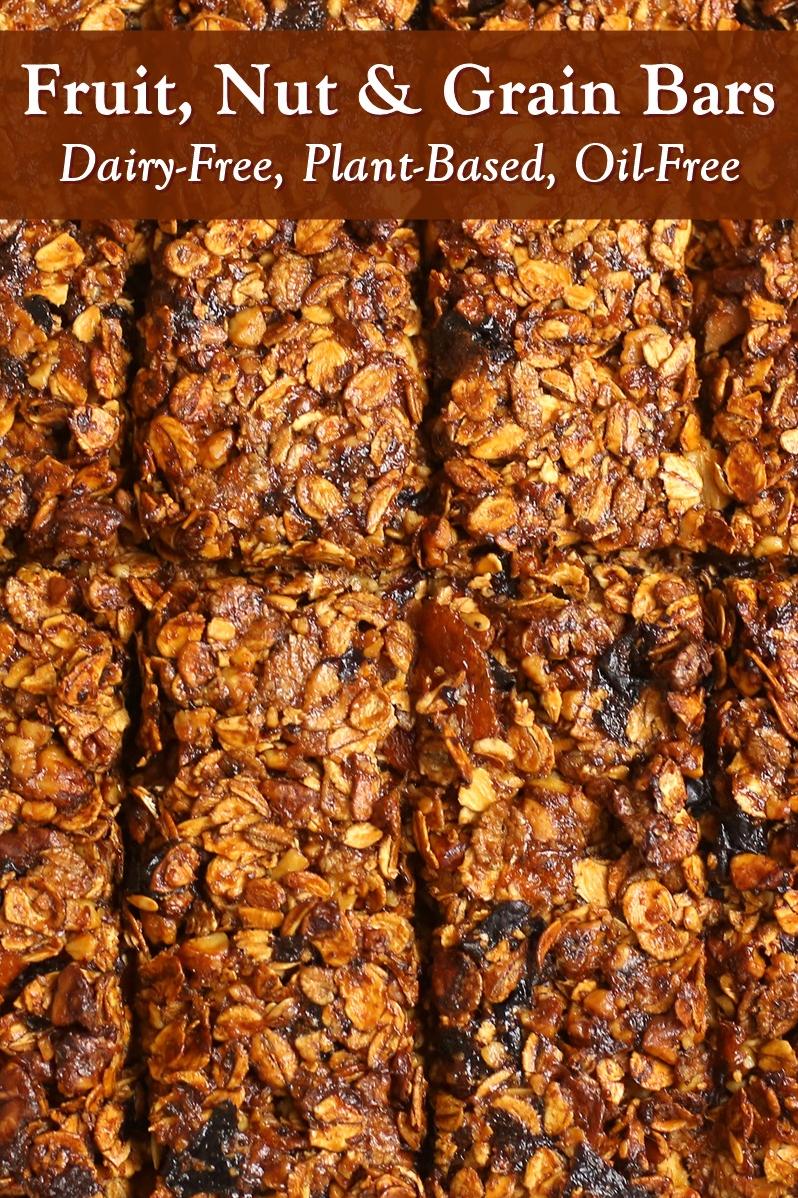
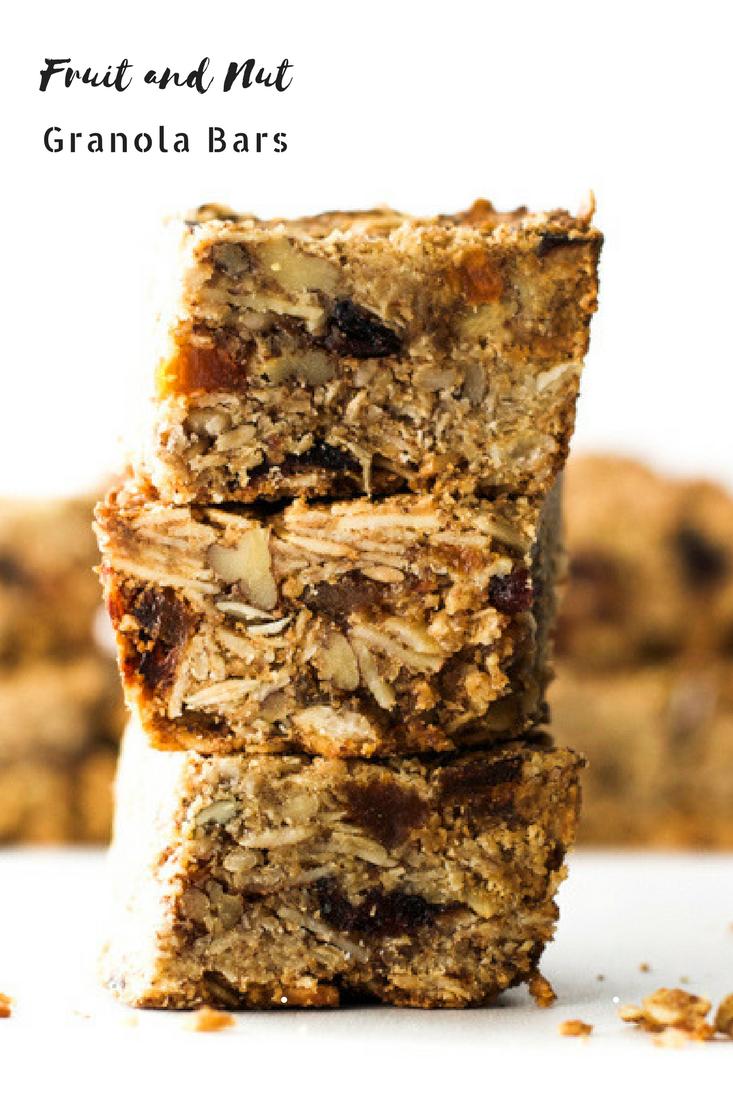
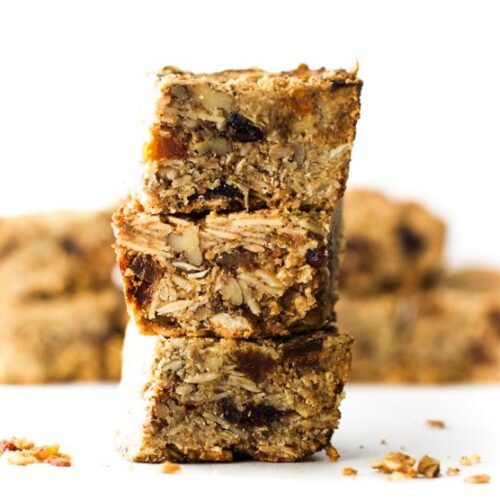
Healthy Recipes: Fruit & Nut Bars for Lunchbox Delight!
Do you struggle to find healthy, homemade snacks for your lunchbox? Do you constantly run to the store to buy pre-packaged snacks that are often loaded with sugar and preservatives? Well, I have good news for you! I’ve created a recipe that’s delicious, easy-to-make, and packed with nutrient-dense ingredients.
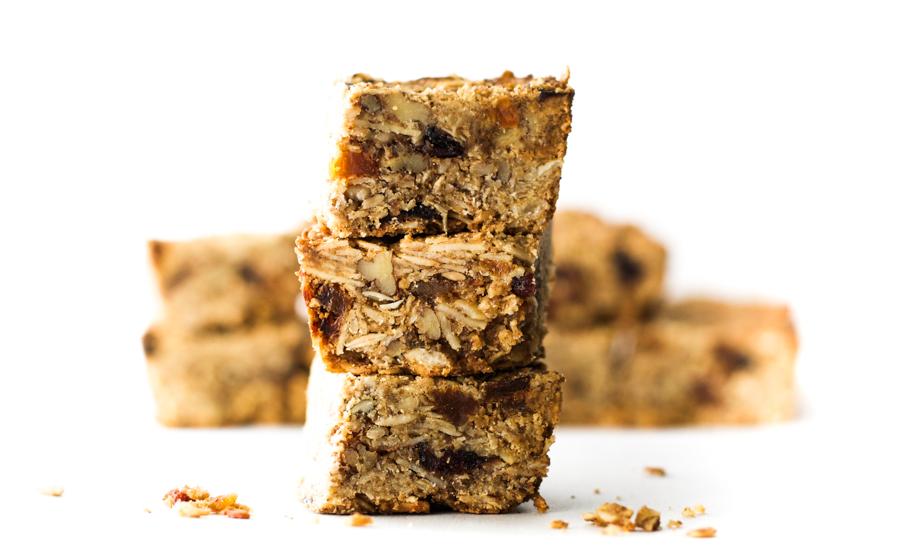
Introducing my Fruit & Nut Lunchbox Bars. This gluten-free recipe is perfect for anyone with dietary restrictions, as it’s also dairy-free and free of refined sugar. Not only are these bars healthy, but they’re also incredibly tasty, making them perfect for kids and adults alike.
With just a few basic ingredients like rolled oats, walnuts, raisins, and dried dates mixed with honey and eggs, you can create a batch of these scrumptious bars that will last you all week long. They make the perfect on-the-go breakfast, snack or dessert.
But don’t just take my word for it- give this recipe a try and see for yourself how simple and tasty homemade treats can be!
Why You’ll Love This Recipe
Are you in search of a quick snack that is not only healthy but also tasty? Then look no further than our Fruit & Nut Lunchbox Bars. These bars are packed with nutritious ingredients, making them a perfect option for breakfast or a mid-day treat.
Our gluten-free recipe uses simple ingredient swaps such as cornflour instead of traditional flour, and honey instead of sugar. Not only does this make the recipe healthier, but it also adds natural sweetness and flavor to the bars. These lunch box bars are a great way to incorporate whole grains and fiber into your diet, and they’re nutty and crunchy which makes them perfect for snack time.
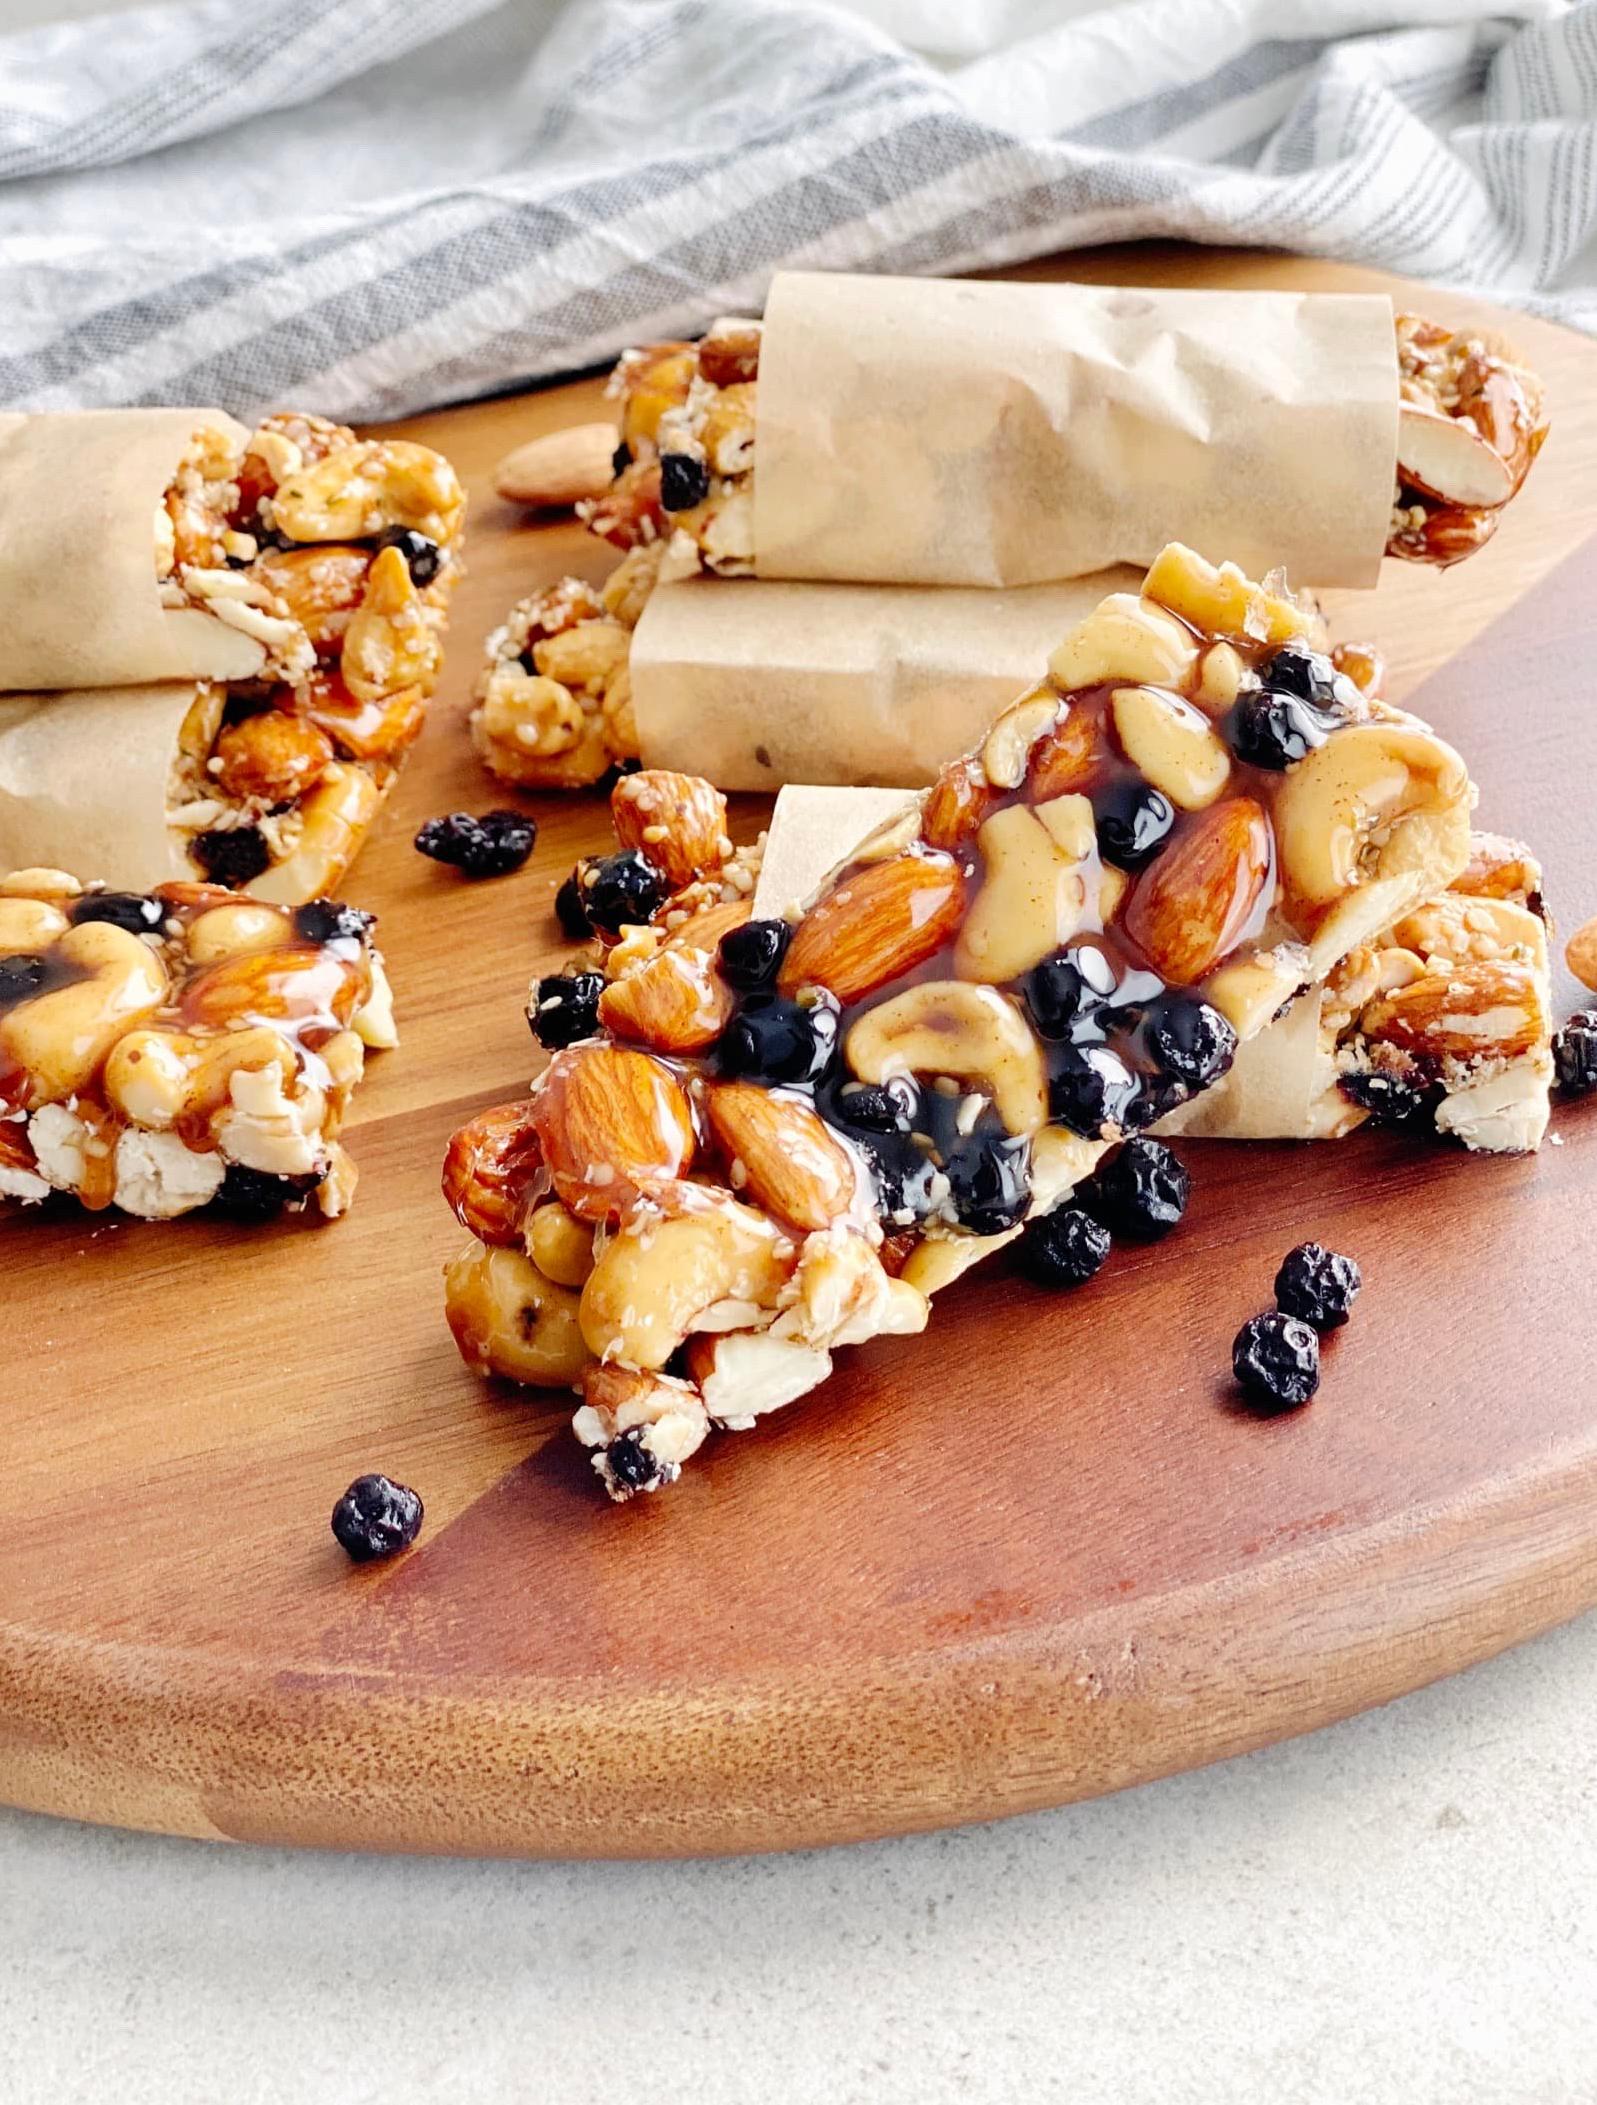
We know that food allergies can be a problem, so we’ve made sure that these bars are completely gluten-free, grain-free, dairy-free, vegan, and nut-free options are available too. They’re loaded with yummy dried fruit like raisins and dates and are perfect for anyone who loves a fruity snack with their nuts.
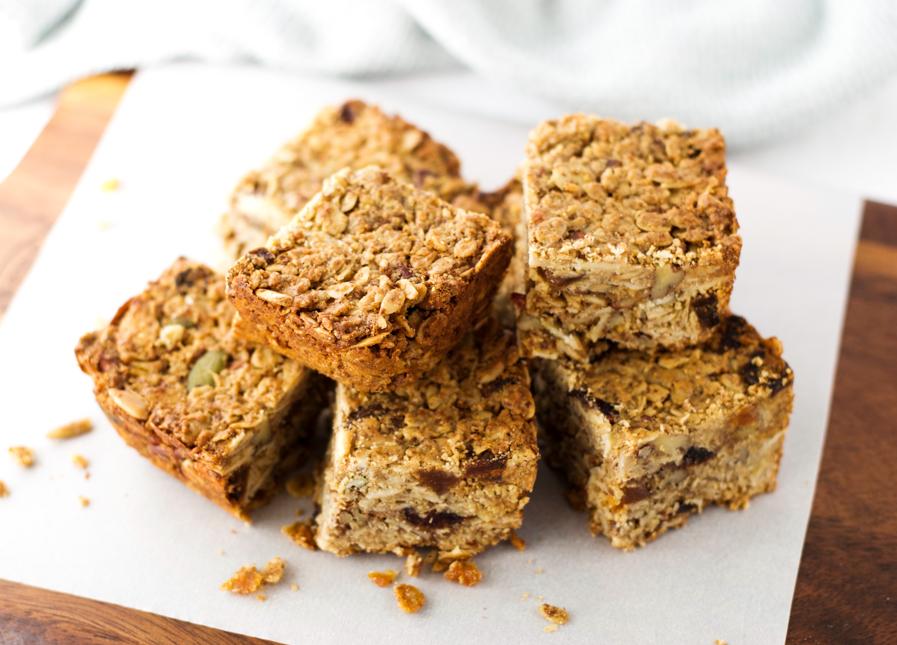
The best thing about these lunch box bars is that they’re versatile. You can swap out the dried fruits or nuts depending on your personal taste. Plus, these granola bars can be stored for up to a week making them perfect for meal prep or on-the-go snacking.
In conclusion, If you’re looking for an easy gluten-free recipe that’s delicious and will satisfy your sweet tooth without breaking the bank, then you’ll love our Fruit & Nut Lunchbox Bars. Give them a try today and take them with you to school or work—they’re sure to become a favorite!
Ingredient List
Let’s take a closer look at the ingredients that go into making these delicious fruit and nut lunchbox bars. Don’t worry, everything in this recipe is gluten-free and dairy-free, so it’s perfect for anyone with dietary restrictions or preferences.
Here’s what you’ll need:
- 1 cup of rolled oats
- 1/2 cup of cornflour
- 1/2 cup of walnuts, roughly chopped
- 1/2 cup of sunflower seeds
- 1/2 cup of raisins
- 1/2 cup of dried dates, chopped
- 1/4 cup of honey
- 2 eggs
- 1 tsp vanilla extract
You’ll find most of these ingredients in your pantry already, but if not, they can easily be found at your local grocery store. Make sure to use high-quality ingredients for best results.
The Recipe How-To
Step 1: Preheat your oven to 350°F. Line a 9 x 13 inch baking pan with parchment paper, leaving an overhang on the sides for easy lifting.
Step 2: Gather all your ingredients. Make sure everything is at room temperature.
Make the batter:
Step 3: In a large mixing bowl, whisk together 2 beaten eggs and 1 cup of honey until well combined.
Step 4: Add 2 cups of rolled oats, ½ cup of cornflour, and mix everything until fully coated with the egg-honey mixture.
Step 5: In a food processor, pulse together 1 cup of walnuts, 1/2 cup of raisins, and 10 dried dates until finely chopped but not quite ground.
Step 6: Mix the chopped nuts and dried fruit into the oat mixture until evenly distributed.
Bake and cool:
Step 7: Pour the batter into the prepared lined pan. Use a spatula to press down on the batter until even on top.
Step 8: Bake in preheated oven for about 30 minutes or until lightly browned.
Step 9: Remove from oven and allow to cool before cutting into bars.
Store and serve:
These fruit nut lunchbox bars can be stored in an airtight container at room temperature for up to a week.
This gluten-free vegan granola bar recipe is perfect for school lunch ideas, quick snack, dessert or even as a breakfast-on-the-go.**
Enjoy your homemade fruit nut granola bars!
Substitutions and Variations
If you’re looking to mix things up in your Fruit and Nut Lunchbox Bars, there are plenty of substitutions and variations to try. Whether you’re looking for a different flavor profile or need to accommodate certain dietary restrictions, we’ve got you covered.
To make these bars vegan, simply swap the honey with maple syrup or agave nectar and use a flax egg in place of the regular egg. This will also make the bars egg-free.
If you or someone you’re serving has a nut allergy, try swapping the walnuts for sunflower seeds or pumpkin seeds. You can also add some extra dried fruit, like cranberries or apricots, to compensate for the lost texture of the nuts.
For a gluten-free granola bar recipe, make sure all of your ingredients are certified gluten-free. Swap out the cornflour for almond flour or coconut flour to keep it grain-free.
If you prefer a sweeter bar, add some chocolate chips into the mix before baking. You can also omit the raisins and use more dried dates instead if you’re a fan of their caramel-like flavor.
For an extra crunchy texture, add in some rolled oats or homemade granola to the mixture before baking. These will add more depth and a satisfying crunch to each bite.
No matter how you choose to switch up this recipe, experiment with different combinations until you find your perfect blend. These Fruit and Nut Lunchbox Bars are perfect for school lunch ideas, trail mix or an allergy-friendly dessert option that everyone can enjoy.
Serving and Pairing
These fruit and nut lunchbox bars are versatile snacks that can be enjoyed at any time of the day. They make for great additions to school lunches or as a midday treat.
Pair them with a cold glass of almond milk or a cup of warm herbal tea for the perfect afternoon pick-me-up. The bars have a unique nutty and fruity flavor that perfectly compliments the subtle sweetness of the honey.
Another great way to enjoy these bars is by crumbling them over a bowl of Greek yogurt or chia pudding, adding an extra crunch and texture to your breakfast or dessert. Alternatively, you can use them as a topping for your oatmeal, smoothie bowls, or salad bowls for an added boost of nutrients.
These fruit and nut bars are also great to take along on hikes and outdoor adventures as they provide nourishing energy throughout the day. They can be paired with other snacks, such as trail mix, fresh fruits, or veggies for a well-rounded snack pack.
Whether you’re searching for an easy gluten-free snack or just looking for new school lunch ideas, these fruit and nut lunchbox bars are sure to satisfy your cravings. They are perfect for anyone with allergies as it is free from gluten, dairy, and refined sugars while being rich in essential nutrients like healthy fats and protein.
Make-Ahead, Storing and Reheating
One of the best things about these Fruit & Nut Lunchbox Bars is that you can make them ahead of time and store them for quick grab-and-go snacks or breakfasts during a busy week. Once baked, let them cool to room temperature before slicing them into bars or squares.
If you plan to use them within a few days, store the bars in an airtight container on your kitchen countertop or in your pantry. For longer storage, wrap individual bars in plastic wrap and store them in an airtight container or ziplock bag in the refrigerator for up to one week.
When you’re ready to eat them, simply take one out of the refrigerator and let it come to room temperature for about 10-15 minutes before enjoying. If you prefer to eat them warm, take them out of the refrigerator and warm them briefly in the microwave or oven.
If you’ve made a batch for school lunches or snack boxes, store the bars in an insulated lunchbox or cooler with ice packs to keep them fresh until it’s time to enjoy. They make great on-the-go snacks and are perfect for satisfying that mid-afternoon hunger while keeping kids fueled throughout the day.
Overall, these Fruit & Nut Lunchbox Bars are easy to make, customize according to personal preferences, and can be stored and reheated with ease. Make a batch today and enjoy healthy, gluten-free snacks that require minimal effort but deliver maximum taste and nutrition!
Tips for Perfect Results

When it comes to making granola bars, there are a few key tips that can make all the difference in getting perfect results. Whether you’re new to gluten-free baking or a seasoned pro, these tips will help ensure that your fruit and nut lunchbox bars come out just right every time.
First and foremost, be sure to measure your ingredients accurately. This is especially important when working with gluten-free flours like cornflour, which can be more temperamental than traditional wheat flour. Use measuring cups and spoons rather than eyeballing amounts, and level off ingredients with the flat edge of a knife to get precise measurements.
When mixing your ingredients together, take care not to over-stir the batter. Gluten-free recipes are often more delicate than their gluten-containing counterparts and can become tough if overworked. Mix until just combined, then stop stirring.
To further prevent your bars from being too tough or crumbly, be sure not to overbake them. Keep an eye on the oven and remove the bars as soon as they turn lightly golden brown around the edges. This will ensure that they stay moist and chewy.
If you’re having trouble getting your bars to stick together, try pressing them down more firmly into the pan before baking. You can also add an extra egg or a tablespoon of honey to help bind everything together.
And finally, don’t be afraid to experiment with different combinations of fruits, nuts, and seeds. This recipe is highly customizable and can be adapted to suit your preferences or dietary restrictions. Swap in your favorite dried fruits or nuts for a personalized twist on this classic snack.
Bottom Line
In conclusion, these Fruit & Nut Lunchbox Bars are not only delicious but also packed with healthy ingredients. They are perfect for breakfast, lunch or snack time, and make an excellent alternative to store-bought granola bars. By using gluten-free and dairy-free ingredients, this recipe caters to a wide variety of dietary restrictions, making it a perfect choice for your family and friends.
You will love the combination of fruits, nuts, and seeds in this recipe. The sweetness from the honey and dried fruits makes these bars irresistible, while the protein from the nuts gives them staying power throughout the day. With easy-to-find ingredients and simple instructions, this recipe is perfect for novice bakers or busy professionals alike.
These bars are versatile too! You can substitute different kinds of dried fruit and nuts according to your preferences or make a larger batch for meal prep. They can be stored in an airtight container for up to one week or in the freezer for longer periods, making them a convenient treat to grab on-the-go.
In summary, these Fruit & Nut Lunchbox Bars are not only healthy but also taste great! With various substitutions and variations available, they cater to different dietary needs and preferences. By using this recipe regularly, you can save money on store-bought granola bars while still maintaining the nutritional value of your snacks. Try it out today!
Fruit & Nut Lunchbox Bars- Gluten Free Recipe
Ingredients
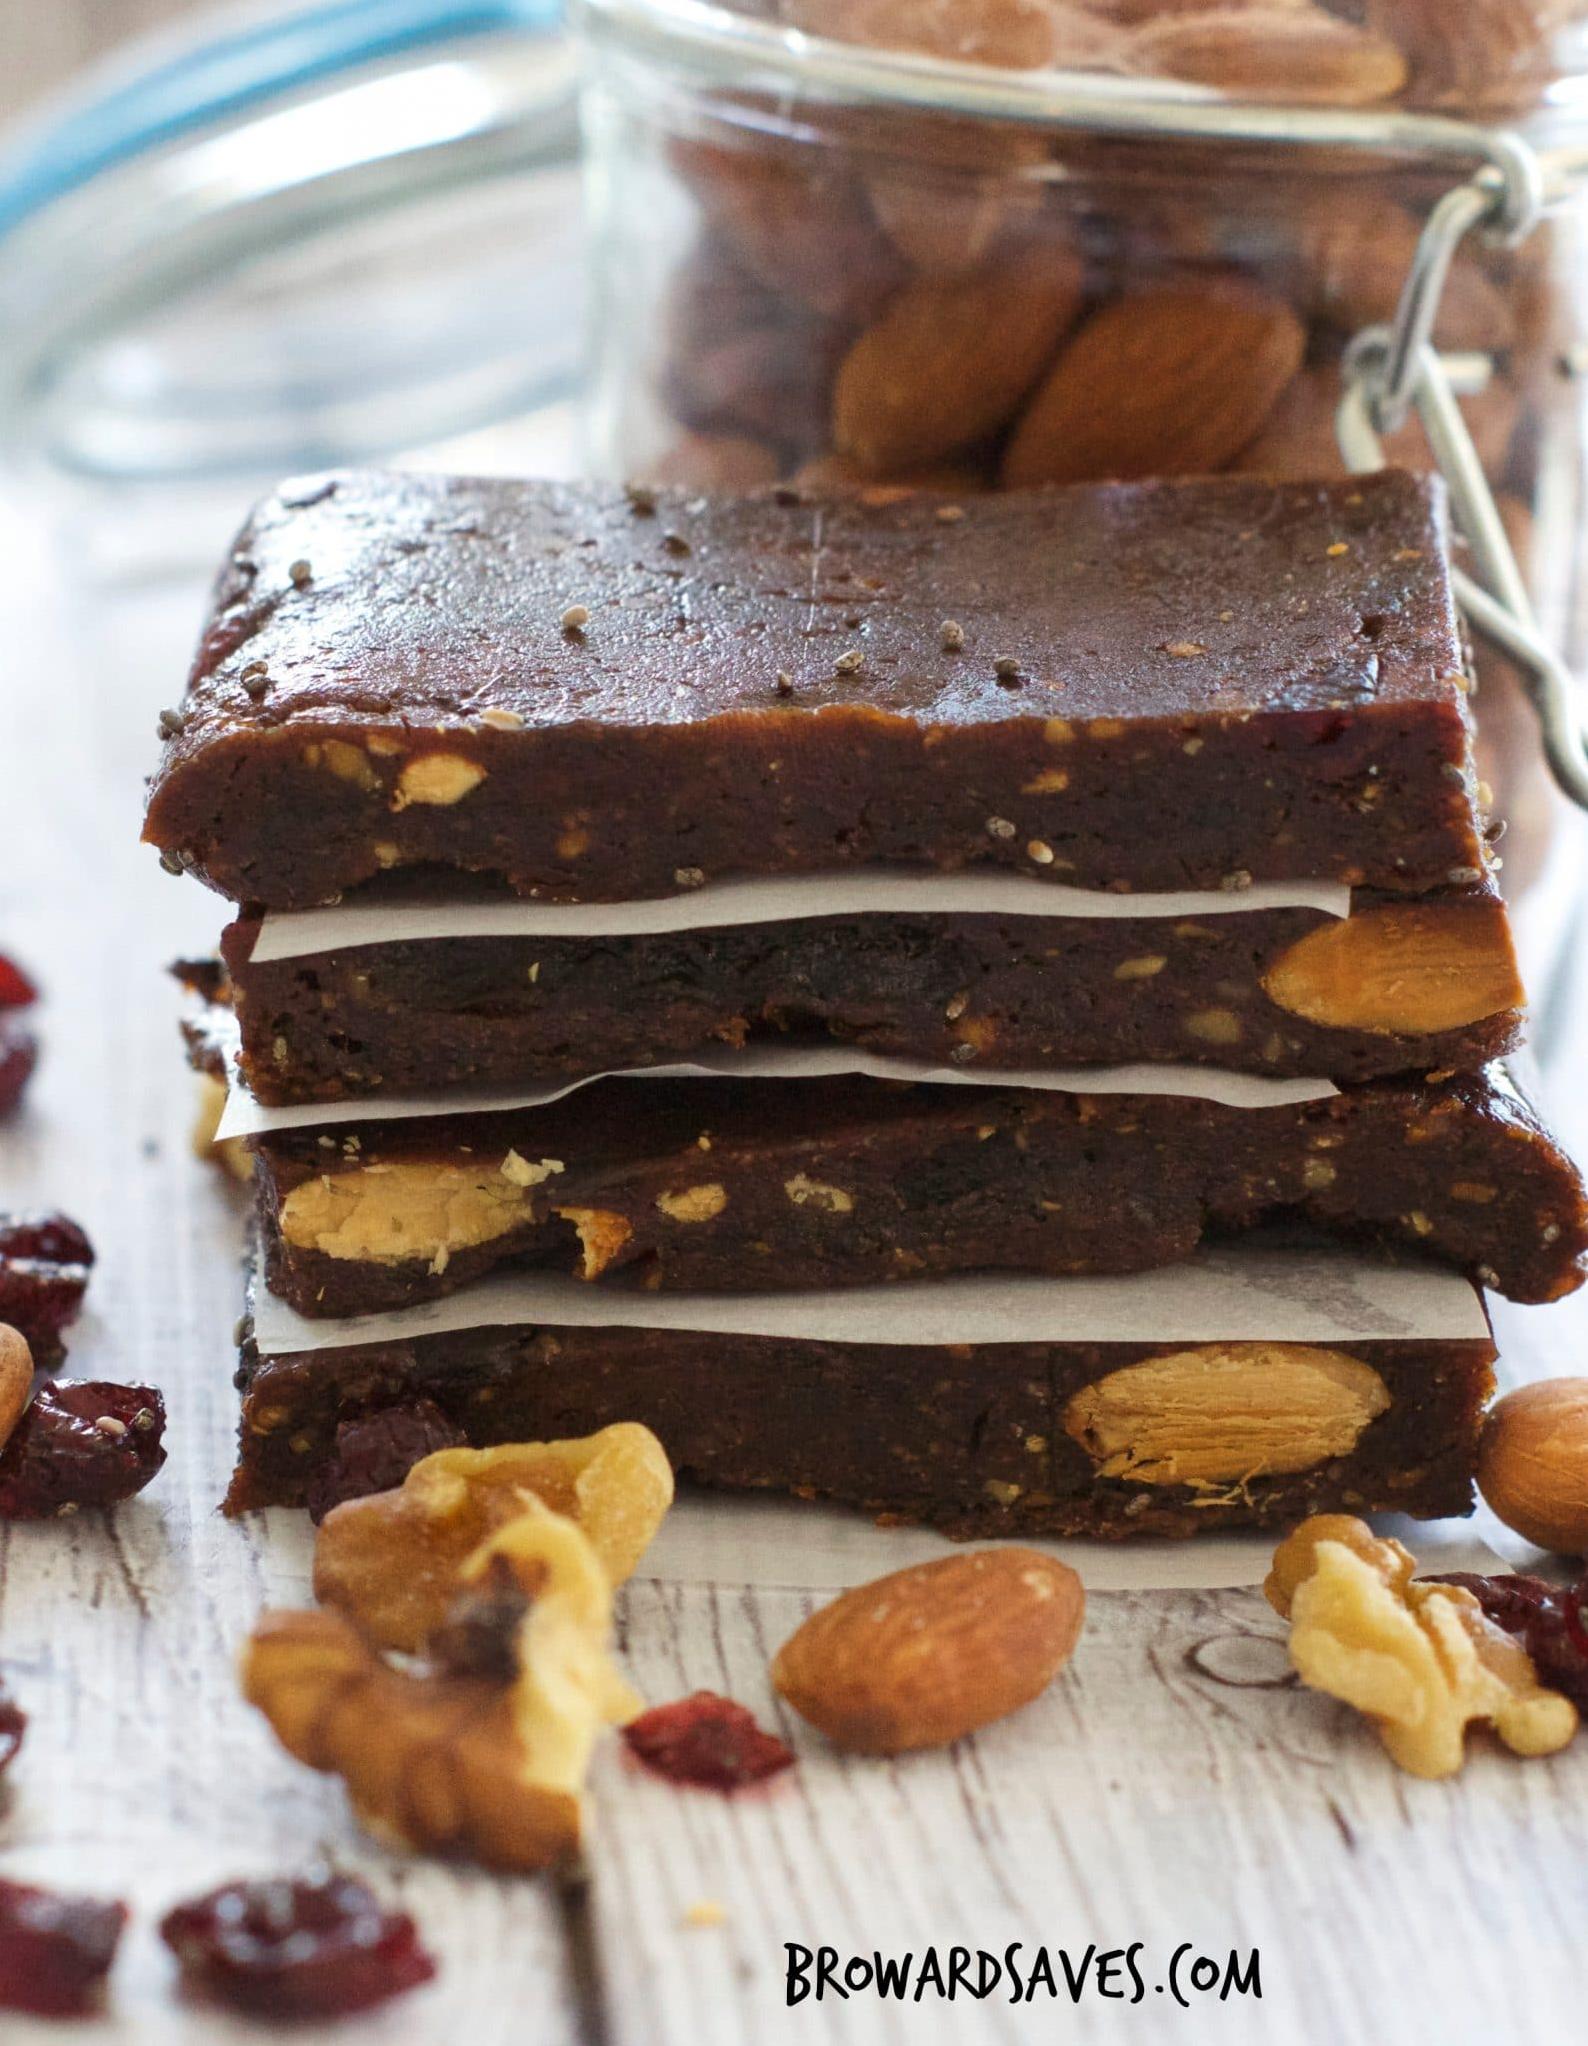
- 120 g dried dates, sliced
- 60 g dried apricots, sliced
- 60 g raisins
- 60 g whole almonds
- 70 g rice flour
- 40 g maize cornflour (US-cornstarch)
- 2 eggs, beaten
- 3 tablespoons honey
Instructions
- Preheat oven to 180°C Grease and line a 20cm x 10cm (8 inch x 4 inch) baking tin with paper.
- Melt the honey (or heat in the microwave) until it is runny.
- In a mixing bowl mix the dried fruits, flours and almonds together.Add the heated honey and the beaten eggs. Mix well.
- Press the mixture into the baking tin and flatten it down with the back of a spoon. The mixture is very thick so you will need to spread it out evenly.
- Bake 15-20 minutes or until golden in colour.
- While the slice is still hot brush with a little marmalade or some extra honey to glaze.
- Slice while still warm and leave to cool before storing in an airtight container in the refrigerator.