Easy Gluten-Free Nut Crust Recipe: Perfect for Any Occasion
Welcome, my fellow foodies, to a gluten-free haven of nutty deliciousness! Today’s recipe is a game-changer for all pie lovers out there who are not afraid to explore new flavors and textures. I am proud to introduce to you the Gluten Free Nut Crust Recipe that will revolutionize your approach to baking pies forever.
As someone who has followed a gluten-free lifestyle for a while, I know the struggles of finding the perfect combination of flour blends that mimic the elasticity and texture that come with wheat. But worry no more. This crust recipe is naturally gluten-free, and you won’t miss the grain-based flours for one second.
In this recipe, we use pecans, walnuts, almond flour, and a touch of dark brown sugar to create an aromatic crust that adds a depth of flavor beyond your wildest dreams. Not only are these nuts packed with nutrients like protein and healthy fats, but they also give you that unforgettable crunch that contrasts beautifully with any filling you choose.
Whether it’s a classic pumpkin pie or a creative butternut squash tart or even a creamy cheesecake base, this nut crust will take your dessert game to the next level. You can even use it as a base for no-bake treats or vegan options by substituting butter with coconut oil.
So get ready to take on this recipe and dive into the world of gluten-free pie crusts with confidence. Your taste buds will thank you later!
Why You’ll Love This Recipe
Are you tired of bland and boring gluten-free pie crusts that fall apart easily? Do you want to indulge in a delicious slice of pecan or walnut pie without worrying about gluten or dairy? Look no further than this gluten-free nut crust recipe!
Not only is this crust made with naturally gluten-free ingredients like almond meal and coconut flour, but it also contains no dairy for those who are lactose intolerant. The combination of pecans or walnuts, unsalted butter, dark brown sugar, and sea salt creates a perfectly balanced flavor profile that will complement any filling you choose to pair it with.
But the best part about this recipe is its versatility. Use it as a base for traditional pies like pecan or apple, or get creative with tarts or cheesecake bases! The possibilities are endless.
Plus, you’ll love the ease and simplicity of making this crust. With just six ingredients and a food processor, you can have a perfectly baked pie crust in no time. No need to worry about rolling out dough or fussing with tricky measurements.
So why settle for a subpar gluten-free crust when you can make this easily adaptable, naturally gluten-free nut crust recipe? Trust me, your taste buds will thank you.
Ingredient List
Let’s take a look at the ingredients you’ll need to make this gluten-free nut crust recipe:
- 1 1/2 cups of pecans, chopped into small pieces
- 1/2 cup of almond flour
- 1/4 cup of coconut flour
- 4 tablespoons of unsalted butter, melted
- 1/4 cup of dark brown sugar
- 1/2 teaspoon of sea salt
- 1/4 teaspoon of ground cinnamon
All the ingredients used in this recipe are naturally gluten-free, making it a perfect choice for individuals who follow a gluten-free diet. The combination of pecans and almond flour brings a delicate nutty flavor with a crispy texture to the crust. The combination of coconut flour and butter adds richness and decadence to this delicious dessert. Don’t forget to choose unsalted butter, as we’ll be adding salt to the crust mixture.
The Recipe How-To
Now, it’s time to dive into the nuts and bolts of making this incredible Gluten-Free Nut Crust recipe. Here you will find an easy to follow, step-by-step guide to achieving the perfect nut crust for all your gluten-free desserts.
Ingredients:
- 1 1/2 cups finely ground pecans
- 1/2 cup almond meal or almond flour
- 4 tablespoons unsalted butter, melted
- 1/4 cup dark brown sugar
- 1/4 teaspoon salt
Directions:
- Preheat your oven to 350°F.
- In a medium bowl, mix together the ground pecans and almond flour.
- Whisk in the melted butter, brown sugar, and salt until everything is well incorporated.
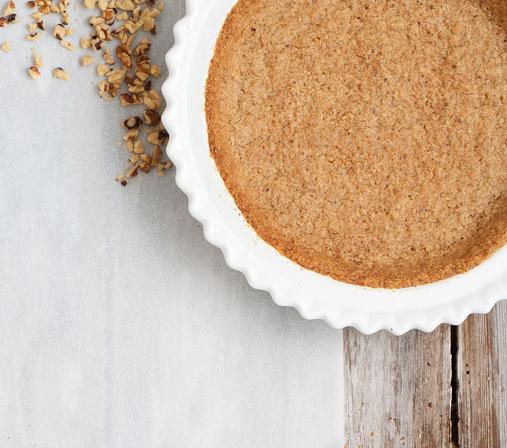
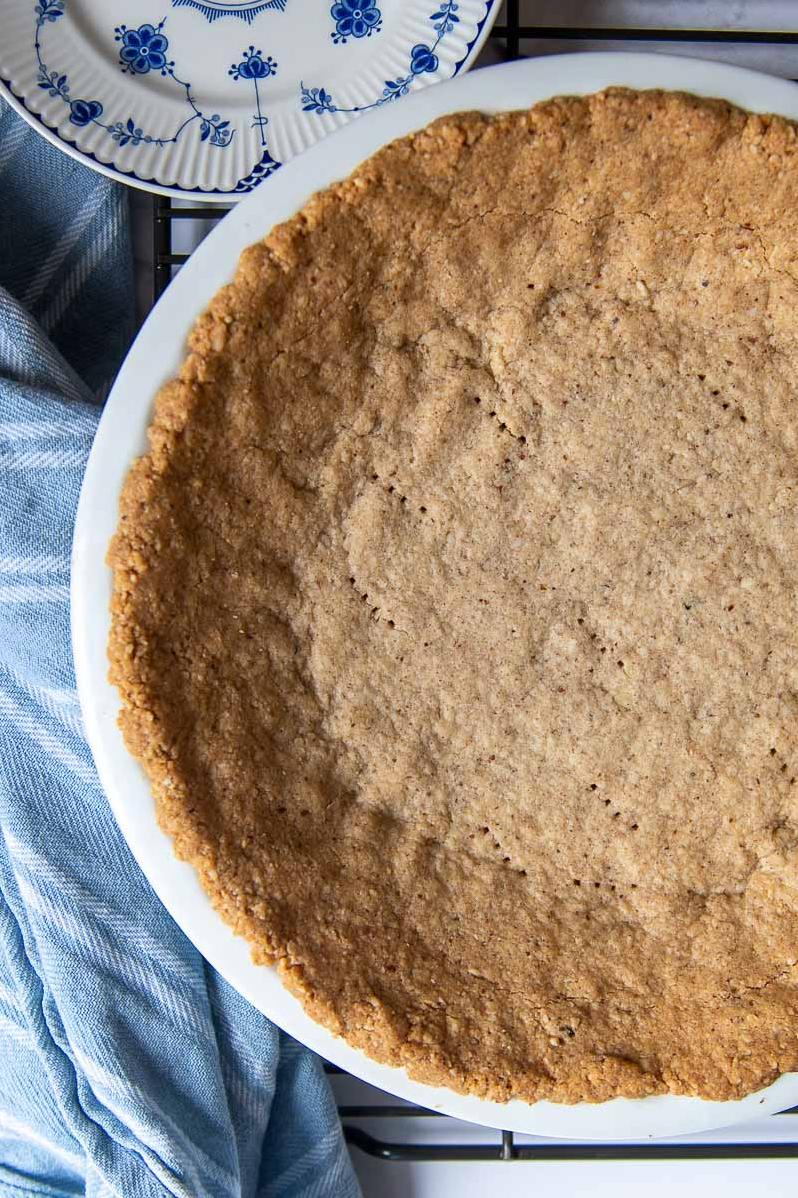
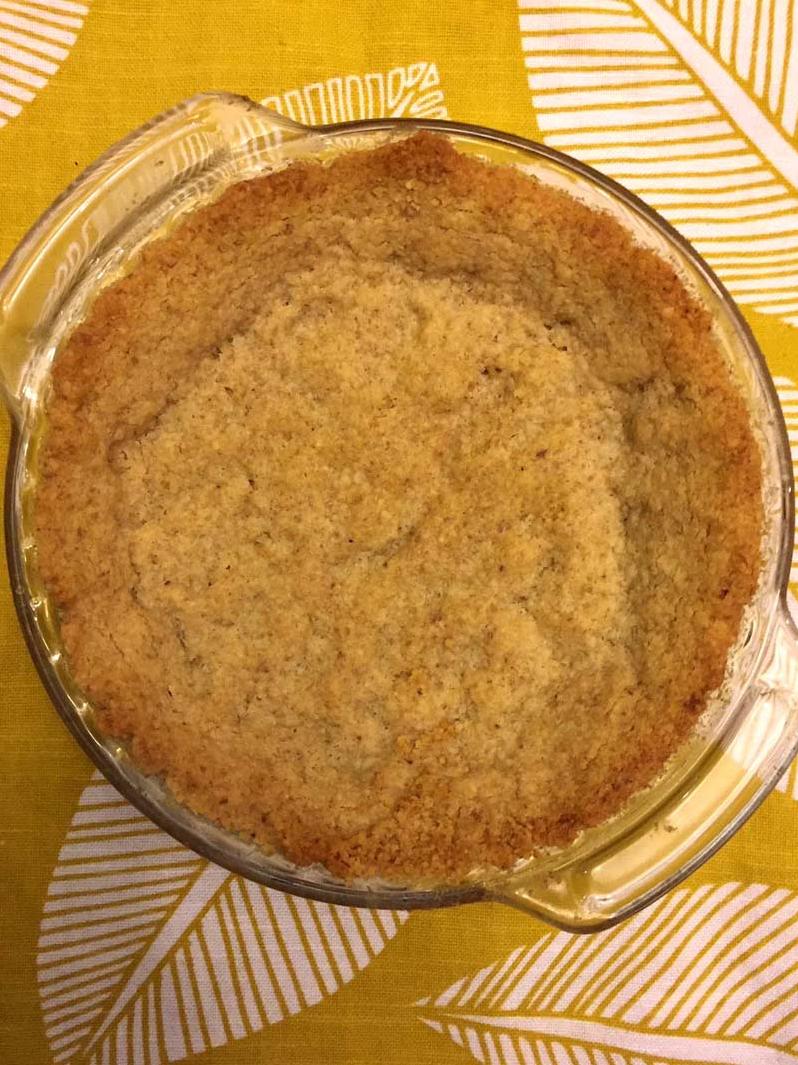
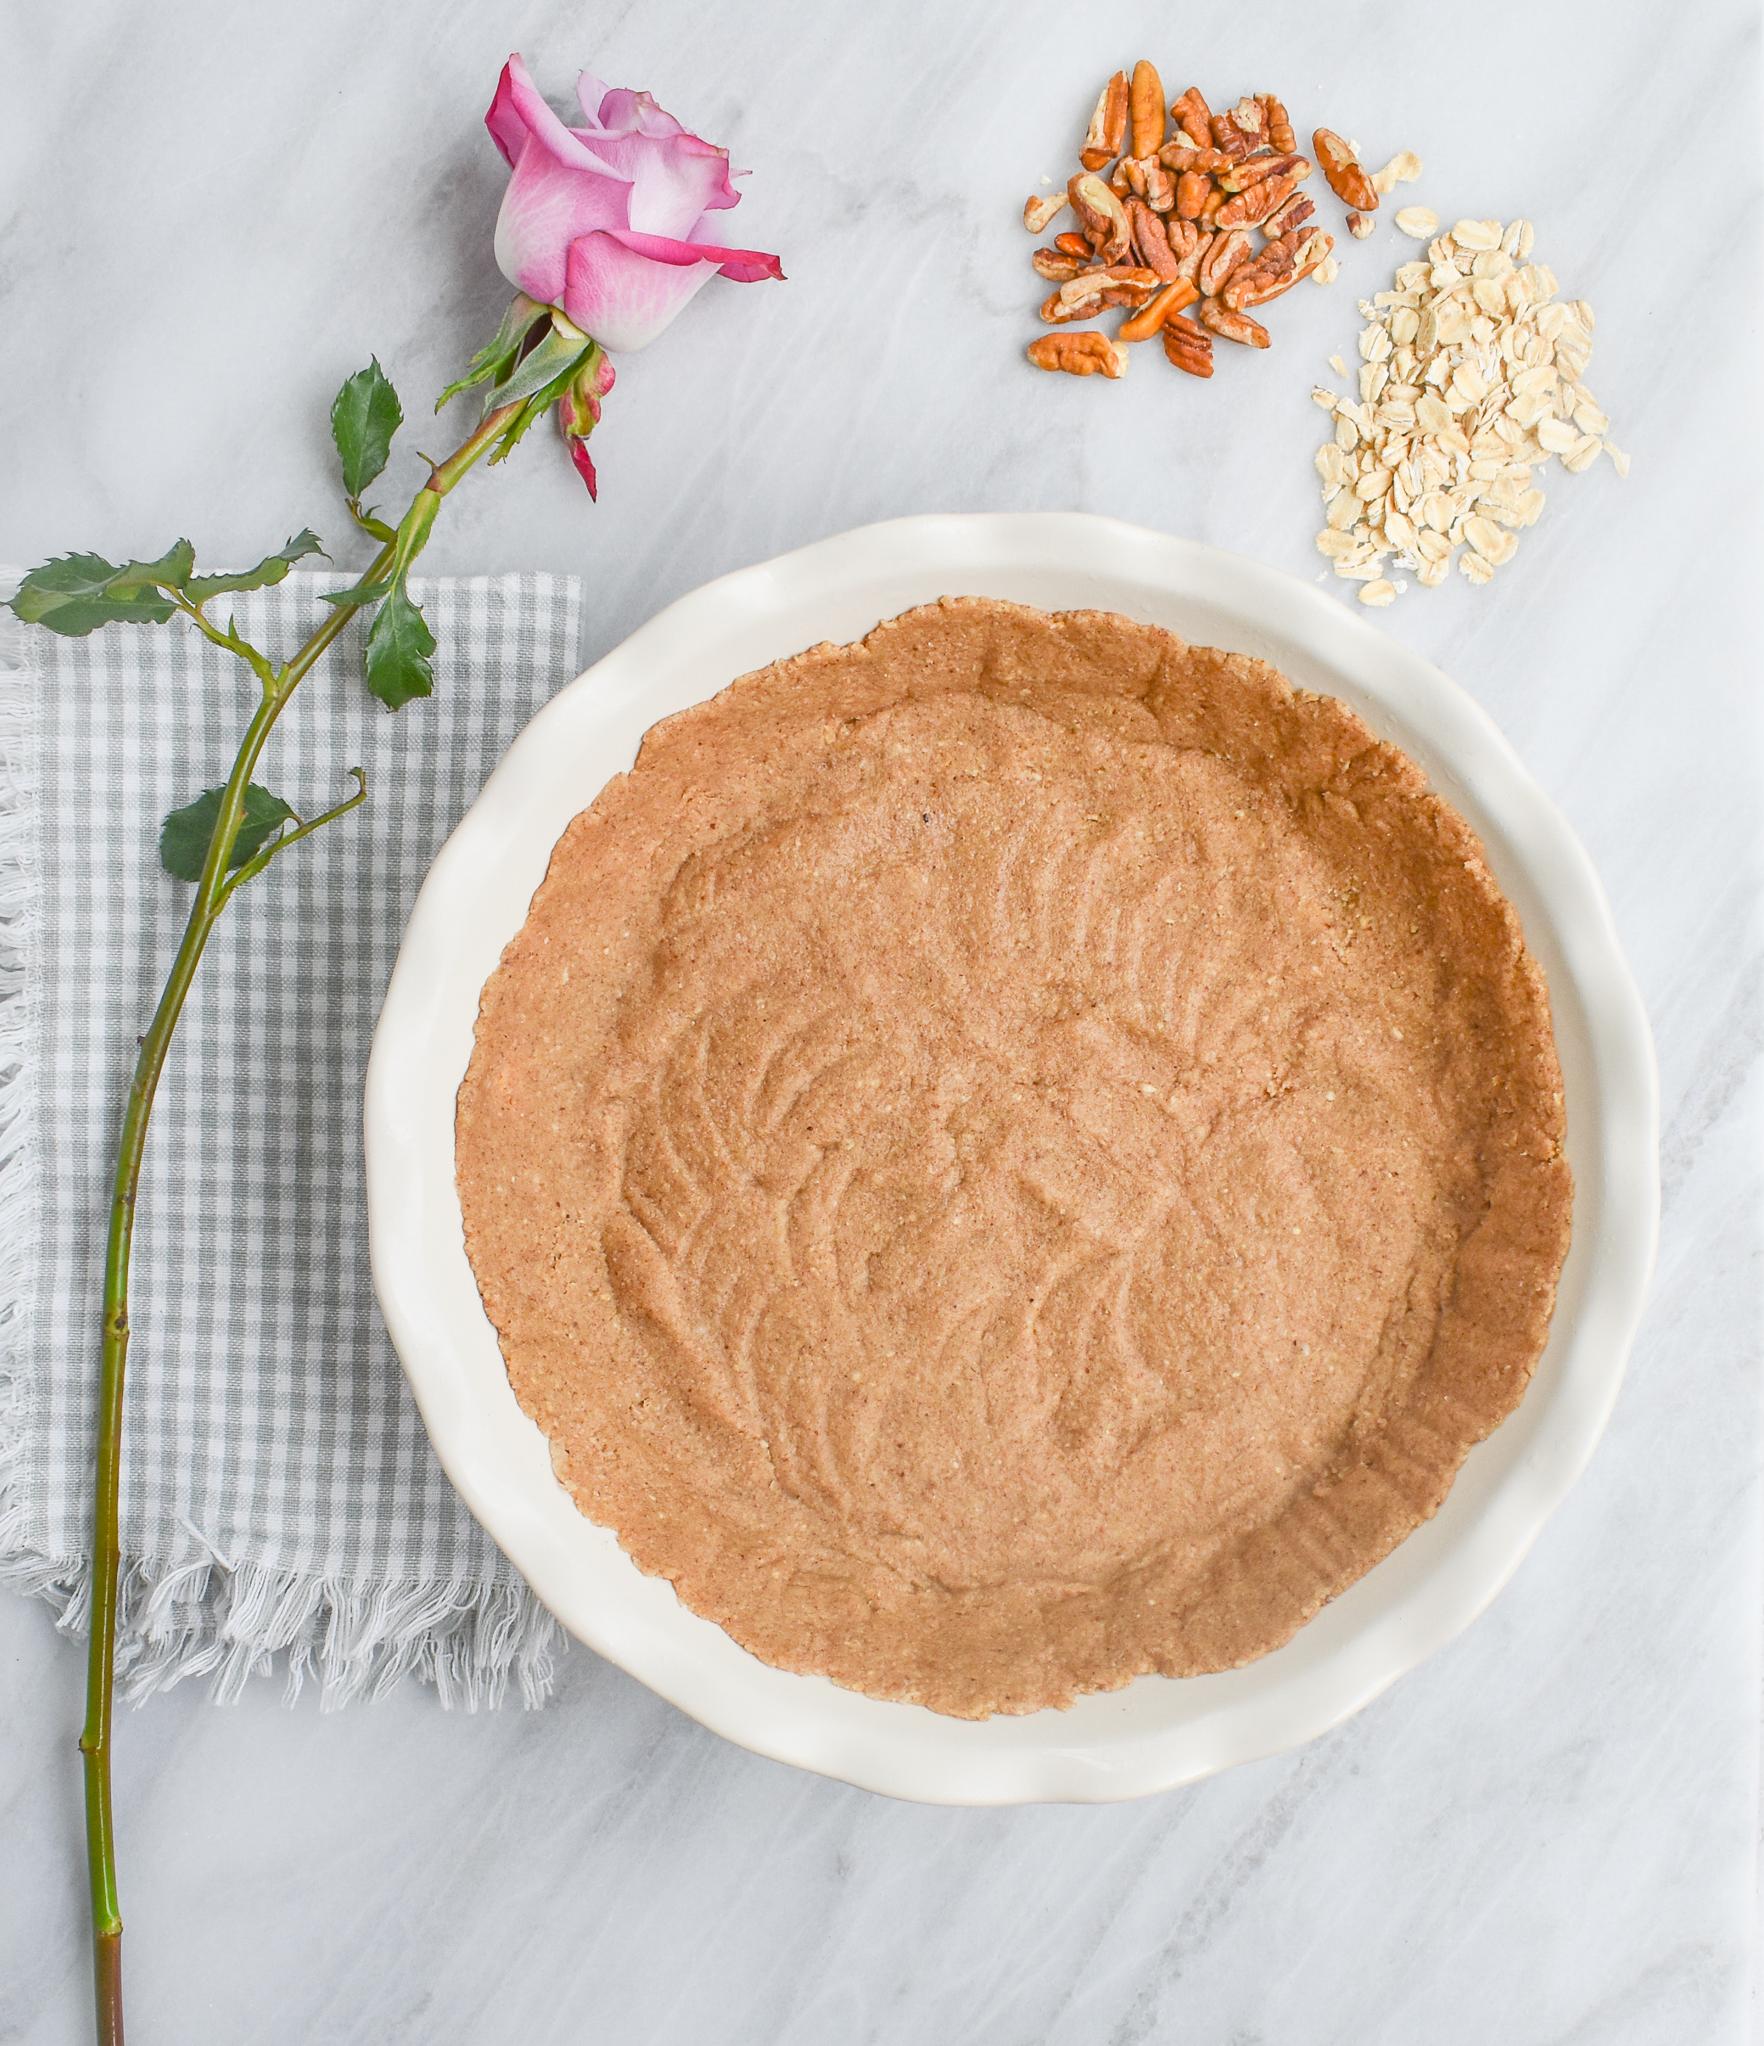
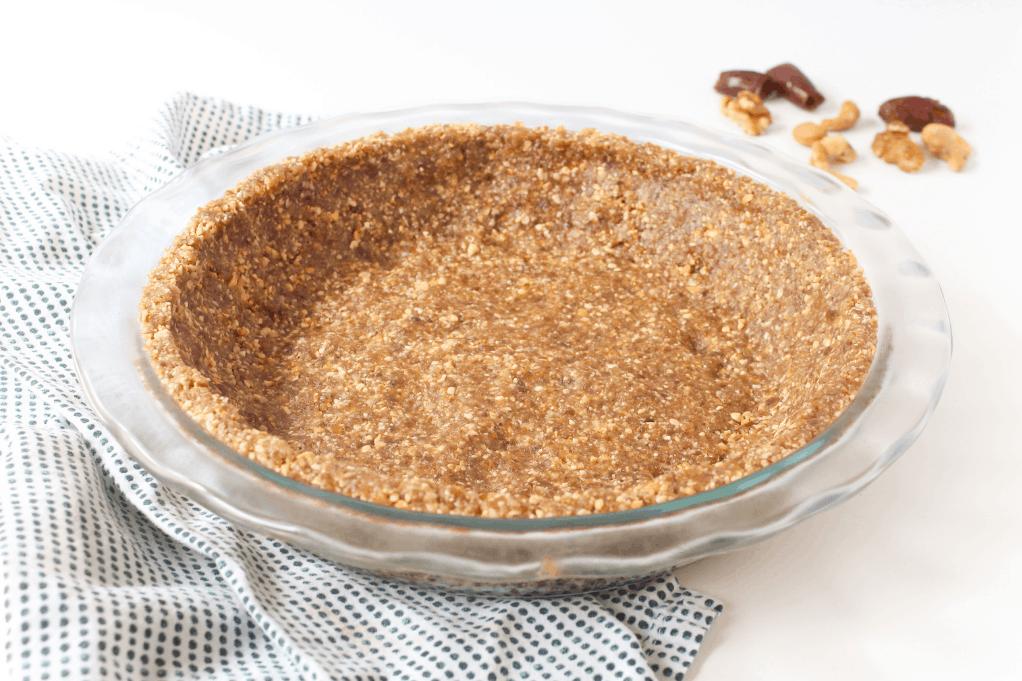
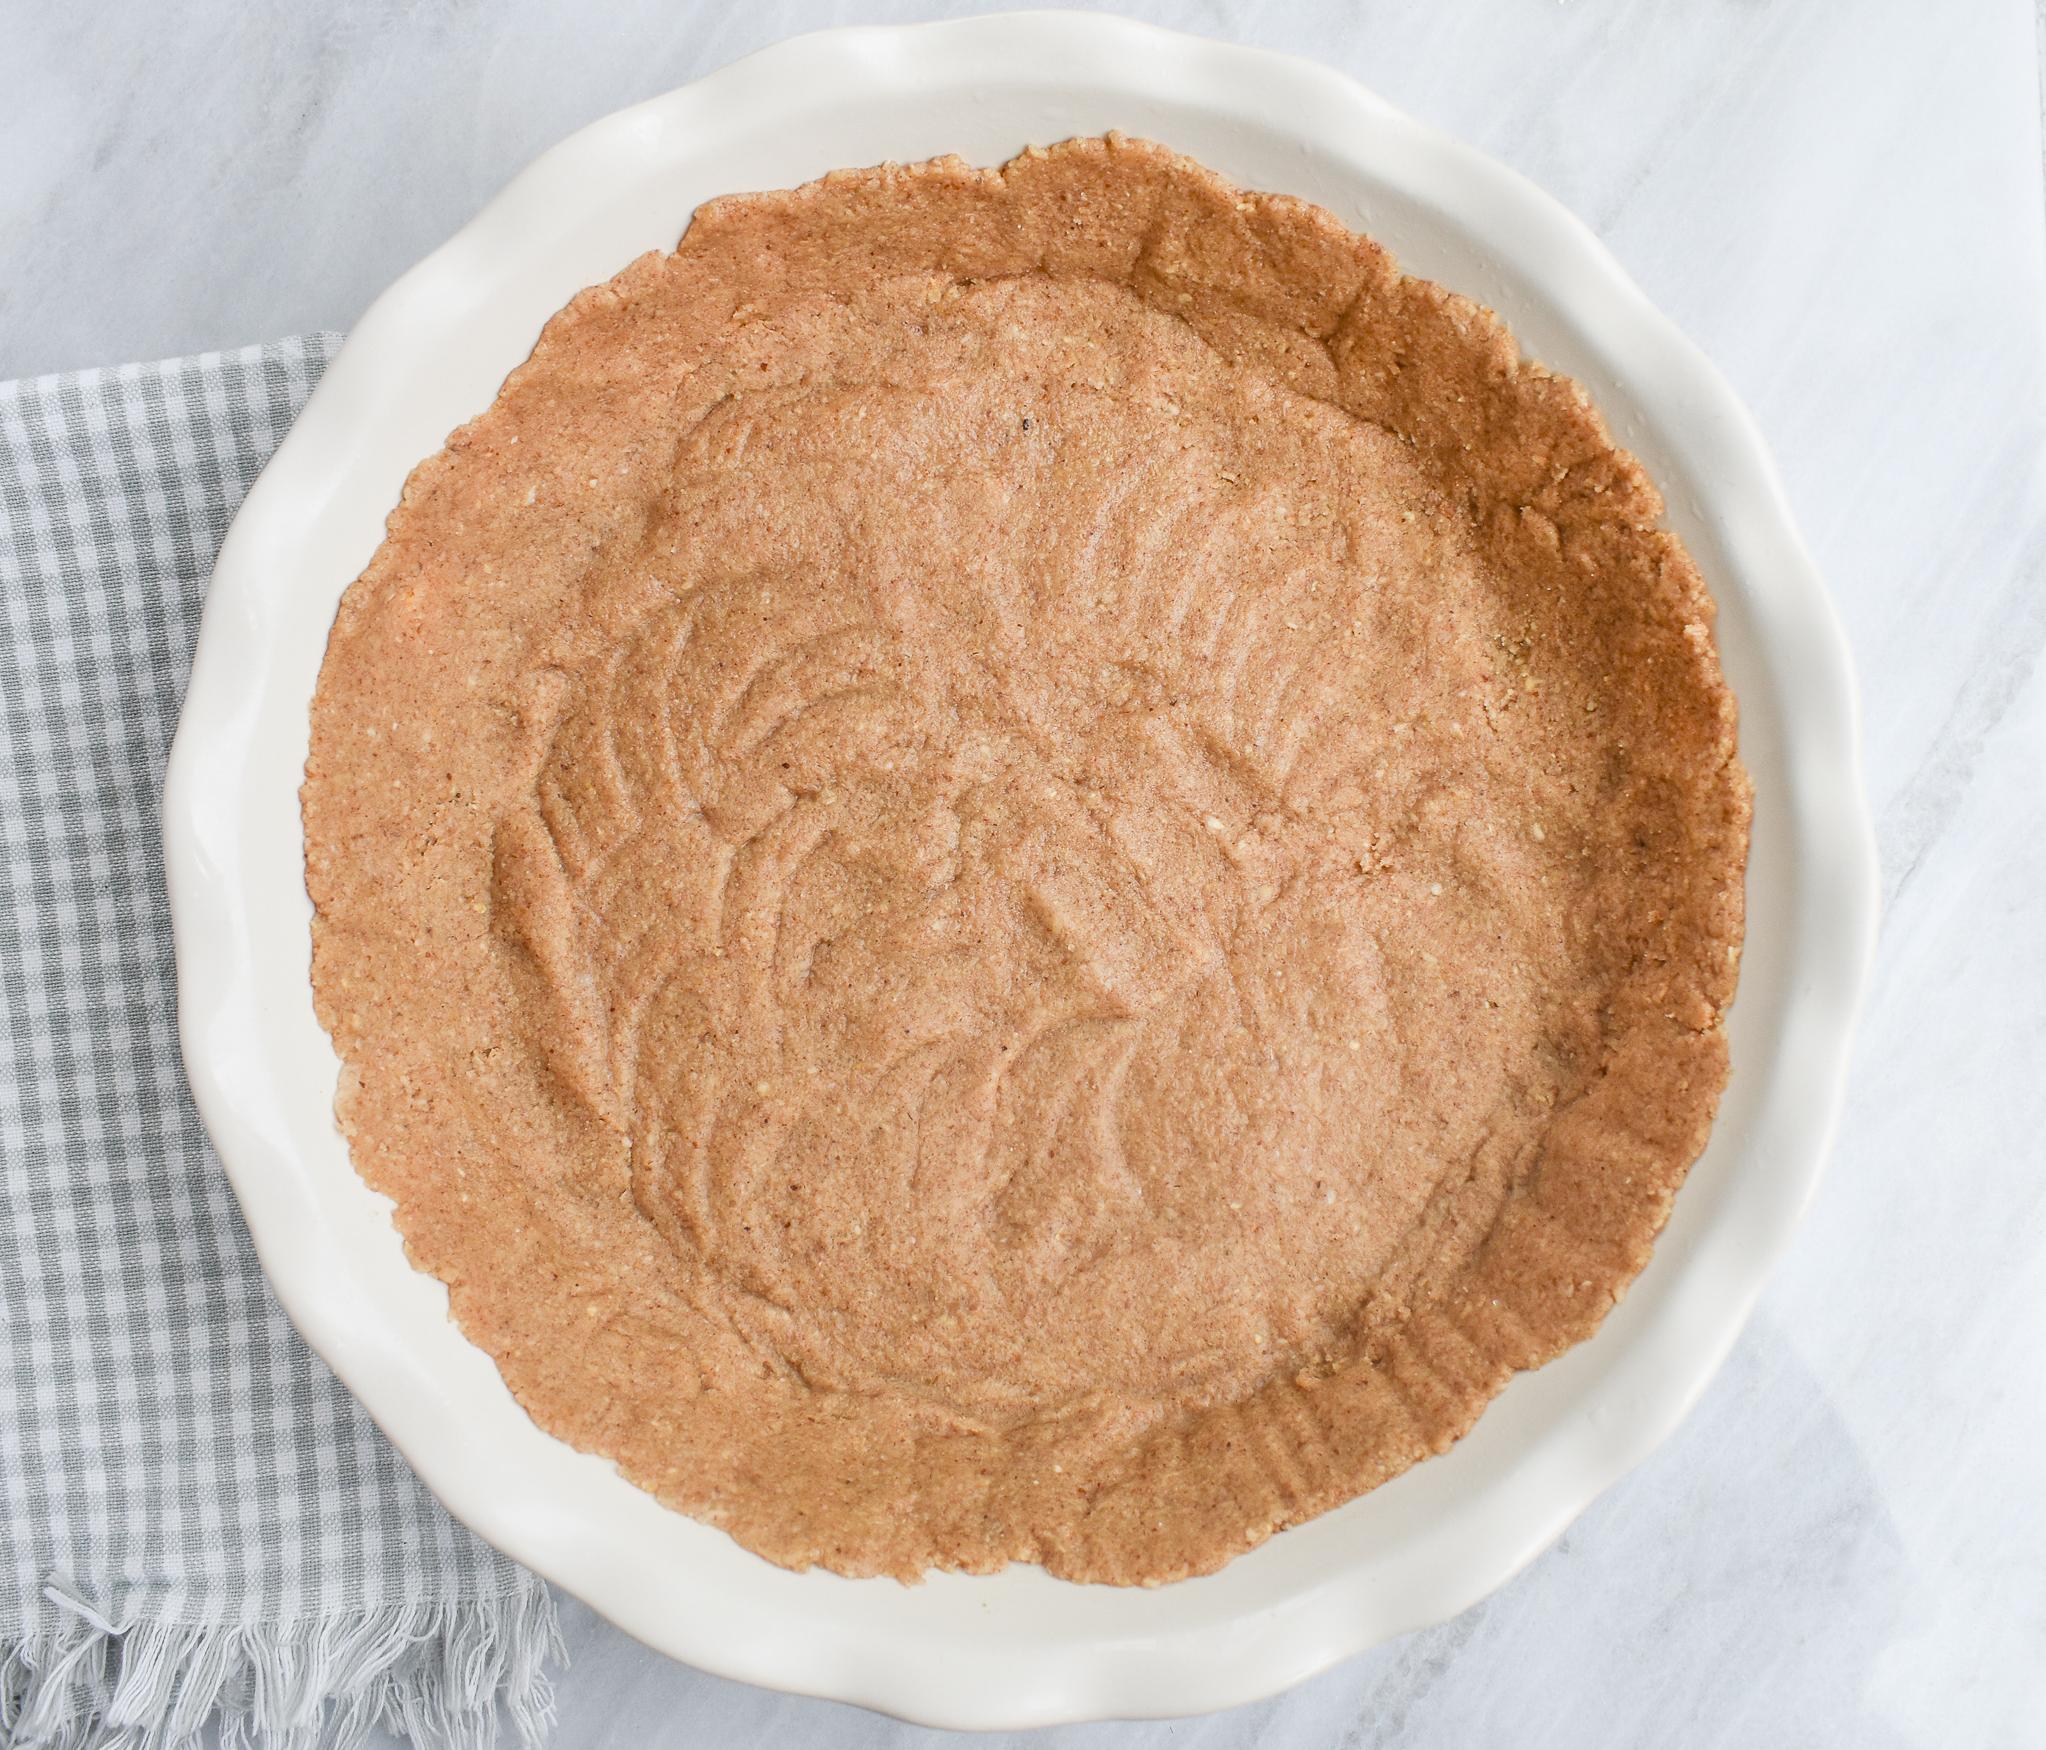
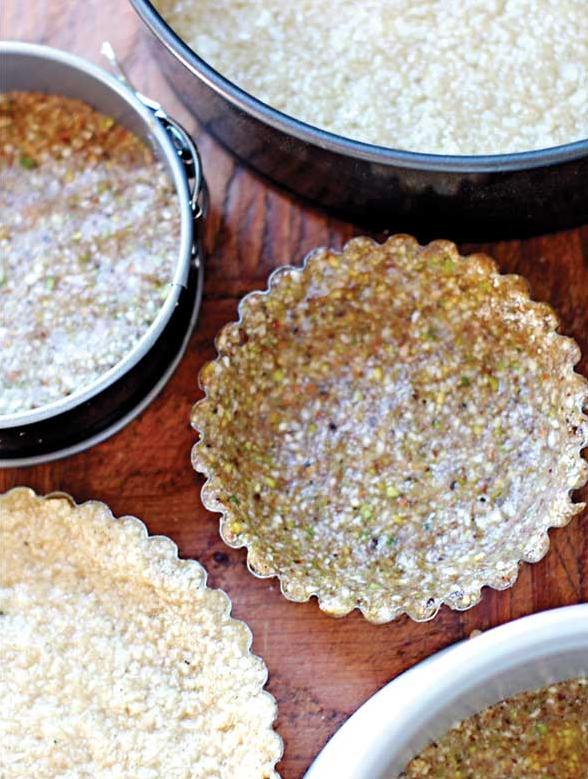
- Press the mixture firmly into the bottom and up the sides of a 9-inch pie dish, making sure that it is evenly distributed and well-packed.
- Bake for about 10 minutes, or until the crust turns slightly golden brown.
- Remove from oven and let cool completely before filling with your favorite pie ingredients.
That’s it! This delicious crust can be used for any type of pie or tart you desire, like pumpkin cheesecake or butternut squash tart.
But before you get started on making your nut crust, there are a few tips I’d like to share with you to ensure perfect results every time.
Substitutions and Variations
Are you looking to mix things up and make this gluten-free nut crust recipe your own? There are plenty of substitutions and variations that can be made to create a unique flavor profile or adjust the recipe to meet dietary needs.
For starters, you can substitute a variety of nuts for the pecans. Walnuts or almonds both work well and can provide a different taste and texture to your pie crust. If you’re feeling adventurous, try using hazelnuts or pistachios for a more complex nutty flavor.
If you’re looking to make this recipe dairy-free, substitute the unsalted butter for coconut oil or another vegan butter alternative. You can also use a non-dairy milk in place of regular milk if needed.
To make this recipe keto-friendly, substitute the brown sugar with a sugar-free alternative such as erythritol or stevia. Additionally, you could add in some cinnamon or pumpkin spice to create a tasty crust that pairs perfectly with pumpkin cheesecake.
If you want to make this recipe even healthier, consider swapping out the almond flour for oat flour. Oat flour is gluten-free and higher in protein than regular wheat flour.
Finally, if you’re looking for a no-bake option, try using this crust as the base for a tart instead of pie. Simply press the mixture into a tart pan and chill before filling with your favorite no-bake cheesecake base, fruit compote or chocolate mousse.
With all these options at your disposal, there’s no reason why you can’t make this gluten-free nut crust recipe perfect for your specific dietary needs or personal preferences.
Serving and Pairing
Once your gluten-free nut crust is ready, it’s time to fill it with your favorite filling. This crust is incredibly versatile, and you can pair it with multiple options according to your taste preference.
The nutty flavor works well with almost anything, from pumpkin cheesecake, butternut squash pie, apple pie or even a savory tart! You won’t have to worry about the crust overpowering any of the fillings because of its mild sweetness and nutty flavor that goes well with anything.
You can also use this crust as a base for a delicious no-bake cheesecake or vegan dessert. With this recipe, there are endless possibilities to create new and exciting desserts that will surely impress your guests.
Furthermore, I recommend pairing this nut crust with a simple whipped cream or coconut whipped cream topping that complements the sweetness of the crust without overpowering the flavor of the filling. Adding some fresh berries or nuts as a garnish would elevate the presentation of your dessert.
Overall, this gluten-free nut crust recipe will make every dessert you create shine with a unique nutty flavor while allowing you to experiment with different combinations to find your perfect match.
Make-Ahead, Storing and Reheating
We all know that one of the best things about baking is making it ahead of time and storing it for later. This gluten-free nut crust recipe is no exception. In fact, this nut crust is so versatile that you can make it ahead of time and store it in your refrigerator or freezer for up to a week.
To make everything easier for you, I’ve prepared some tips and instructions on how to make-ahead, store and reheat your nut crust:
Make-Ahead:
If you want to make this gluten-free nut crust ahead of time, you can prepare the crust and then wrap it tightly with plastic wrap or put it in an airtight container. You can then keep it in the refrigerator for up to 3 days or in the freezer for up to 3 months.
Storing:
Once you have baked the nut crust, let it cool completely before storing it. The best way to store your baked crust is by wrapping it tightly with plastic wrap or putting it in an airtight container to keep it fresh. Store your nut crust at room temperature for up to 2 days, or in the refrigerator for up to a week.
Reheating:
If you want to reheat your pre-baked nut crust, take out from the freezer and let it thaw overnight in the refrigerator. You can also bake the frozen crust directly from the freezer without thawing first. Just add an additional 5-10 minutes to the baking time.
If you want to reheat an already baked nut crust, preheat your oven to 350°F (180°C). Then place your cold nut crust on a baking sheet and warm it in the oven for 5-10 minutes before using.
By following these simple steps, not only will this gluten-free nut crust recipe save you time but it will also leave your friends and family craving more!
Tips for Perfect Results
Making a gluten-free nut crust can be a challenge, but with these tips, you will achieve the perfect results every time.
1. Use freshly ground nuts: The key to making the best nut crust is to use fresh nuts. Whole nuts retain their oils better than pre-ground ones, which can become rancid over time. Use a food processor to grind your own nuts and create a fresh, flavorful crust.
2. Use cold butter: For a flaky crust, it’s essential to use cold butter or other fats such as coconut oil or shortening. This technique ensures that the fat doesn’t melt too quickly while baking and creates air pockets for a flaky texture.
3. Chill the dough: After mixing the ingredients for the crust, be sure to chill the dough for at least 30 minutes before rolling it out. The cold dough will be easier to handle and will prevent the crust from shrinking during baking.
4. Press the dough evenly into the pan: It’s important to press the dough evenly into the pie dish or tart pan to ensure even baking. Use your fingers or the bottom of a measuring cup to press down on the dough until it covers the entire surface area of the pan.
5. Blind Bake: For pies with wet fillings like pumpkin pie cheesecake or apple crumble, pre-baking (often called blind baking) is key so an uncooked bottom does not ruin your dessert. Preheat your oven for this step then use parchment paper filled with pie weights (or dry chickpeas) on top of your crust and bake for about 15 minutes before adding any filling.
6. Experiment with different nuts: While pecans are traditional for a nut crust recipe, don’t be afraid to try other nuts like walnuts or hazelnuts. You can also use a combination of nuts like almonds and macadamia nuts for an interesting flavor profile.
7. Don’t forget the salt: Salt enhances the flavor of any dessert, so don’t skip it. Use a pinch or two of sea salt in your nut crust recipe to bring out the flavors of the nuts and add a savory note to your dessert.
With these helpful tips, you’ll be able to make a perfect gluten-free nut crust for your next pie or tart. Experiment, have fun and enjoy the delicious results!
FAQ
Before you dive into making this gluten-free nut crust recipe, it’s important to take note of some frequently asked questions about the ingredients and the process. So, let’s get those questions answered for a stress-free experience in the kitchen.
How do you keep gluten free crust from falling apart?
Creating a sturdy gluten-free pie crust is achievable with a simple trick – incorporate an egg into your dry mixture first before adding water. Once the egg has been thoroughly mixed, gradually pour in the necessary amount of water to form your dough. This technique will help ensure that your crust holds together perfectly.
Why put vinegar in gluten free pie crust?
Want to know the secret to the perfect pie crust? Give your dough an unexpected twist by adding a dash of apple cider vinegar to the mix. When you’re adding your ice water, simply add 1 teaspoon of vinegar to your favorite recipe. This little addition can really make a big difference in preventing your crust from turning out tough by hindering the formation of gluten. Trust me, your taste buds won’t be disappointed!
Why is my gluten free pie crust tough?
When making pie crusts, it’s important to be mindful of the amount of water you use, especially if you’re using gluten-free flour. Adding even a tablespoon or two more than necessary can result in an unpleasantly tough texture. It’s best to use the minimum amount of water called for in the recipe to avoid disaster.
Are diamond pie crusts gluten free?
This food item includes wheat and its derivatives, along with other types of gluten-containing grains and their products, as well as tree nuts and their derivatives.
Bottom Line
Based on this gluten-free nut crust recipe, it’s clear that healthy eating does not have to be bland or boring. This recipe is perfect for anyone looking for a healthy and delicious alternative to traditional pie crusts. With just a few simple substitutions of ingredients, you can make a flavorful crust that’s naturally gluten-free and grain-free.
So go ahead, try out this nut crust recipe, and let your taste buds experience the joys of good health. You’ll soon find out that your body and mind will thank you for choosing healthier options. Remember, every small change counts towards better living, so start today – make this crust the foundation of your next tart, cheesecake or pie, give it a try!
In conclusion, I urge you to experiment with this recipe – swap the nuts, mix in different spices or sweeteners and make it your own. You can enjoy making desserts without feeling guilty or compromising your dietary needs; you deserve delicious food that fuels your body with clean health. With the possibilities of variations and substitutions, this gluten-free nut crust recipe is truly a gift that keeps on giving!
Gluten Free Nut Crust Recipe
Ingredients
- 2 cups gluten free flour
- 1/2 cup dark brown sugar
- 2/3 cup unsalted butter, room temperature
- 1 cup pecans, finely chopped
Instructions
- preheat oven 350.
- spray a pie pan with vegetable oil.
- stir flour and sugar together, cut in butter.
- stir until fine crumbs.
- stir in nuts.
- press into pan.
- bake 10-20 min until golden brown.