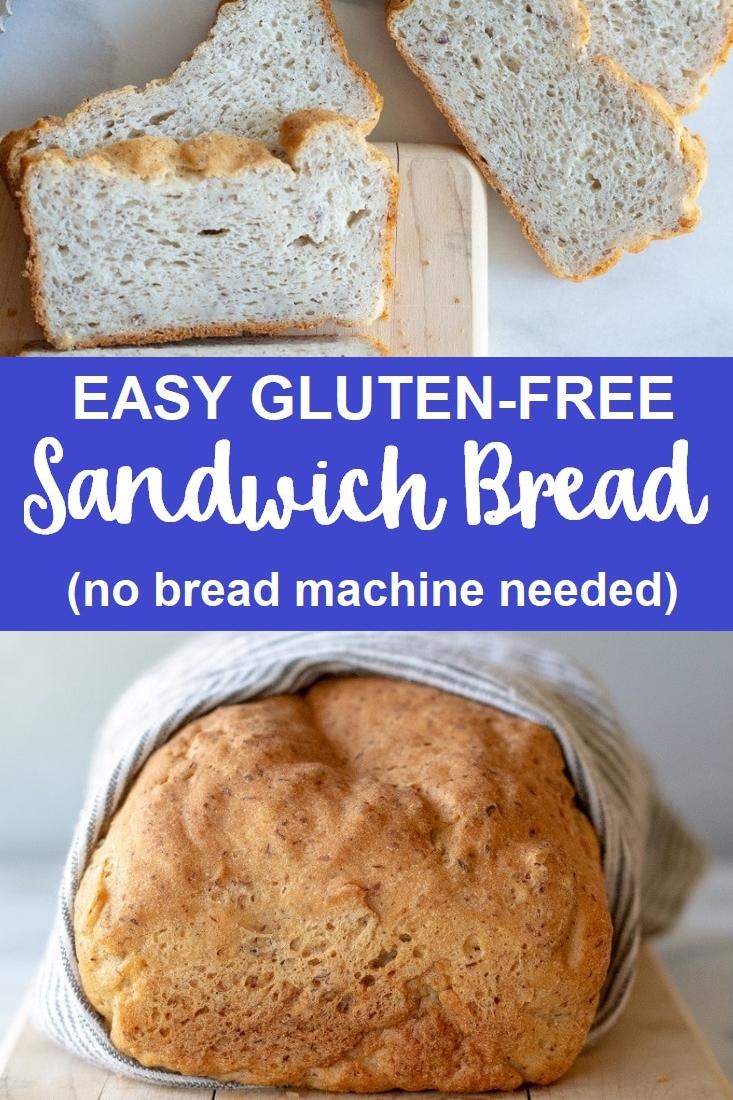
Fluffy gluten-free bread for those with dietary restrictions
Oh, dear readers! I am delighted to share with you a recipe that is sure to win hearts and warm many tummies – my easy gluten-free bread recipe. Bread is often referred to as the staff of life, and rightfully so, as it is one of the most basic and essential foods around. Unfortunately, traditional bread recipes often contain gluten, making it challenging for those with gluten sensitivities or celiac disease to enjoy this fundamental food.
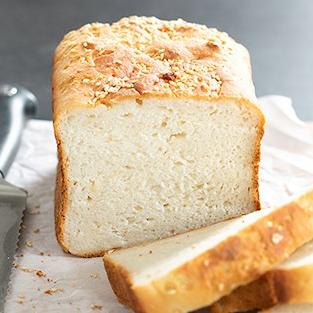
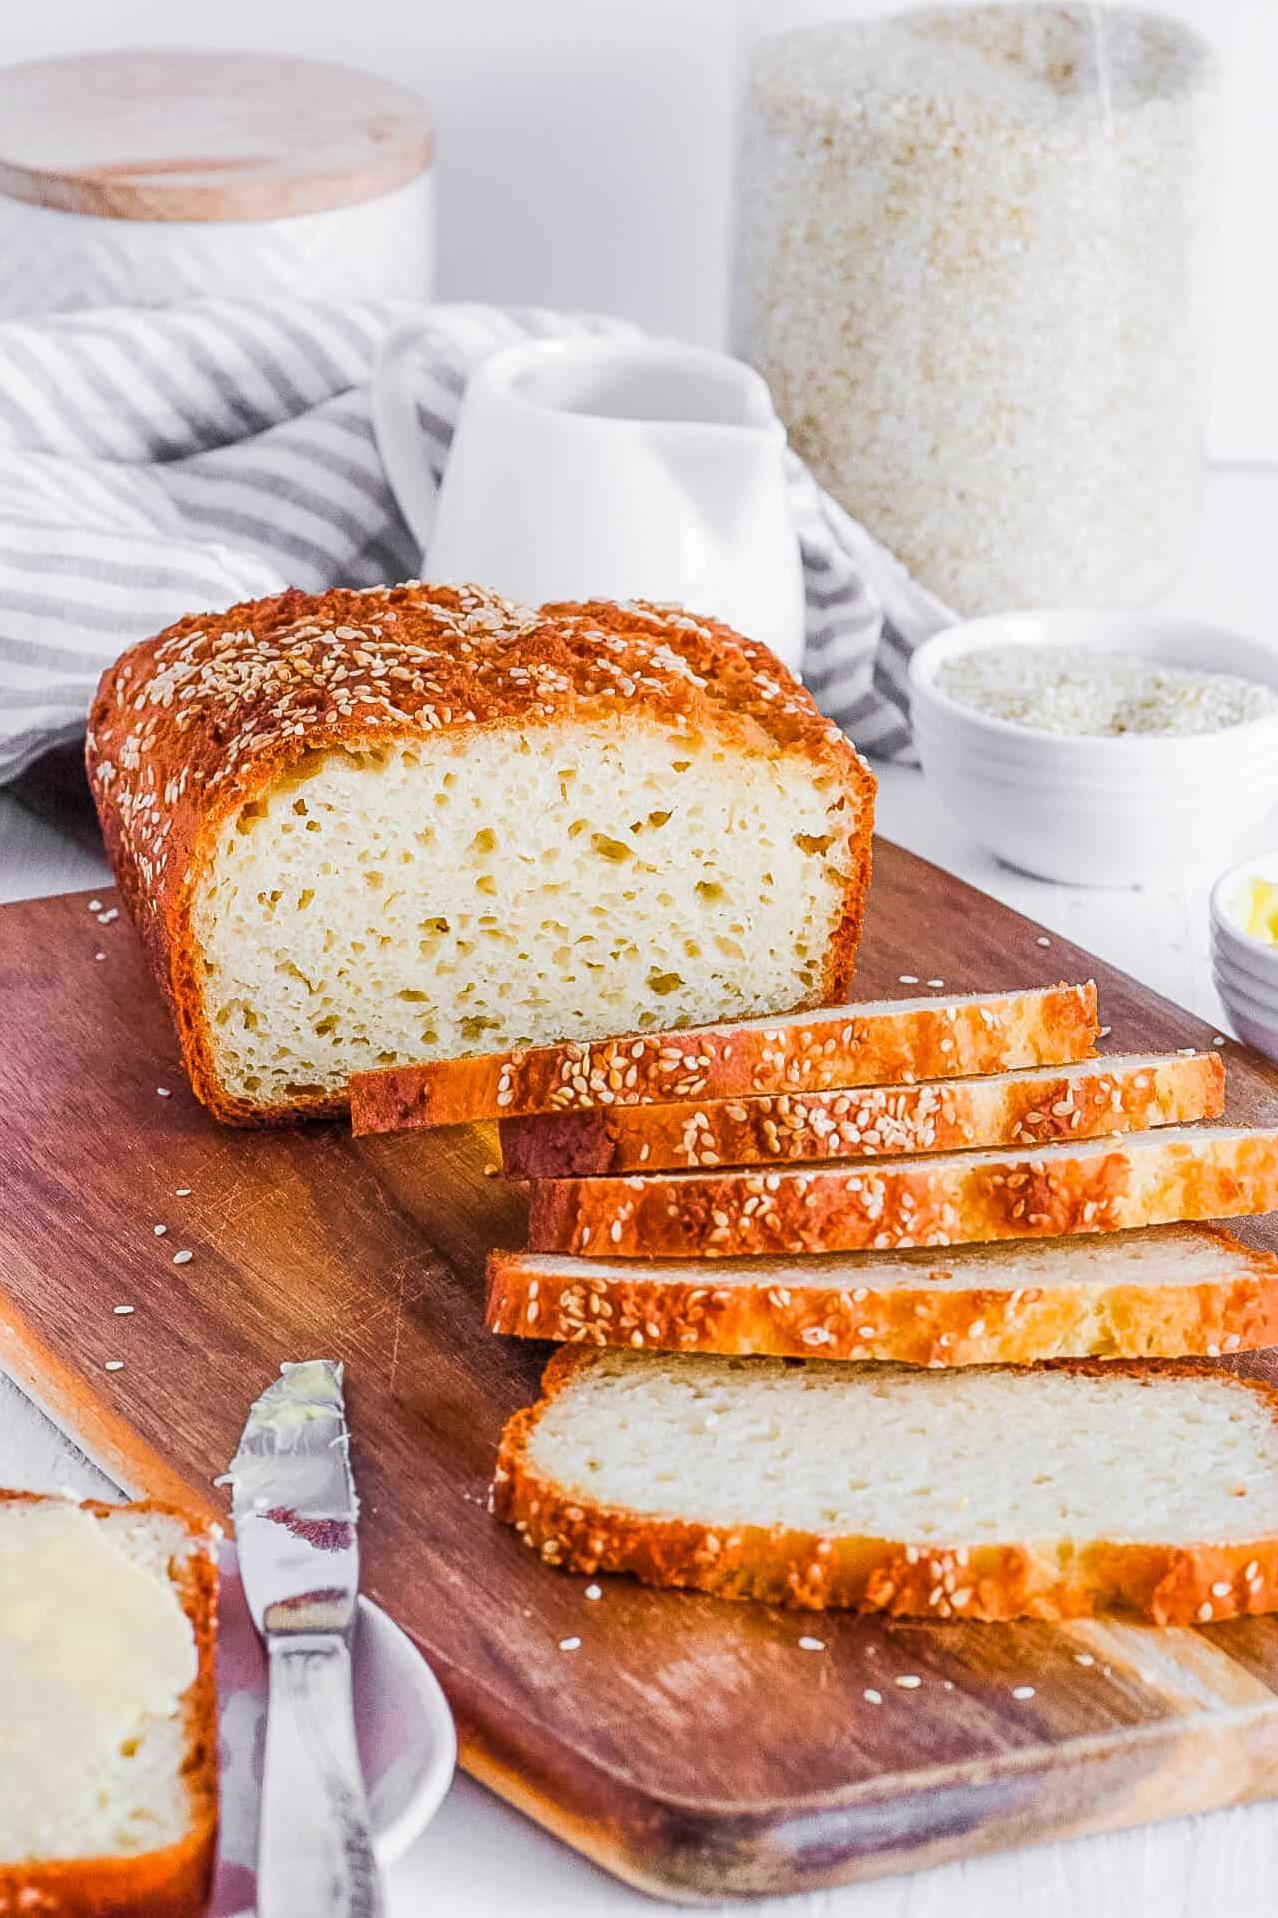
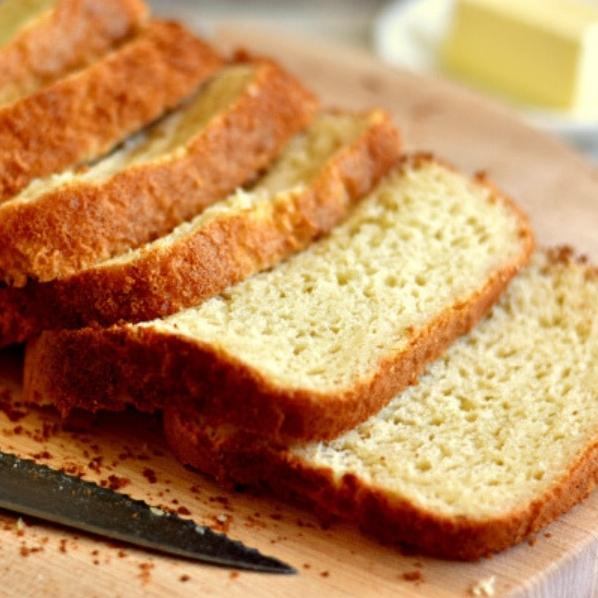
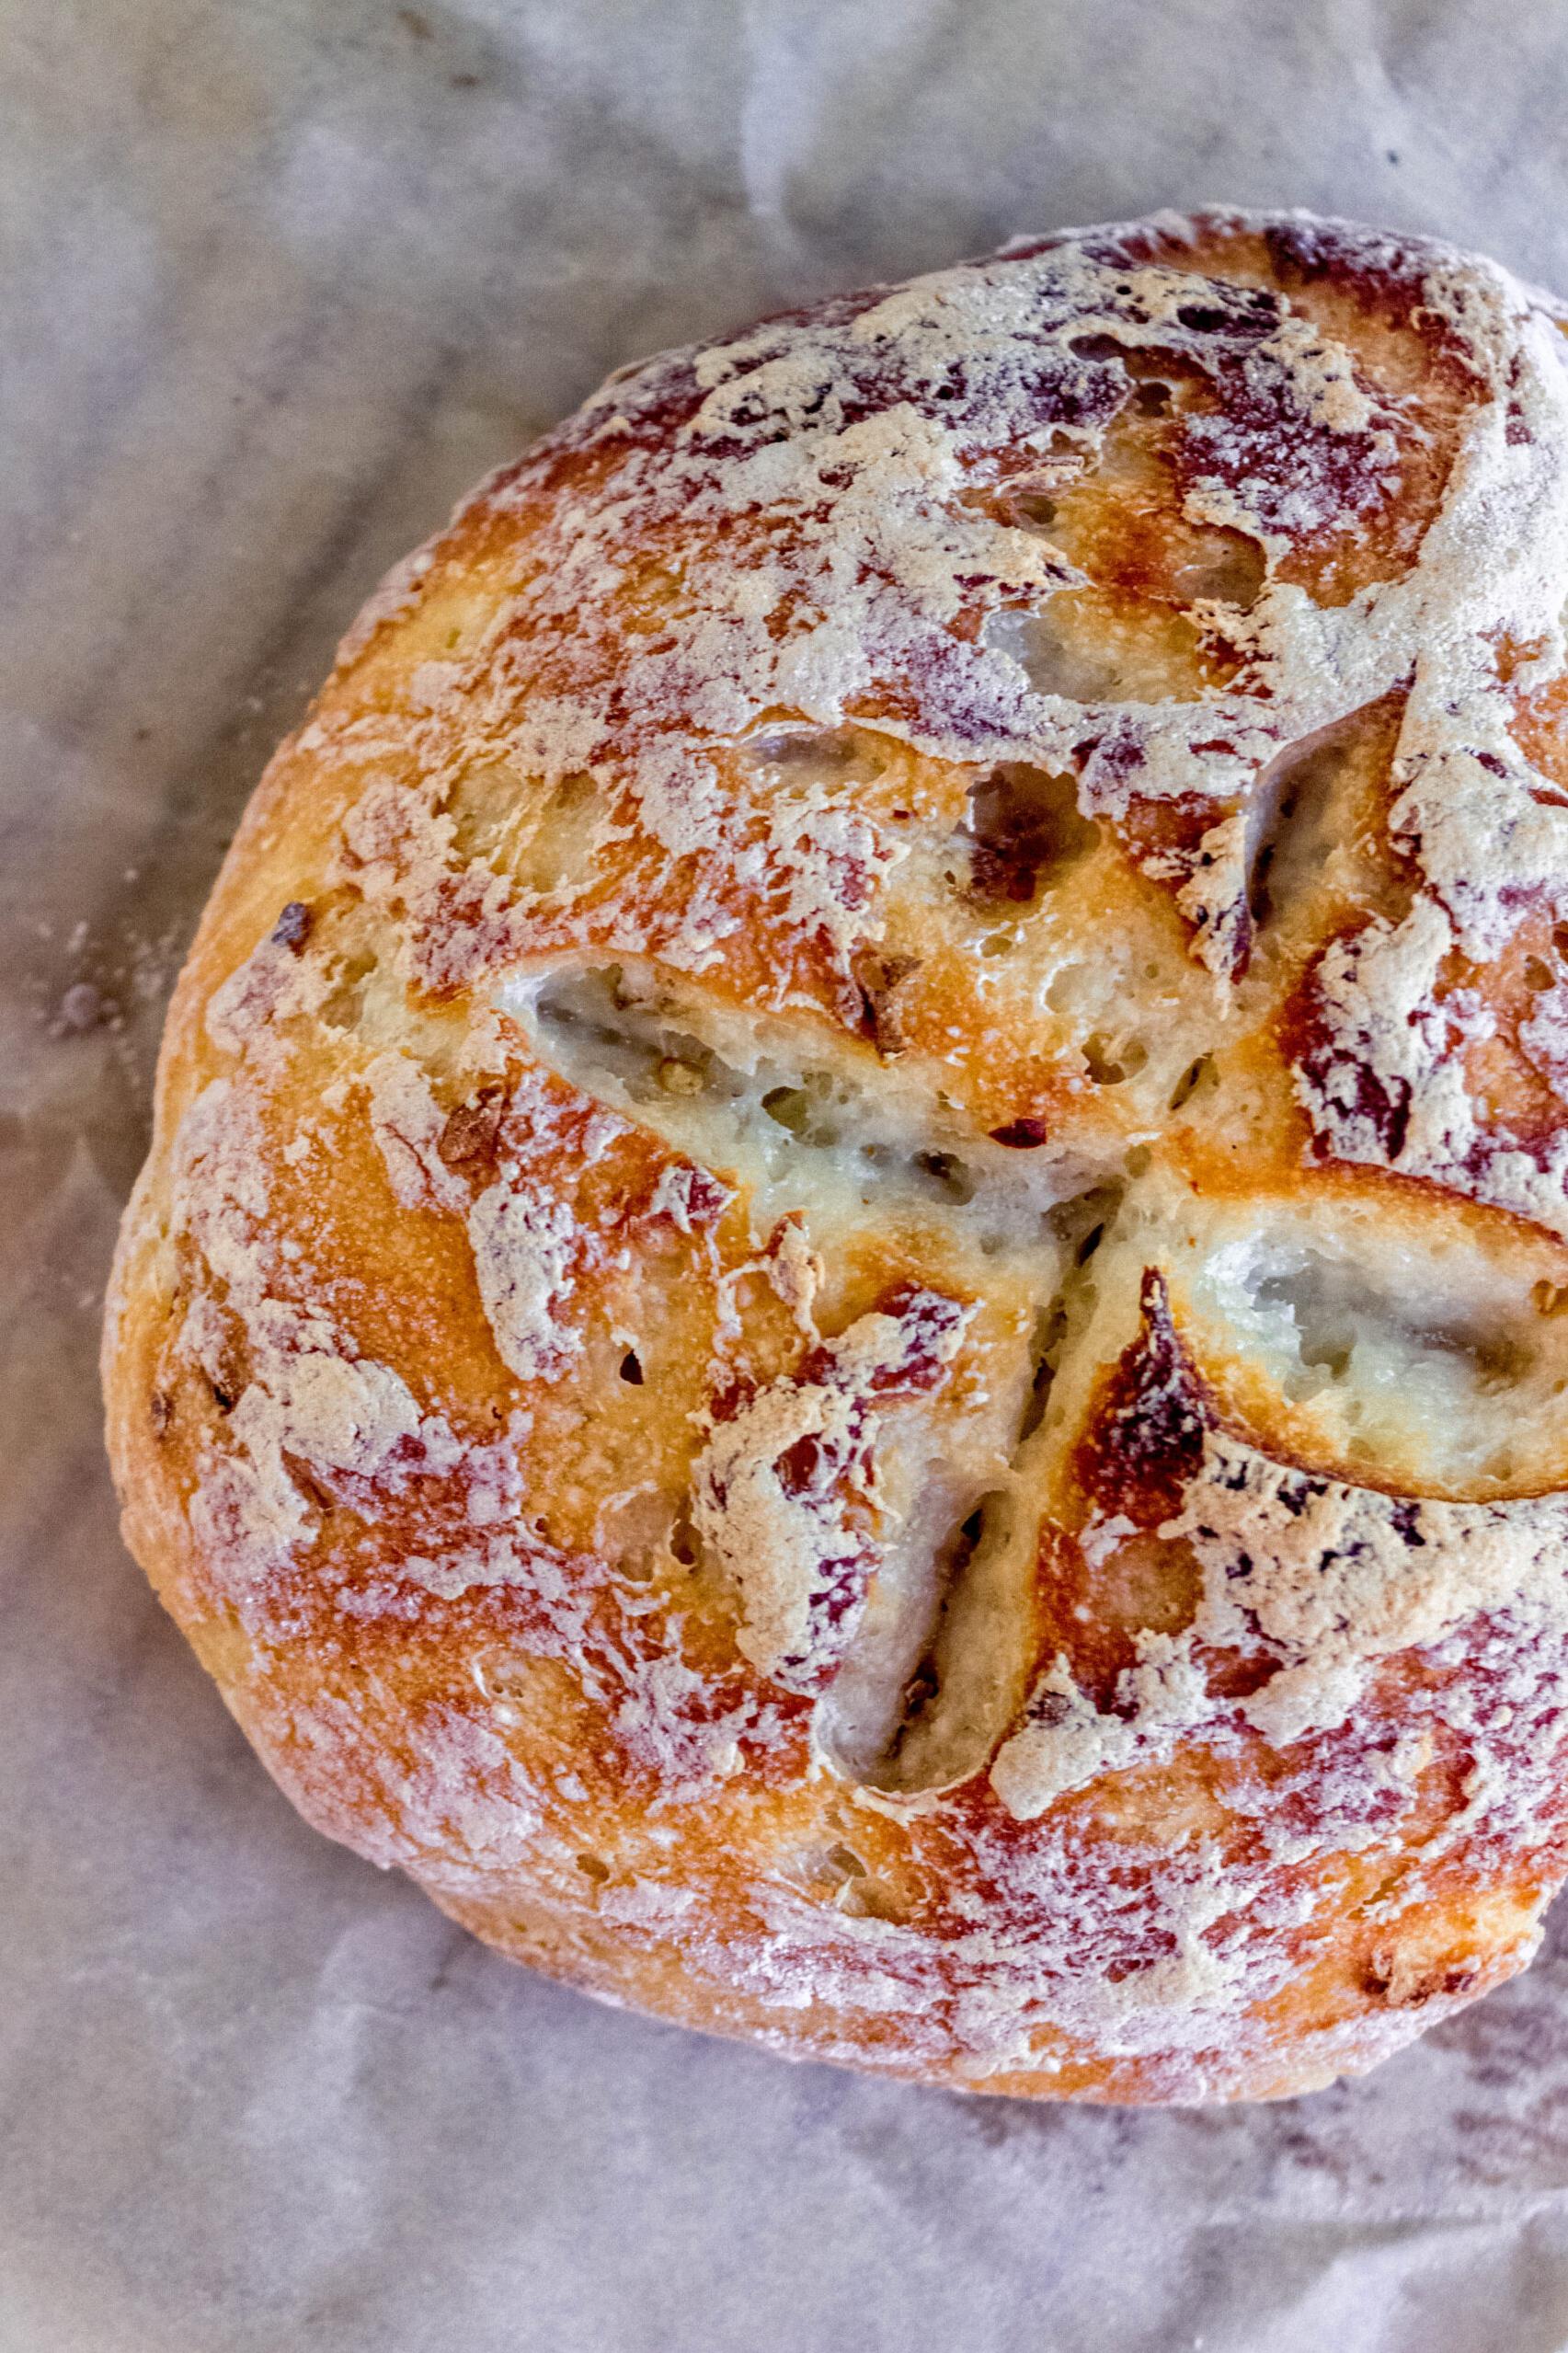
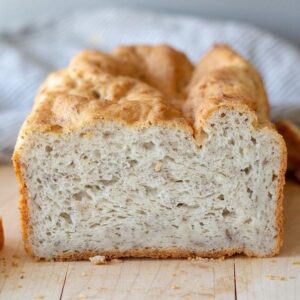
But fear not! My gluten-free bread recipe is here to save the day. It requires only a handful of ingredients, and the end result is deliciously crusty on the outside and soft on the inside, perfect for sandwiches or just slathered with butter. With this recipe, you won’t have to miss out on one of life’s simple pleasures.
But wait, there’s more! This recipe is also dairy-free and can easily be made vegan by substituting the egg with a flax egg. Don’t let intolerances or dietary restrictions keep you from enjoying fresh bread that comes straight from your kitchen. Follow along as I show you how to make your own homemade gluten-free bread.
Why You’ll Love This Recipe

Good people of the realm, if you are searching for a delectable and nutritious gluten-free bread recipe, look no further! One of my favorite kitchen hacks is making easy gluten-free bread, and I assure you that this recipe is a game-changer. Allow me to present several compelling reasons why you will absolutely love this easy gluten-free bread recipe.
Firstly, this recipe calls for only 5 ingredients – that’s right – only 5! With such few ingredients required, it takes minimal time and effort to put together. You can quickly whip up a batch of bread dough at any time without hassle or fuss. Moreover, most of the ingredients in this recipe are pantry staples, making it super convenient to have them on hand.
Secondly, this bread recipe is gluten-free, dairy-free, and vegan! It caters to those with a range of dietary restrictions and preferences without compromising on taste or texture. The flour blend in the recipe is made up of rice flour, tapioca starch, potato starch, and millet flour. Xanthan gum leaves the flour gluten-free while giving your bread dough the perfect texture. So whether you’re celiac or just looking to incorporate more wholesome gluten-free options into your diet, this bread recipe has got you covered.
Lastly and most importantly, what makes this bread so special is its delicious taste and ideal texture. The crumb is light yet sturdy enough for sandwiches or toast. The flavor derived from granulated sugar compliments the nuttiness of the flours used in making the blend perfectly. Try pairing a freshly baked slice of this bread with some warm soup or toasted with jam for breakfast—a match made in culinary heaven!
In conclusion, if you’re someone who loves soft-baked goods but prefer them with restricted ingredients that are still delectable to your taste buds- then you will absolutely fall head over heels for this easy gluten-free bread recipe. So don’t hesitate to give this simple recipe a try even if you have never made gluten-free bread before- It is so easy that even the village fool could do it.
Ingredient List
Here are the ingredients you will need to make this easy gluten-free bread recipe:
Dry ingredients:
- 3 cups (360g) gluten-free flour blend (you can use a store-bought blend or make your own with rice flour, tapioca starch, potato starch, and millet flour)
- 1 1/2 teaspoons xanthan gum (leave out if your flour blend already contains it)
- 1 tablespoon (10g) baking powder
- 3/4 teaspoon salt
- 1/4 cup (50g) granulated sugar
Wet ingredients:
- 2 tablespoons (28g) honey (for vegan option, use maple syrup instead)
- 2 teaspoons (7g) active dry yeast
- 1 1/2 cups (360ml) warm water
- 2 tablespoons (30ml) olive oil
Additional ingredient:
- 1/4 cup (30g) gluten-free flour blend for kneading
Note: milk and egg are not needed for this dairy-free and egg-free recipe.
The Recipe How-To
Now that you have all of your ingredients assembled let’s get started on making this easy gluten-free bread. This recipe only requires one bowl and a few easy steps.
Step 1: Prep the Dry Ingredients
In a large mixing bowl, whisk together flour blend, xanthan gum, sugar, baking powder, and salt until well combined.
Step 2: Add the Wet Ingredients
In a separate bowl, combine the warm water, egg(s) (or your preferred egg substitute for vegan), and milk (or non-dairy milk). Mix the wet ingredients until they are fully combined.
Step 3: Mix It All Together
Pour the wet ingredients into the bowl with the dry ingredients. Use a spatula to fold everything together until you get a sticky dough.
Step 4: Knead and Shape the Dough
Transfer your dough onto a floured surface and knead it just enough to shape it into a classic sandwich loaf form. Place it in a greased loaf pan until its ready for baking.
Step 5: Bake
Preheat your oven to 375°F (190°C). Place your loaf pan in the oven on the center rack and bake for approximately 50 minutes, or until golden brown on top.
Step 6: Enjoy!
Take your freshly baked gluten-free bread out of the oven when it’s done and let it cool for at least an hour before slicing.
This recipe is ready in just over 1 hour and is great for sandwiches or toasted with a spread of vegan butter or jam. This easy homemade gluten-free bread is definitely worth trying!
Substitutions and Variations
Verily, there are few things in this world that cannot be altered or adapted to the needs of the body and soul. And so it goes with this easy gluten-free bread recipe.
Forsooth, while the recipe calls for a specific blend of gluten-free flours, fear not, for there are substitutes that can be made.
Firstly, one could swap out the rice flour for sorghum flour or buckwheat flour; both impart a slightly nuttier flavor to the bread. Similarly, one may utilize arrowroot starch or cornstarch in place of tapioca starch.
Moreover, if one has an allergy to eggs or dairy products, they may use vegan substitutes such as applesauce or mashed banana in lieu of eggs. One can also substitute almond milk or soy milk for regular milk to make this a dairy-free recipe that all can enjoy.
Similarly, if one desires a sweeter loaf, they may add raisins or cranberries to the mix. On the other hand, if a savory flavor is more to one’s taste, then herbs such as rosemary and thyme can be added for a more aromatic loaf.
In conclusion, let it be known that though the original recipe is quite delectable indeed, there exist many ways in which it can be made to suit each individual’s whims and fancies. So fear not the power of experimentation and give it your own unique twist!
Serving and Pairing
When it comes to serving and pairing this gluten-free bread recipe, there are a few things that you should keep in mind. First and foremost, this bread makes for an amazing sandwich bread. Its soft and fluffy texture makes it perfect for layering all of your favorite sandwich ingredients. Try it with some hummus and veggies for a delicious vegan option or pair it with turkey and cranberry sauce for a savory Thanksgiving leftover sandwich.
That being said, this bread is also great on its own as a side dish or an accompaniment to your favorite soup or salad. Toast up some slices and serve them alongside a bowl of creamy tomato soup, or have them as a tasty side with your next dinner party.
If you’re feeling fancy, this recipe can even be used to make rich and decadent homemade croutons. Simply cube the bread and toss it with some olive oil and garlic before toasting in the oven until golden brown. These croutons are perfect for topping salads, soups, or even adding crunch to your morning avocado toast.
Finally, don’t forget that this recipe is not only gluten-free but also dairy-free. That means it’s the perfect option for those who may have multiple dietary restrictions without sacrificing taste or quality. So whether you’re making sandwiches or enjoying it on its own, this easy gluten-free bread recipe is sure to impress!
Make-Ahead, Storing and Reheating

Hark! So you have baked a scrumptious gluten-free bread, and you want to ensure it will last for a few days. Fear not, dear reader, for I have some tips for make-ahead, storing, and reheating this delightful loaf.
Firstly, if you wish to bake ahead of time, the dough can be prepared and shaped, then refrigerated overnight before baking. This will save some of your precious time in the morning. After baking, make sure to cool the bread completely.
To store your gluten-free bread, wrap it tightly in plastic wrap or store it in an airtight container at room temperature for up to three days. For longer storage periods, slice the bread first and store it in the freezer where it will keep for 2-3 months.
When it comes to reheating, slicing the bread before reheating will allow the heat to penetrate evenly. Either microwave an individual slice for 15-20 seconds or place slices on a baking sheet and warm them in a preheated oven at 350°F (180°C) for about 10 minutes.
Remember that gluten-free bread is delicate and does not contain any preservatives. Therefore proper storage will guarantee freshness and deliciousness over a more extended period. And there you have it- my simple yet effective tips for make-ahead, storing and reheating this gluten-free bread recipe!
Tips for Perfect Results
If you are new to gluten-free baking, then it can be quite challenging to get perfect results. But don’t worry, I’ve got some tips and tricks up my sleeve to make sure that your gluten-free bread recipe turns out well. Here are my best tips for achieving a gluten-free, dairy-free and egg-free bread that’s light, fluffy, and delicious.
1. Use a Good Gluten-Free Flour Blend
Choosing the right flour blend is essential for gluten-free baking. For this recipe, I recommend using a high-quality all-purpose gluten-free flour blend that contains several types of flours like rice flour, millet flour, potato starch, and tapioca starch. If you can’t find one in your local grocery store, you can make your own by combining these ingredients.
2. Add Xanthan Gum for Binding
Xanthan gum is an essential ingredient for creating the right texture in gluten-free bread recipes. It helps to bind the ingredients together and keep your bread from being too crumbly. Without xanthan gum or any other binding agent, the dough will not rise properly.
3. Don’t Overmix the Dough
Overworking the dough can cause it to become tough and chewy. Remember to mix all the ingredients until they are just combined before kneading. Be sure not to knead the dough too long either.
4. Let the Dough Rise Twice
Gluten-free bread needs more time to rise than regular flour bread because it doesn’t contain gluten which is a natural binder that helps with yeast activity. Allow your dough to rise at least twice before baking it as it would increase its volume overtime making it soft and easy to slice.
5. Increase Baking Time
Gluten-free bread takes longer to bake than traditional bread due to its low protein content and denser texture since it lacks gluten that acts as a natural binder for yeast activity. A longer baking time will be needed to ensure the center of the bread is not undercooked.
With these tips, you will be sure to get perfect results every time you make this easy gluten-free bread recipe. Just follow the recipe and remember to give yourself plenty of time, as gluten-free baking often takes longer than traditional baking.
FAQ
But wait, folks! Before you start unleashing your inner masterchef in the kitchen, let’s tackle some frequently asked questions that might help address some of your concerns and ensure a successful outcome.
Which gluten-free flour is best for bread?
Discover the perfect solution for making your favorite bread recipe gluten-free with the versatile Bob’s Red Mill Gluten Free All Purpose Baking Flour. This exceptional alternative to traditional bread flour is specially crafted to be used in a wide array of wheat flour recipes.
What is the secret to getting gluten-free bread to rise?
When it comes to making delicious yeast breads, the way you let them rise can make a big difference in the end result. A useful technique is to preheat your oven to 200º F, turn it off once it’s heated, and then place your un-raised bread inside the warmed oven with a piece of parchment paper, coated in oil, on top. Besides, keeping a bowl of water inside the oven can also help the bread to rise as per the directions specified.
What is the trick to baking with gluten-free flour?
Looking to swap out gluten in your baking? Opt for a different thickening agent such as xanthan gum or guar gum. Simply add at least 1 teaspoon of your chosen substitute for each cup of gluten-free flour mix. These substitutes are derived from the cell coat of a microorganism known as Xanthomonas campestris.
Is it cheaper to make your own gluten-free bread?
Making gluten-free bread at home can save you a significant amount of money compared to buying it at a store, with potential savings ranging from 35% to 50%.
Bottom Line
This easy gluten-free bread recipe is not only a great substitute for those who cannot tolerate gluten, but it also contains dairy-free and vegan options for those following those restrictions. With just a few simple ingredients and easy instructions, you can make the best gluten-free bread that is perfect for sandwiches or even to accompany a delicious soup or chili.
The beauty of this recipe lies in its versatility. You can easily switch up the mixture of gluten-free flours to make a variety of bread options. Feel free to experiment with this recipe by adding different ingredients like seeds, nuts, and herbs to create something that is uniquely yours.
When it comes down to choosing the right ingredients, always make sure that they are gluten-free and safe to consume. Moreover, follow the guidelines provided for perfect results every time. You’ll be surprised at how easy and rewarding it is to make your own gluten-free bread at home.
So, what are you waiting for? Try out this easy gluten-free bread recipe today and taste the difference for yourself! And don’t forget to share with your friends and family who may also be looking for a delicious gluten-free sandwich bread recipe. Happy baking!
Easy Gluten Free Bread Recipe
Ingredients
- 1 cup rice flour
- 1 1/2 tablespoons sugar
- 1 3/4 teaspoons baking powder
- 1/2 teaspoon salt
- 1 egg
- 1/2 cup milk
- 1/8 cup vegetable oil
Instructions
- Mix the dry ingredients, (**BEAT THE EGG BEFORE YOU ADD TO DRY**).
- Add wet ingredients to dry (here is where you could add cheese, cinnamon, or other extra ingredients). Batter should be the consistency of a muffin mix.
- Grease your pan VERY LIGHTLY.
- Put in small loaf pan (double or triple recipe to make a big loaf).
- Bake 15-20 minutes at 350°F.