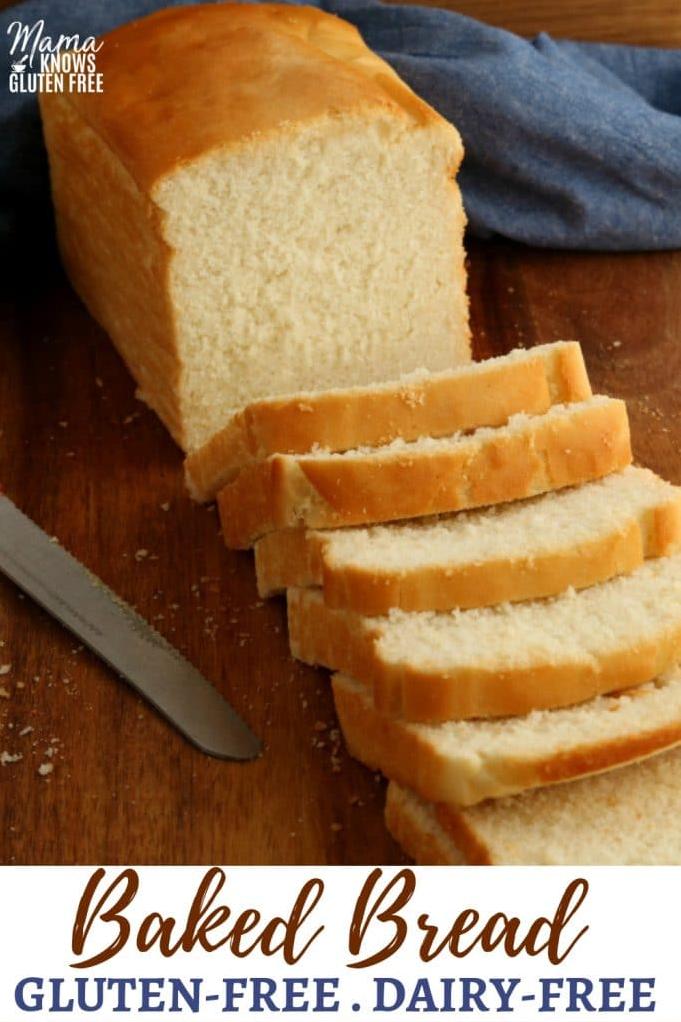
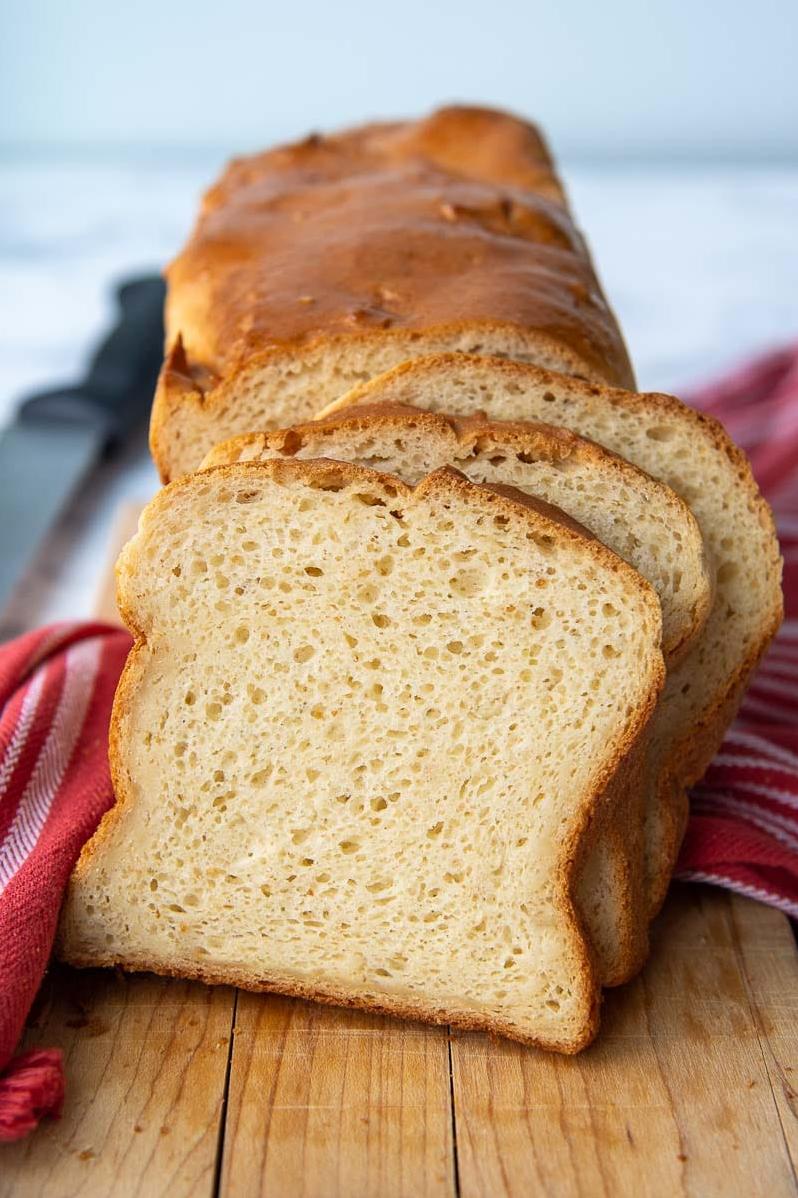
Soft and Fluffy Gluten-Free Bread Recipe
Oh, dear readers! Harken to my words and attend to my tale, for I have a magical recipe that will delight your taste buds and nourish your body. This recipe is none other than the Soft White Bread (Gluten Free) Recipe!
Are you searching for a bread that is not only gluten-free but also free from dairy? A bread that is both soft and fluffy, yet still maintains its shape for sandwiches? Well, fret not my friends, for this recipe has everything you need to satisfy those cravings.
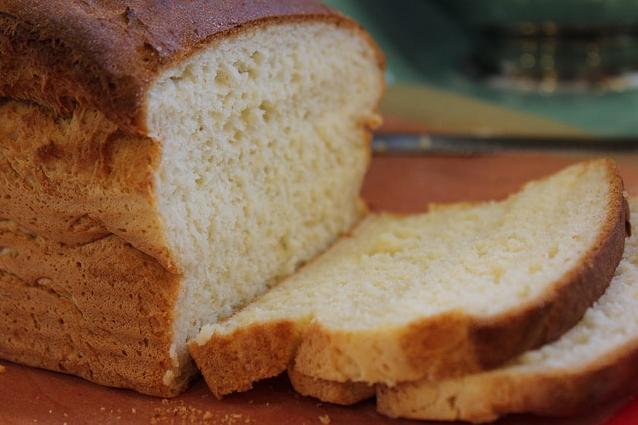
Gone are the days when gluten-free bread would crumble at the slightest touch or taste like cardboard. This Soft White Bread (Gluten Free) Recipe is here to change everything! Its scrumptious flavor and delightful texture make it the best ever gluten-free bread I have had the pleasure of trying.
But wait, there’s more! This recipe is easy to make and does not require any fancy ingredients. All you need are some basic gluten-free flours, yeast, sugar, salt, and water. Plus, I will provide you with a step-by-step guide on how to make this delicious soft sandwich bread at home!
So what are you waiting for? Let’s dive in and learn how to create this delectable homemade bread that will leave you wanting more. Trust me; this Soft White Bread (Gluten Free) Recipe will become your go-to recipe for all occasions.
Why You’ll Love This Recipe
Oh, fair reader! Oft we face a conundrum when it comes to gluten-free bread: the texture can be dry, crumbly, and devoid of soul. But fear not! This soft white bread recipe is here to solve your gluten-free struggles.
First and foremost, let me assure thee that this bread is soft, and it is fluffy. Nay, I venture to say it is even softer and fluffier than its wheat-based counterparts. Focus on that first bite ‒ `tis a revelation, one fit for royalty.
But softness alone does not make a great bread. Fear thee not though, for this recipe is also scrumptious and full of taste. From the moment the warm bread escapes thee from the oven’s heat, thou’lt know that thou hast created something quite special with thine own hands.
And did I mention that this recipe is versatile? Thou canst adjust it to thy liking by adding seeds or switch out the ingredients to meet thine dietary needs. If dairy be thine enemy or milk bringeth more harm than good into thy life, fear thee not as this recipe is dairy-free too.
In truth, this bread offers a sense of accomplishment like no other – a sense of pride knowing that thou hast crafted thy sandwich bread from scratch.
Take it from me, dear reader, after trying multiple recipes for gluten-free sandwich loaves; thou wilt find that this recipe will have thee jumping over cabbages in excitement at how easy it was to master. Trust me on this – thou wilt love this recipe!
Ingredient List
One of the most essential parts of any recipe is the ingredient list. In this case, we’re using gluten-free flours and other ingredients to make this recipe accessible to anyone who needs or wants to avoid gluten. Here’s what you’ll need to gather before you start:
Dry Ingredients:
- 1 1/2 cups white rice flour
- 3/4 cup tapioca starch
- 1/4 cup dry milk powder
- 4 teaspoons xanthan gum
- 1/4 cup granulated sugar
- 2 teaspoons salt
- 2 1/4 teaspoons Active dry yeast, which is equivalent to one packet
Wet Ingredients:
- 1/4 cup melted butter or dairy-free alternative
- 3 large eggs at room temperature
- 1 teaspoon white vinegar
- 1 cup warm water (not hot, around 110 degrees)
Optional Add-Ons:
Using these add-ons can enhance the flavor and texture of your bread recipe.
– A pinch of psyllium husk
– Few drops of flavored extracts
Make sure you’ve got everything on this list – it’s important to have the correct measurements for each ingredient.
The Recipe How-To
Now, it’s time to get baking! Preheat the oven to 375°F (190°C).
Step 1: Mix the Yeast
In a small bowl, dissolve 1 tablespoon of granulated sugar in 1 ¼ cups of warm water. Then sprinkle in the contents of 1 packet of active dry yeast, and let the mixture sit for about 5 minutes until it becomes frothy.
Step 2: Combine Dry Ingredients
In a separate mixing bowl, whisk together 3 cups of gluten-free all-purpose flour (such as King Arthur Gluten-Free Purpose Flour), ¾ cup of white rice flour, ½ cup of tapioca starch, 3 tablespoons of dry milk powder, 2 teaspoons of xanthan gum, and 1 ½ teaspoons of salt until thoroughly combined.
Step 3: Add Wet Ingredients
Create a well in the center of the bowl with the dry ingredients, and pour in the yeast mixture along with 2 eggs, 4 tablespoons of melted butter, and 1 tablespoon of apple cider vinegar. With an electric mixer on low speed, gradually add in cool water, up to a total volume of ¾ to 1 cup, until the mixture becomes soft and moist but not runny.
Step 4: Mix Well
Once all ingredients have been added to the mixing bowl, increase the speed of your electric mixer to medium-high and blend for about 4 minutes until everything is thoroughly mixed together into a slightly sticky dough.
Step 5: Let Sit
Cover your mixing bowl with a tea towel or plastic wrap and let it sit for approximately half an hour at room temperature. This resting period will allow time for the dough to rise.
Step 6: Transfer to Baking Dish
Coat one loaf pan or baking dish with cooking spray or butter. Using floured hands, remove the dough from the mixing bowl and shape it into a rectangular bread loaf (giving it well-rounded edges and tucking any excess dough underneath). Place the loaf gently into the dish.
Step 7: Allow Dough to Rise
Cover your baking dish with a towel or plastic wrap and let it sit in a warm, draft-free location for approximately 50 minutes. The dough should expand and rise up, filling out the baking dish with an impressive billowy texture.
Step 8: Bake and Cool
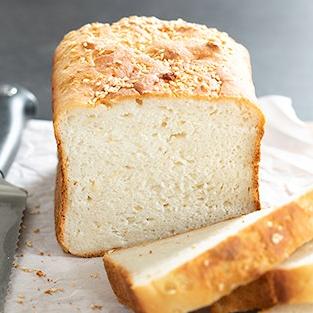
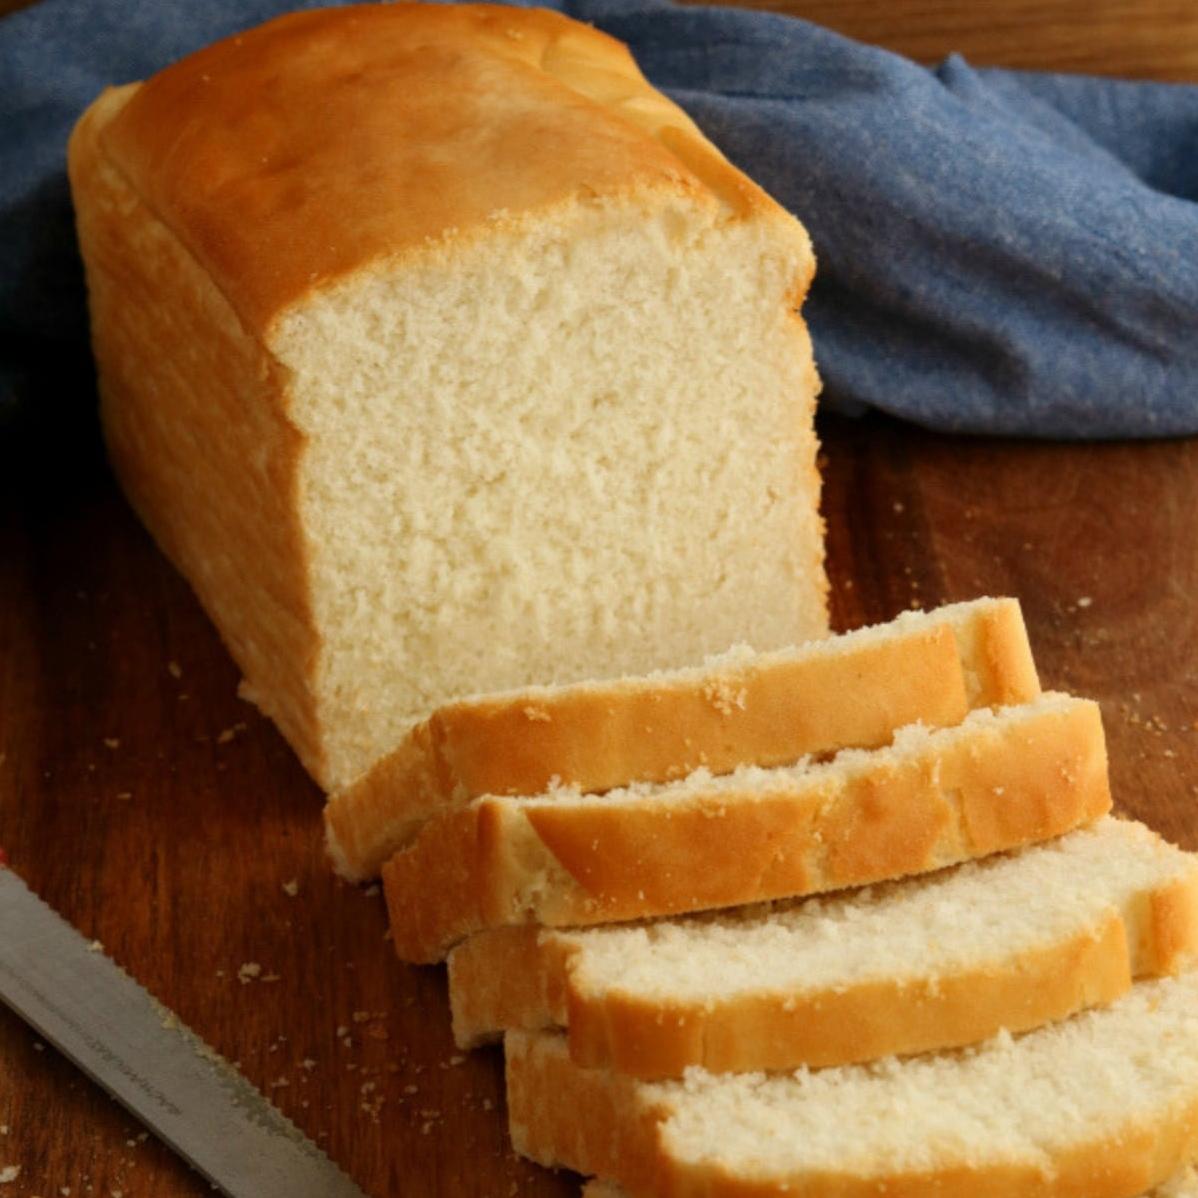
Place your loaf pan/dish on the middle rack of your preheated oven, and bake it for 35-40 mins. When done, your bread should be lightly browned on top, and sound hollow when tapped on the bottom. Remove the pan from the oven and set it on a wire rack. Let the bread cool completely before cutting into it.
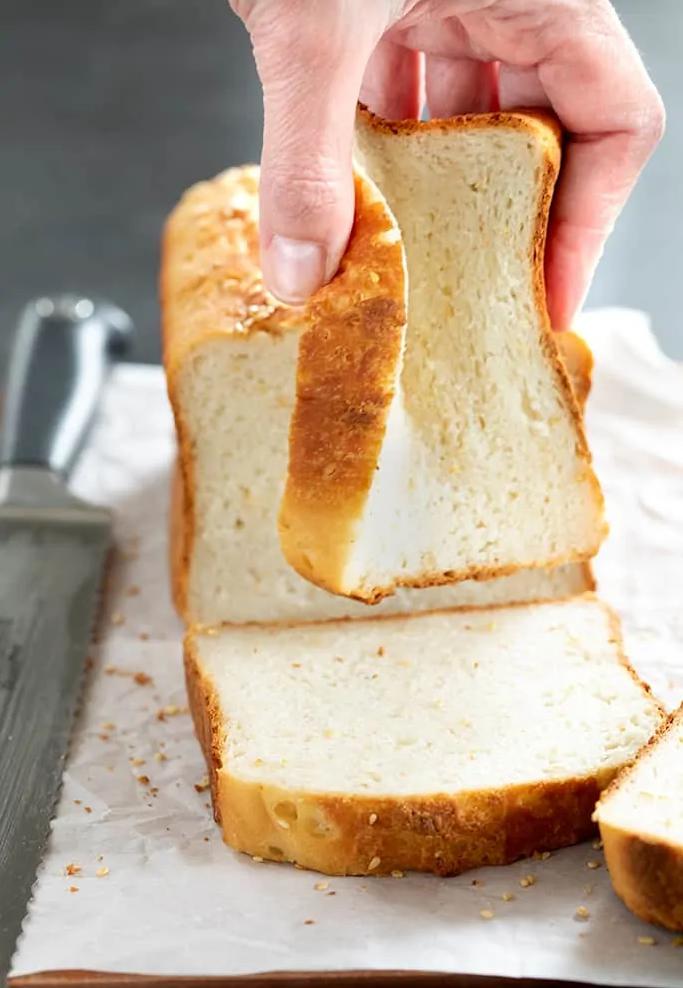
Enjoy your freshly homemade delicious soft gluten-free white sandwich bread!
Substitutions and Variations
Verily, one of the wonderful things about cooking is the ability to make substitutions and changes that suit one’s needs and tastes. In this section, I shall share various substitutions and variations you could try with this gluten-free Soft White Bread recipe.
For those who are dairy intolerant, fear not! You can substitute butter with a vegan alternative such as margarine or coconut oil. Additionally, you can also replace the dry milk powder with coconut milk powder or almond milk powder.
If you desire a vegan-friendly option, eggs can be substituted for chia eggs or flax eggs. To prepare them, combine one tablespoon of chia seeds or ground flax seeds with three tablespoons of warm water. Allow it to rest until it becomes gel-like.
Furthermore, if you have an aversion to xanthan gum, you may substitute it with psyllium husk. This substitute will give your bread a texture that is similar to whole-grain bread.
Tapioca flour is used in the recipe to help create a more authentic texture of white bread. Nevertheless, if you don’t have any tapioca flour in your pantry, it can be replaced with cornstarch or arrowroot powder. However, keep in mind that these substitutes may change the texture of the bread slightly.
In addition to these substitutions, you could add herbs and spices like garlic powder, rosemary or cinnamon for extra flavor. Also, sliced olives and sun-dried tomatoes could be incorporated as mix-ins for a savory twist.
In conclusion, feel free to experiment with different combinations and variations in this recipe to make your perfect loaf of gluten-free Soft White Bread!
Serving and Pairing
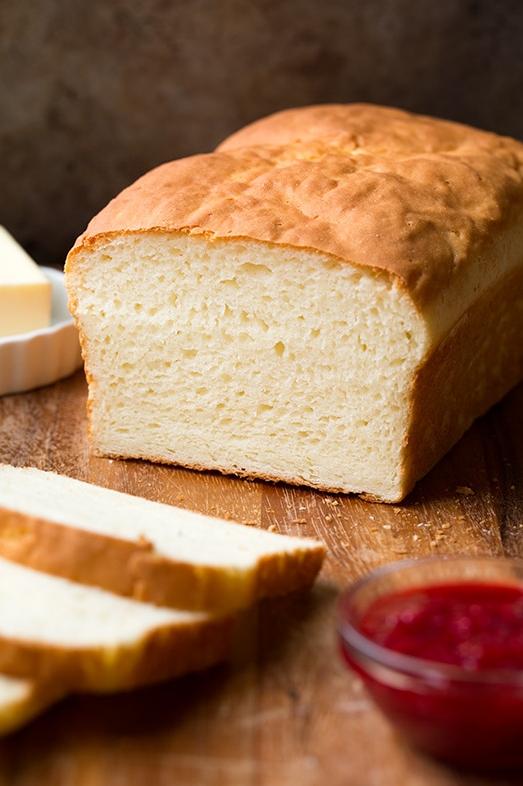
Hark! Once thou hast baked thy soft and scrumptious gluten-free white sandwich bread, thou art ready to behold the glory of a sandwich made with thy very own hands. This bread possesses the power to elevate any sandwich to uncharted heights of deliciousness.
Forsooth! Thou mayest slice this fluffy white loaf thinner for dainty tea sandwiches or thicker for a hearty lunchtime meal. It pairs well with a wide variety of deli meats, cheeses, and veggies. Thy sandwich options are limited only by thy imagination.
When thou art hosting a luncheon or brunch, consider serving warm slices of the best ever gluten-free white rice flour bread alongside bowls of chicken salad, egg salad, or flavored butters. Thy guests will marvel at the fluffiness and full taste of this delicious bread.
Shouldst thou have any leftovers, fear not. This bread is versatile enough to be repurposed into French toast, stuffing or croutons. Or merely toast it to its golden perfection and serve it on the side of your favorite soups or stews.
Indeed, this soft and fluffy gluten-free white sandwich bread hath no equal. It is not merely gluten-free, but also free from dairy: it is a true delight for all those who wish to partake in delicious creations without being weighed down by any pesky dietary restrictions.
Make-Ahead, Storing and Reheating
Ah, the beauty of making bread ahead of time! Imagine waking up to the delicious aroma of freshly baked bread without any fuss or hassle. Well, good news…you can! This gluten-free soft white bread is a great make-ahead option because it can be stored in an airtight container for up to 4 days at room temperature without losing its soft texture and taste.
If you made more than needed or want to conserve your bread for longer, there are also options for freezing it. To freeze your free white sandwich bread, slice it into portions and store them in an airtight container or freezer bags for up to 3 months. When reheating, allow the slices to thaw at room temperature then reheat them in a preheated oven or toaster.
For those who are always on the go and looking for quick breakfast options, this recipe is perfect for preparation ahead of time. Slice, toast and serve with a variety of toppings that suit your taste buds or make sandwiches and wraps as you please.
Another great tip is to use this gluten-free soft fluffy bread to make French toast – this technique revives stale bread as if it were freshly baked!
So go ahead, make your life a bit easier and eye-catching with this amazing soft fluffy gluten-free white sandwich bread. It’s versatile, convenient and utterly scrumptious!
Tips for Perfect Results
Now that you have all the ingredients and steps needed for this soft white bread recipe, I want to share with you some tips to ensure that your bread turns out perfectly.
1. Measure Accurately: Gluten-free baking is precise! Even a small amount of extra flour or liquid can drastically affect the result. So be sure to use measuring cups and spoons to get accurate quantities of ingredients.
2. Follow the Recipe: This may seem like an obvious tip, but it’s crucial to follow each step in the instructions as written. Meticulously measuring and following directions will help guarantee a loaf of perfect gluten-free bread.
3. Add Xanthan Gum or Psyllium Husk for Baked Goods Structure: The xanthan gum or psyllium husk will help give structure to your gluten-free bread dough, reducing the crumbliness that is common when baking without gluten.
4. Let the Dough Rest: After mixing and kneading the dough, resist the temptation to jump right into shaping the loaf. Letting gluten-free dough rest for at least 15-30 minutes is an essential step for optimal texture.
5. Use a Bread Machine: Making gluten-free bread can be hard work. If you have a bread machine, use it! Simply add all ingredients in the order recommended by your machine’s manual, set it for “gluten-free” mode, start, and let your machine do the rest.
6. Bake Bread Until It’s Fully Cooked: Undercooked gluten-free bread will simply fall apart when you cut into it. For assurance that you perfectly baked it inside and out check with an instant-read thermometer – internal temperature should read 190 degrees Fahrenheit (88 Celsius) before removing from the oven.
7. Store Properly: Once cooled, store sliced bread at room temperature in a tightly sealed container (or freezer bag) for up to 5 days. You can also slice your bread and freeze it in airtight container or bag for up to 3 months.
By following these tips, you should get fluffy white delicious soft gluten-free bread that’s perfect for sandwiches and toasts. You can even add toppings like jam or peanut butter and savor this scrumptious gluten-free treat.
FAQ
Hark! Here comes the most frequently asked questions about my gluten-free, dairy-free, and soft white bread recipe. Tarry no longer, for I shall answer them all, from the measurements of the ingredients to the best options for substitutions. Read on and all doubts on this delicious soft bread shall be cleared!
What is the trick to making soft bread?
When it comes to making breads softer, incorporating some form of fat is key. For sandwich breads and soft rolls, liquid fats work best. One simple way to achieve this is by substituting some, or all, of the water in the recipe with whole milk. It is important to keep in mind, however, that doing so may affect the browning of the exterior of the bread as well.
What is the best gluten-free flour substitute for bread flour?
In order to transform your go-to bread recipe into a gluten-free version, try using Bob’s Red Mill Gluten Free All Purpose Baking Flour. This flour is an excellent alternative to regular bread flour and can be used in practically any recipe that calls for wheat flour.
Bottom Line
In conclusion, making your own Soft White Bread (Gluten Free) using this recipe is an easy and rewarding task. The result is a delicious and healthy bread that can be used for sandwiches, toast or as a side with any meal. With just a few simple substitutions and variations, you can make this bread work perfectly for your personal needs and preferences.
By using gluten-free flours like tapioca starch, white rice flour, and psyllium husk, this recipe ensures that anyone with dietary restrictions can enjoy a soft and fluffy loaf of bread. Even those with dairy sensitivities can enjoy this recipe by substituting the butter and dry milk with their preferred alternatives.
In summary, with the help of the step-by-step instructions on how to make this Soft White Bread (Gluten Free), you can enjoy the taste free from gluten without compromising on flavor or texture. Give it a try – I guarantee you will not be disappointed!
Soft White Bread (Gluten Free) Recipe
Ingredients
- 1/2 cup warm water
- 2 teaspoons sugar
- 4 teaspoons dry yeast, granuels
- 1 1/2 cups water
- 4 tablespoons butter, melted
- 1 teaspoon vinegar, gluten-free
- 3 eggs
- 2 cups rice flour
- 2 cups tapioca flour
- 1/4 cup sugar
- 4 teaspoons xanthan gum
- 2/3 cup dry milk
- 1 1/2 teaspoons salt
Instructions
- Mix the four liquid ingredients in a small bowl and let stand for 15 minutes.
- Then mix above dry ingredients in a large bowl, and add the butter mixture and yeast mixture to the dry ingredients.
- Beat on high for 2 minutes.
- Use two small greased bread pans, as one large one seems to cause the bread to rise too high and become like a mushroom.
- If desired brush with a mixture of egg and water, sprinkle sesame seed or poppy seeds over top, before baking.
- Allow to rise in pan, then bake at 350 degrees 20 - 25 minutes.
- Adjust time depending on size of loaves.
- Can also be made as sandwich rolls, as indicated below:
- use small individual pie tins (about 4 across, purchase in paper goods supply store, round out the bottom crease with your thumb and finger, or press the tin down on the bottom of a jar the appropriate size to round out the crease, these may be reused time and time again) spray the tins with cooking oil, divide dough to make about 12 sandwich rolls, place pie tins on two cookie sheets, allow to rise.
- If desired brush with a mixture of egg and water, sprinkle sesame seed or poppy seeds over top, before baking.
- Bake until nicely browned in 15 -20 minutes.