The Ultimate Gluten-Free Bread Recipe for Your Health
Are you a fan of sandwiches but can’t enjoy them due to gluten intolerance? Are you tired of the cardboard-like texture of store-bought gluten-free bread? Fear not, my friend! I have just the recipe for you: homemade gluten-free bread that is soft, fluffy, and perfect for any sandwich!
Over the years, I have experimented with different ingredients, ratios, and methods to come up with the ultimate gluten-free bread recipe. And trust me, this recipe has impressed even the biggest gluten lovers!
Not only is this bread gluten-free, but it is also dairy-free and uses organic ingredients. No more confusing labels or hidden ingredients – you know exactly what’s in your food.
With simple instructions and easily accessible ingredients, making your own gluten-free bread at home has never been easier. Plus, it’s a great way to save money and personalize your bread to suit your taste buds.
So grab your apron and preheat that oven – it’s time to indulge in some tasty and healthy gluten-free bread!
Why You’ll Love This Recipe

Looking for a guilt-free, wonderful and delicious gluten-free bread recipe? Well, look no further because I have the perfect recipe that will satisfy your cravings! This recipe is not only gluten-free, but it’s also dairy-free, vegan, eggless and sugar-free.
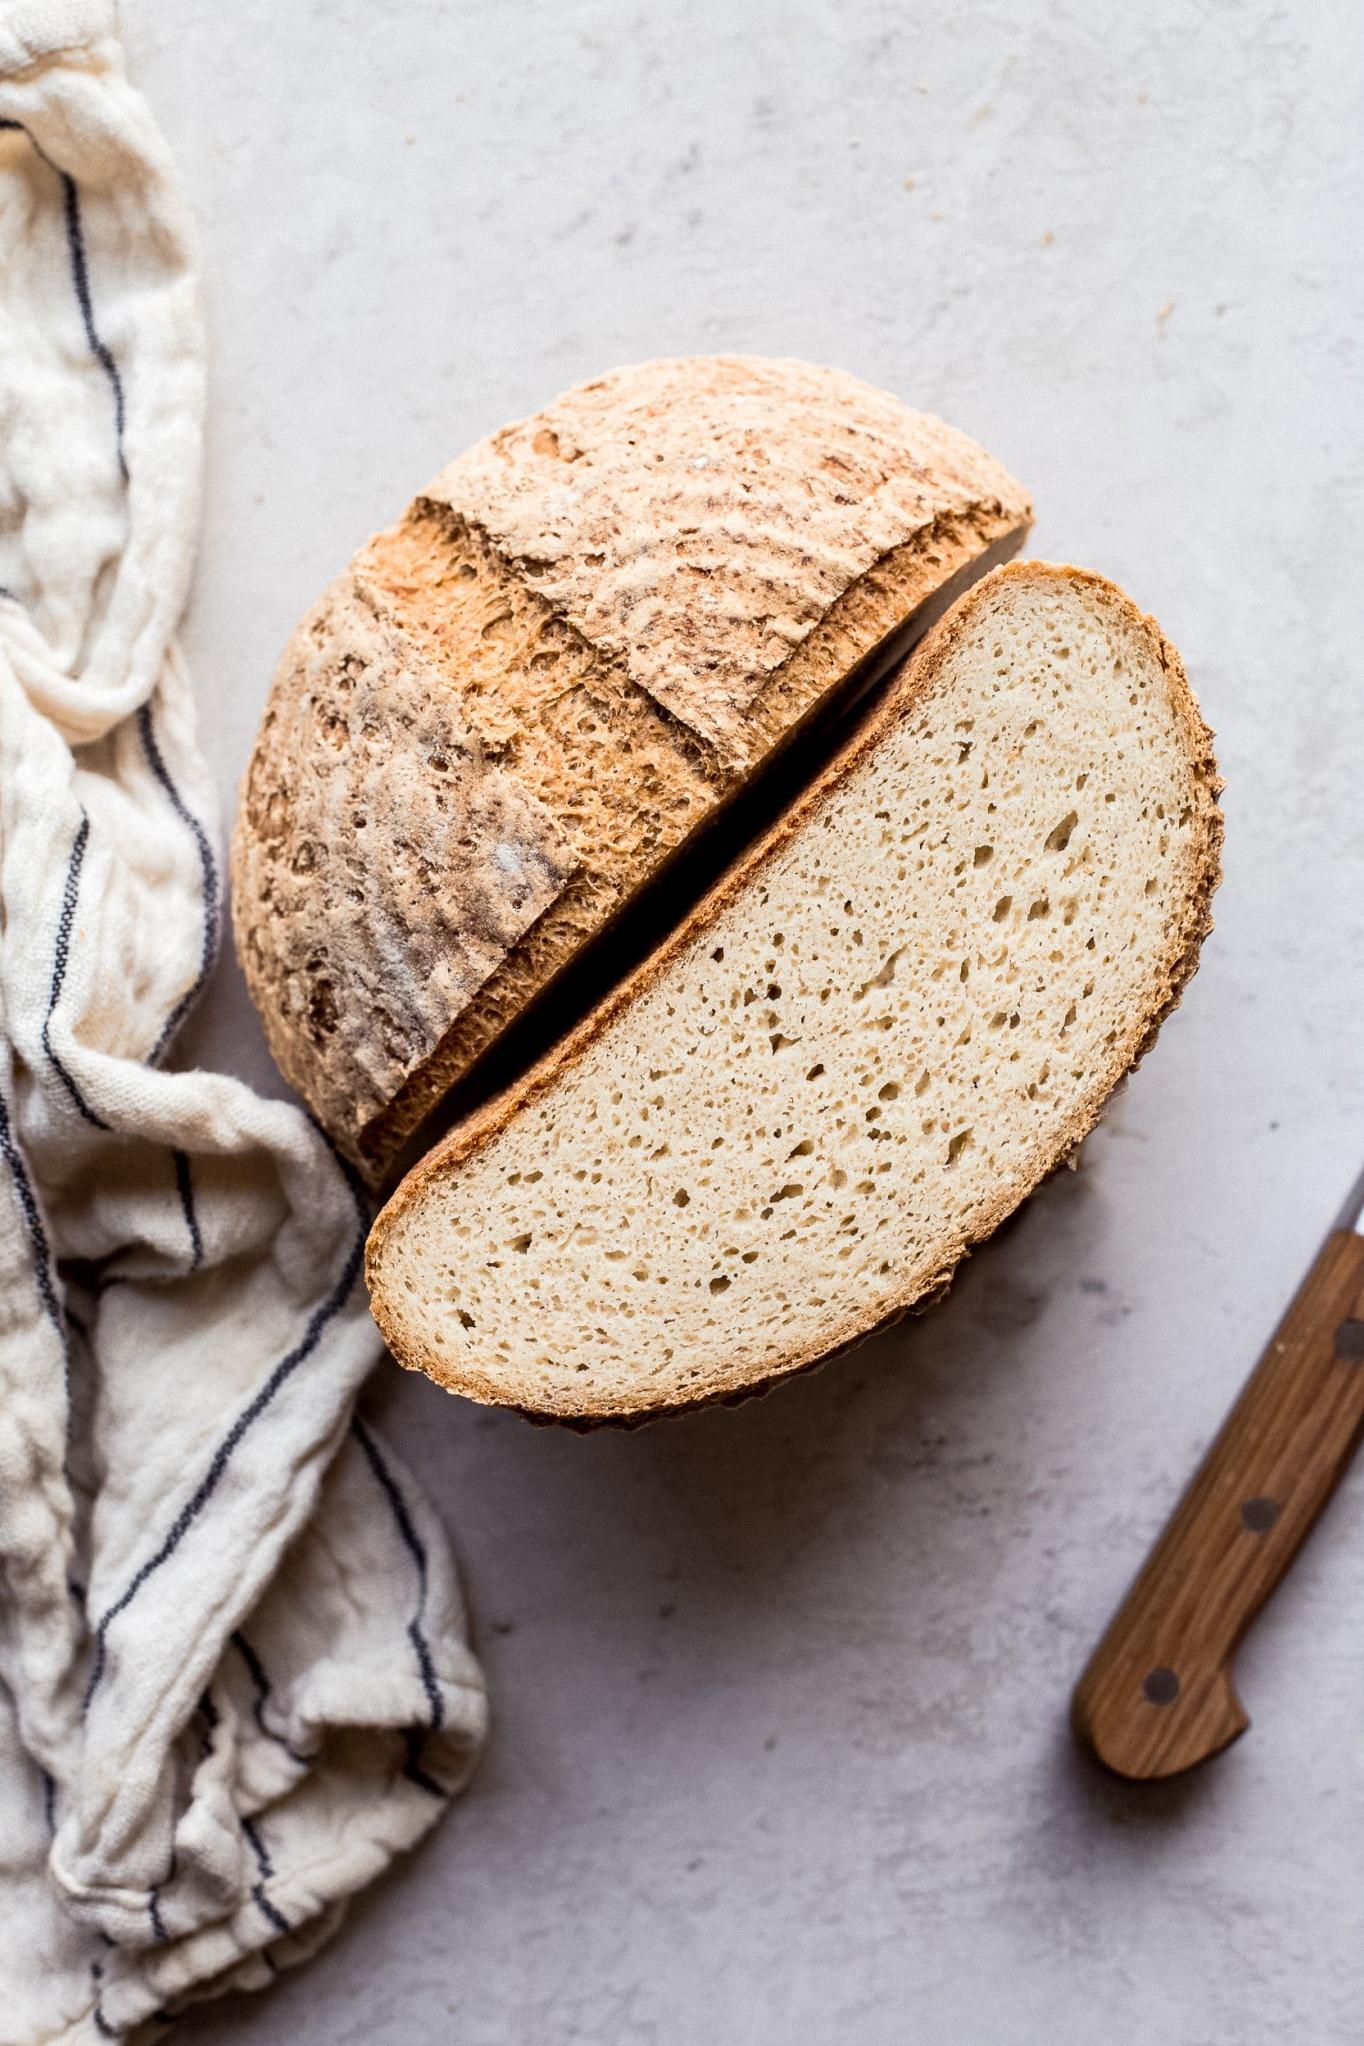
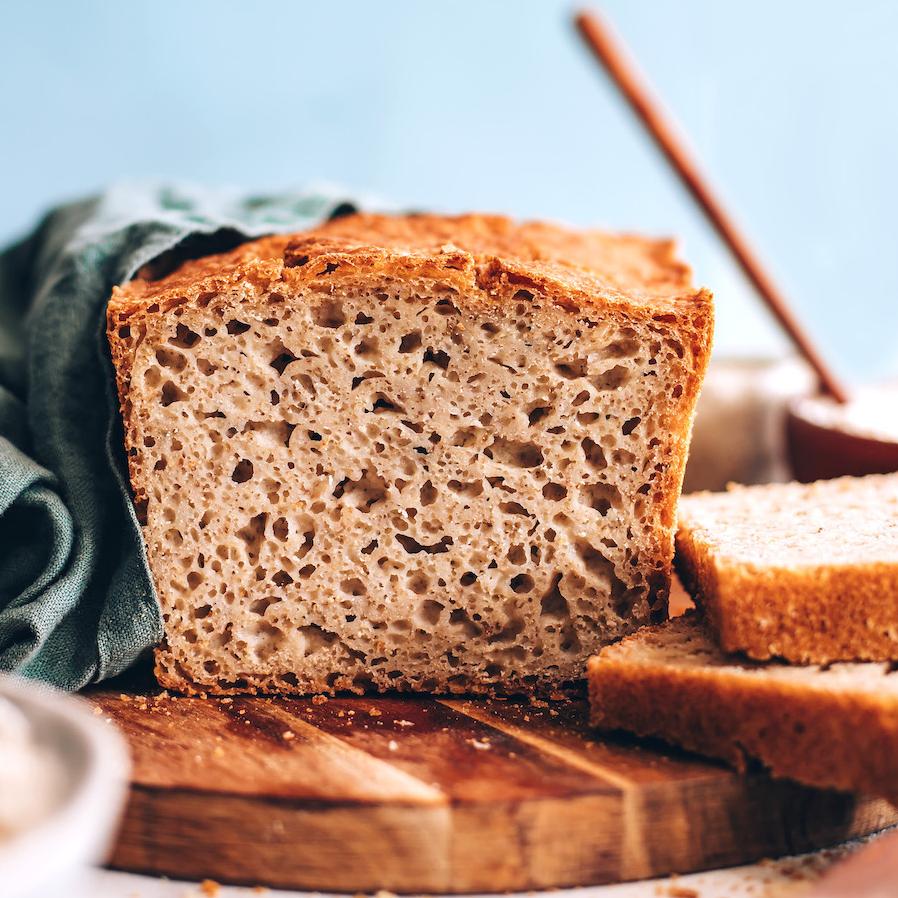
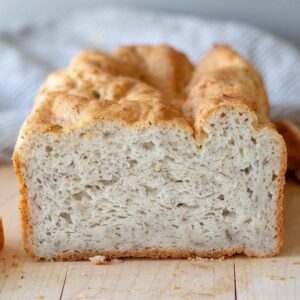
It’s a great option for people with dietary restrictions who find it hard to enjoy classic bread recipes. The result is truly amazing with a super soft texture inside and a crunchy crust outside that will take your taste buds on a flavor adventure!
But perhaps the most intriguing thing about this recipe is its versatility. You can make gluten-free sandwich bread, artisan bread, quick bread or even sweet bread.
You’ll love how fluffy and light it is compared to other gluten-free bread recipes you’ve tried in the past. The combination of carefully selected flours such as brown rice flour, tapioca starch, potato starch and millet flour makes all the difference!
And let’s not forget about how easy it is to make this recipe! Anyone can make it in the comfort of their own home without having to be an expert baker. All you need are simple ingredients like yeast, warm water, salt, apple cider vinegar and guar gum or xanthan gum (if you have them).
So trust me when I say that this easy gluten-free bread recipe will soon become your favorite go-to-bread recipe!
Ingredient List
- Brown Rice Flour (¾ cup) paired with a whole grain, provides a nutty flavour to the bread.
- Tapioca Starch (¾ cup), which is derived from the cassava root, lightens up the bread and gives it a chewy texture.
- Potato Starch (½ cup) adds moisture and helps combine the other ingredients
- Millet Flour (½ cup) brings out the feel-good factor of the wholesome grains.
The blend of these four gluten-free flours can be used as an all-purpose flour in many gluten-free recipes. It’s also essential to remember some “glue” for any gluten-free flour blend. For this recipe, it’s Guar Gum (2 tsp) or Xanthan Gum (1 tsp). They’re easily available at grocery shops or can be ordered online.
Yeast Mixture
The yeast mixture is prepared using Active Dry Yeast (2 tsp), mixed with 2 tbsp of warm water and sugar (1 tsp). Allow the yeast to sit for 5 minutes to activate.
Wet Ingredients
Once your yeast mixture is ready, whisk in two large eggs t and add three cups (540 grams) of warm water along with 1 tbsp of cider vinegar.
Dry Ingredients
In a separate mixing bowl, whisk together the dry ingredients for best results: 3 cups of gluten-free flour blend, 1+1/4 tsp salt, remaining sugar (3/4 cup) and additional Xanthan Gum if desired.
Don’t forget about powdered milk if you want to add more nutrition to the bread. If you’re baking dairy-free or vegan bread, skip it.
The Recipe How-To
Now that you have all your ingredients ready, it’s time to put them to work! This gluten-free bread recipe makes a great base for any kind of sandwich or just a delicious slice of bread with some butter or jam. Here is the step-by-step recipe guide for this homemade gluten-free bread:
Step 1: Mix the Dry Ingredients
In a large mixing bowl, mix together the gluten-free flour blend, tapioca starch, potato starch, salt, sugar, and guar gum, until uniformly combined.
Step 2: Combine Wet Ingredients
In another mixing bowl, beat together the wet ingredients — warm water, whole eggs, room temperature, and apple cider vinegar.
Step 3: Add Wet Ingredients to Dry Mixture
Add wet ingredients to the dry mixture slowly while beating on low with an electric mixer. Make sure everything is well-combined.
Step 4: Pour the Mixture into a Loaf Pan
Pour the mixture into a greased loaf pan, and let it rise until it almost doubles in volume. This step takes about 60 to 90 minutes, depending on weather conditions.
Step 5: Preheat Oven and Starts Baking Process
Preheat the oven to 350 F (175 C). Bake for around 50 – 55 minutes. At the halfway mark, cover with aluminum foil so that the bread doesn’t brown too much.
Step 6: It’s Ready!
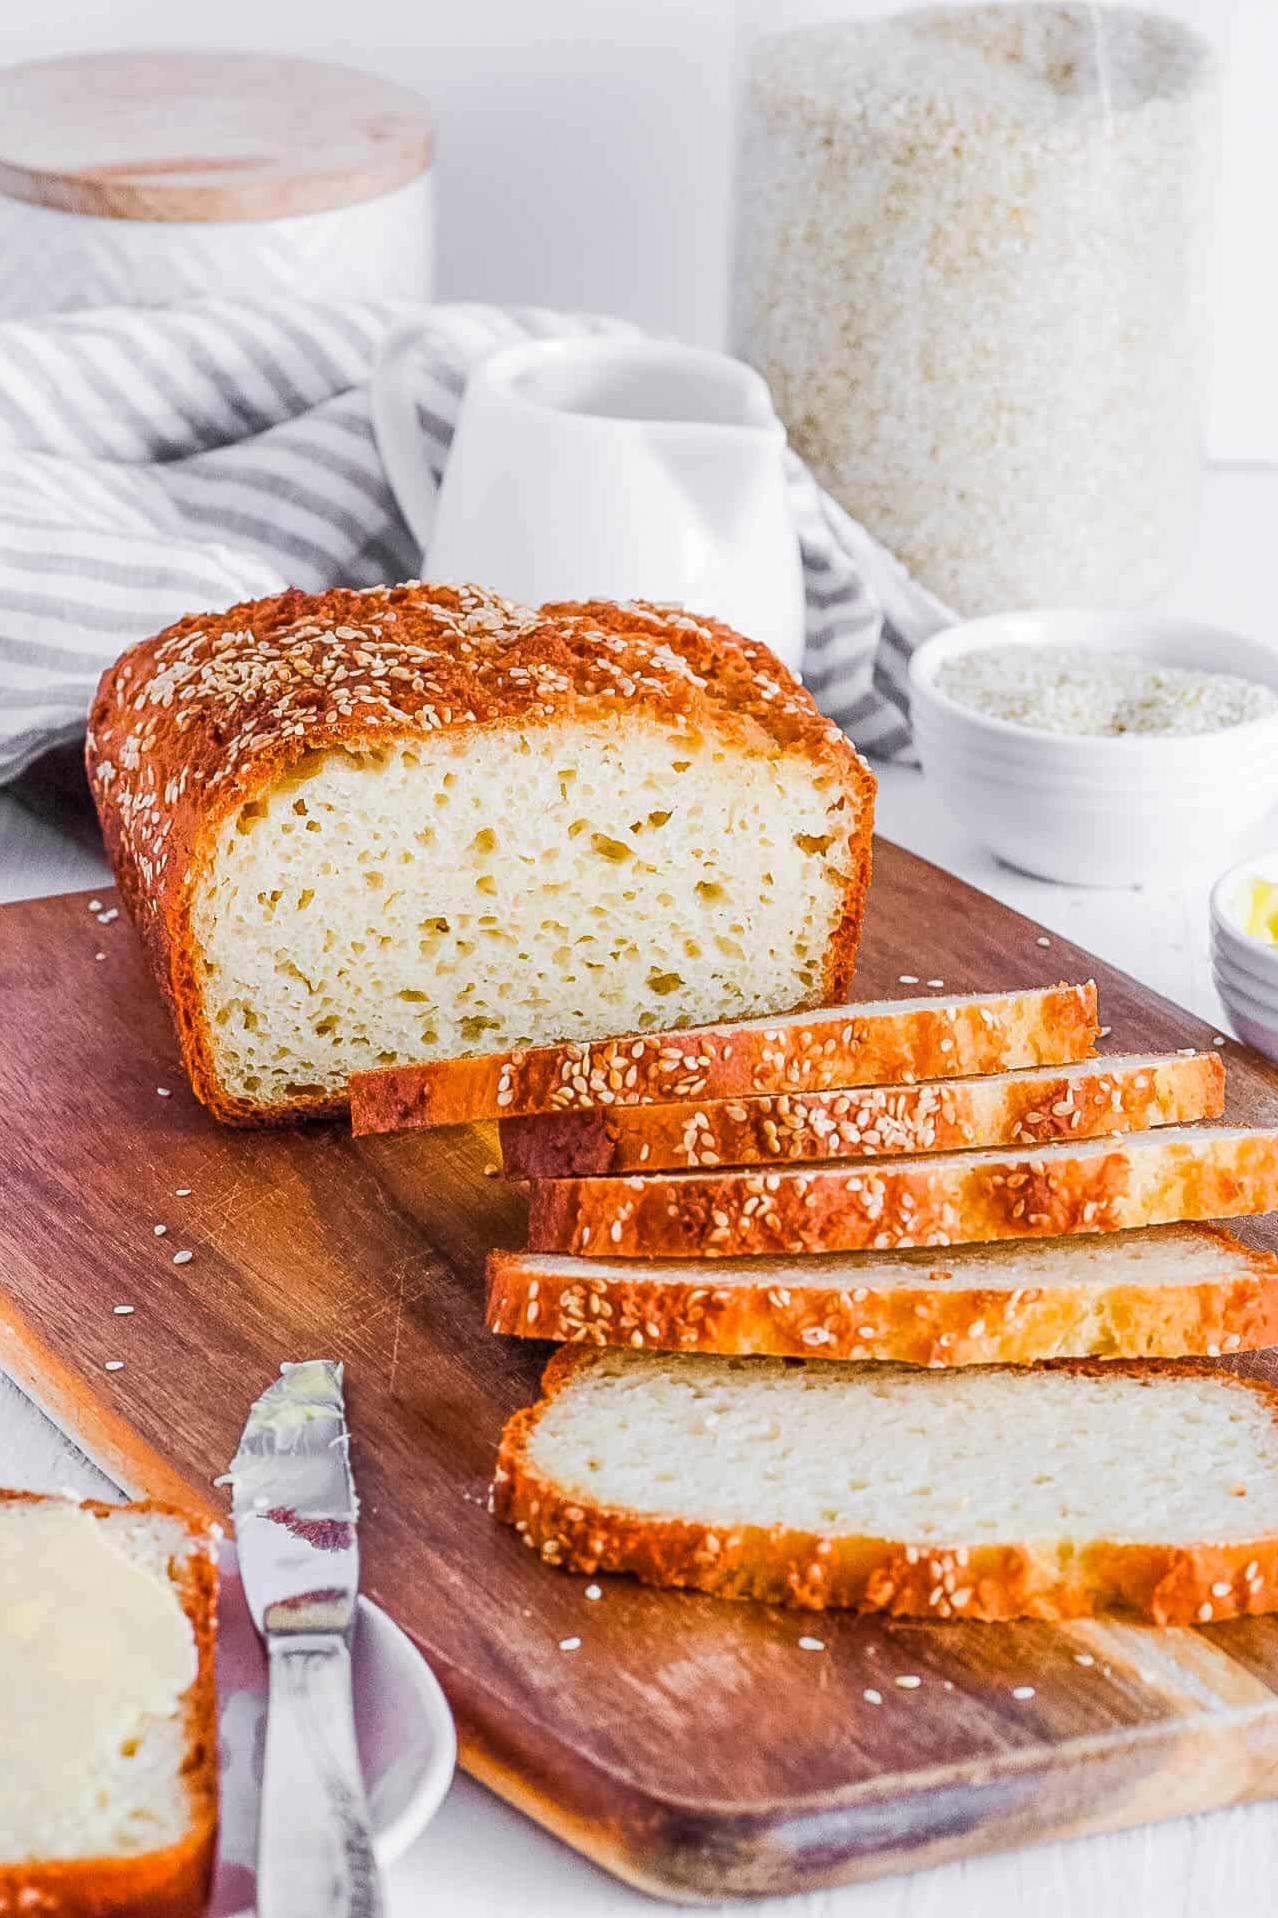
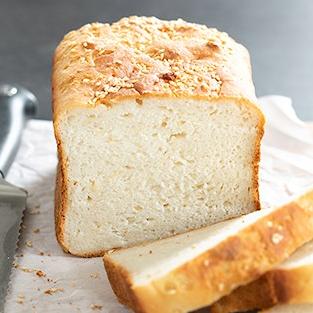
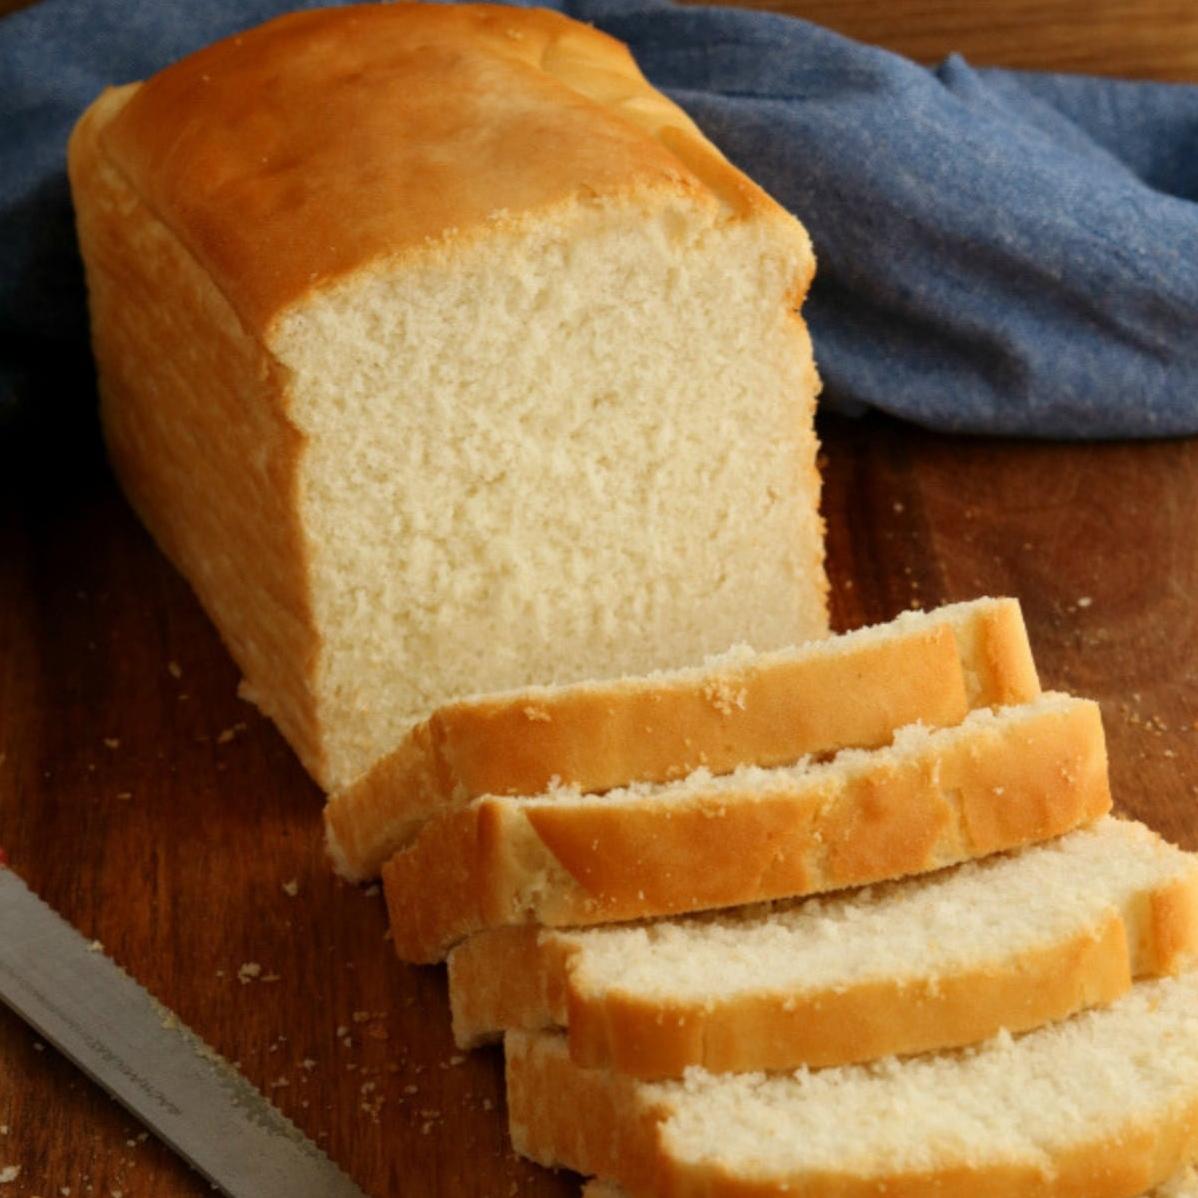
Remove from oven, let cool on a wire rack for at least 20 minutes before cutting. Your homemade gluten-free bread is ready to serve!
Enjoy your soft and fluffy custom-made gluten free sandwich bread!
With this easy recipe at hand, making gluten-free bread has never been easier. Give it a try for yourself and let us know how it turns out.
Substitutions and Variations
As a nutritionist and food blogger, I understand that everyone has their dietary preferences and restrictions. So, if for any reason you prefer not to use some of the ingredients in this recipe, I’ve got you covered! Here are some ingredient substitutions or variations you can try out with this gluten-free bread recipe.
– Flour blend: If you do not have the exact flour blend used in the recipe, you can always make your own flour blend. Feel free to experiment with different blends of gluten-free flours such as brown rice flour, buckwheat flour, oat flour, and millet flour. You could also try using almond flour or coconut flour if you are looking for a low-carb option.
– Yeast: For vegan options, you can replace yeast with sourdough starters or baking powder. However, note that the texture may differ slightly.
– Eggs: If you want to make this gluten-free bread recipe eggless, consider using psyllium husk mixed with warm water or applesauce as a binding agent.
– Dairy-free: Substitute powdered milk with powdered coconut milk or almond milk powder for a dairy-free option.
– Gluten-Free sandwich bread: To make gluten-free sandwich bread, reduce the amount of guar gum in the recipe by half, add more tapioca starch, and use a loaf pan instead of shaping it into free-form bread dough.
– Sweet Bread: Adding 3 tablespoons of sugar to a typical bread recipe gives it the twist of sweetness. You may also add raisins and cinnamon powder together with sugar to give that additional flavor.
Remember, feel free to get creative with your recipes; blending does wonders for experimentation. Have fun testing out these substitutions and variations until you get the perfect bread loaf tailored to your personal taste preferences!
Serving and Pairing
Ah, the moment of truth. Your homemade gluten-free bread is out of the oven and your kitchen smells like a bakery. Now it’s time to serve and enjoy!
This bread recipe is versatile and can be used in many ways. For a traditional sandwich, slice it up and use it as you would any regular bread. If you’re feeling fancy, try using thicker slices and toasting them for a delectable panini.
The great thing about this gluten-free bread recipe is that it is perfect for both sweet and savory dishes. Try using it as a base for French toast or bread pudding on lazy mornings, or serve it alongside soups, stews, or chili in place of crackers.
Given that this recipe is also dairy-free, it pairs beautifully with alternative spreads such as coconut oil, almond butter, or avocado. You may also try topping your bread with some vegan cream cheese or hummus for an extra flavor boost. The possibilities are endless.
Whether you’re creating a gluten-free sandwich masterpiece or serving up some warm soup with fluffy slices of homemade gluten-free bread, make sure to savor every bite knowing you made it yourself!
Make-Ahead, Storing and Reheating
Once you have prepared your delicious gluten-free bread, the next thing is to ensure it stays fresh for as long as possible. Here are some tips to make-ahead, store and reheat the bread:
Make-Ahead: You can make this gluten-free bread ahead of time and refrigerate it for a few days before serving. Wrapped in plastic wrap, it can last up to five days. This bread freezes exceptionally well, making it easy to have a quick snack or sandwich at hand whenever you need it.
Storing: To keep your bread fresh for as long as possible, store it in an airtight container in the fridge or on the counter. A bread box could also be ideal – just ensure that the air gets filtered by cracks in the lid.
Reheating: The best way to reheat gluten-free bread is using an oven or a toaster oven. Place the slices of bread either directly on the oven rack or on a baking sheet lined with parchment paper, fire up the oven to 350°F/175°C and heat up for around 10 minutes until heated through.
For microwaving, wrap your bread slices in damp paper towels and place them on a microwave-safe plate. Heat for about 15 seconds and then check if it has reached your preferred temperature range. If not, return to the microwave again for another 10 seconds till it reaches optimal temperature.
There you go! Keep these tips in mind whenever you make this amazing gluten-free bread recipe so that you can enjoy every slice of gluten-free goodness at its freshest state.
Tips for Perfect Results
Now that you have all the ingredients ready, it’s time to make sure your gluten-free bread turns out perfectly. Here are some tips that can help you make the best gluten-free sandwich bread.
Firstly, use high-quality ingredients. Not all gluten-free flours are created equal, so make sure to invest in a good quality gluten-free flour blend. I recommend using brown rice flour since it has a neutral taste and is less gritty compared to other types of gluten-free flours. There are many brands available in the market like Red Mill’s all-purpose flour or Bob’s Red Mill’s all-purpose flour.
Another essential tip is to use xanthan gum or guar gum as a binder. Gluten provides elasticity and structure to bread, which needs to be replaced with a binder while baking gluten-free bread. Gums like xanthan or guar mimic the features of gluten and hold the dough together making it soft and fluffy.
It’s important to measure your ingredients accurately as precision helps in achieving the desired consistency and texture of your bread loaf. You can also weigh your ingredients instead of measuring them with cups for more accuracy.
The next tip is to add cider vinegar or lemon juice to balance the sweetness from the sugar in the recipe. It also helps activate yeast for proper rising when making homemade gluten-free bread.
Make sure that you proof your yeast by adding warm water and sugar before using it in your recipe. Yeast is responsible for making your bread rise properly, so you want to check its activity beforehand for best results.
Lastly, don’t open the oven door while baking your bread as this will let out steam resulting in uneven rising and a flat final product. You can also use an oven thermometer to ensure that your oven temperature is accurate.
By following these tips, you can achieve perfectly baked fluffy and soft gluten-free sandwich bread every time.
FAQ
Before you embarking on making this gluten-free bread recipe, it’s essential to keep in mind some common questions and their answers. Here are the FAQ to assist you in preparing and troubleshooting any issues that may arise during the preparation and baking process.
What gluten-free flour is best for bread?
If you are searching for an ideal replacement for regular bread flour to make gluten-free bread, consider using Bob’s Red Mill Gluten Free All Purpose Baking Flour. This versatile flour can be substituted in almost every recipe that calls for wheat flour.
What is the secret to getting gluten-free bread to rise?
When attempting to get your yeast breads to rise before baking, a useful technique is to heat up your oven to 200º F and then switch it off once it has reached the right temperature. After this, place your un-raised bread inside the warmed oven along with a sheet of parchment paper that has been coated with oil and a bowl of water in the oven with it. Allow it to rise as per the instructions given.
What is the main ingredient in gluten-free bread?
When it comes to preparing gluten-free breads, there is a wide variety of grain and legume flours that can be used as they are naturally gluten-free. These include flours made from rice, almond, buckwheat, chickpea, sorghum, quinoa, and millet.
Is it cheaper to make your own gluten-free bread?
Making your own gluten free bread recipe at home can be a more cost effective option compared to purchasing it from the store, with savings ranging from 35% to 50%.
Bottom Line
this gluten-free bread recipe has all the right ingredients for a healthy and delicious gluten-free sandwich. A vegan, dairy-free, and egg-free recipe that is easy to bake in your own kitchen with basic kitchen tools. By using the right flour blend and adding the right amount of xanthan gum, you’ll be able to recreate the texture and taste of regular bread, without the wheat!
By making this bread at home, not only will you save yourself some money, but you’ll also be consuming a much healthier alternative than store-bought gluten-free bread.
This gluten-free bread makes for a perfect sandwich or toast in the morning, and can even be used to make french toast or bread pudding.
So give this recipe a try, and enjoy a slice of homemade gluten-free goodness in every bite!
Gluten Free Bread Recipe
Ingredients
- 1/2 cup warm water
- 2 teaspoons sugar
- 4 teaspoons yeast
- 1 1/2 cups warm water
- 4 eggs
- 4 tablespoons oil
- 1 teaspoon cider vinegar
- 2 cups tapioca starch
- 2 cups rice flour
- 2/3 cup powdered milk (is optional)
- 4 teaspoons guar gum (or xanthum gum)
- 1 1/2 teaspoons salt
- 1/4 cup sugar
Instructions
- mix water, sugar, yeast. set aside to rise for about 10 minute.
- mix wet (water, eggs, oil, vinegar) ingredints, mix well.
- mix dry ingredients (tapioca starch, flour, milk powder, guar gum, salt, sugar).
- add yeast mixture and remaining wet ingredients to dry ingredients and beat well for about 2 minutes.
- pour into 2 bread pans.
- cover and allow to rise until double in size.
- bake at 350 for about 50 minutes.